Although we had built a roll-off roof observatory (and worked out the kinks) at our previous home in Georgia, we felt this time we needed to build an observatory with a dome. The biggest factor in choosing a dome design is the wind. Even on a calm night here in New Mexico it is blowing 5-10 mph and would be jostling the telescope continuously.
There were several options - buy a turnkey solution of dome with building (round or square) or build our own building and mount a purchased dome on top of it. All of the available dome/building combinations consisted of buildings which had reduced height doors and very little interior space.
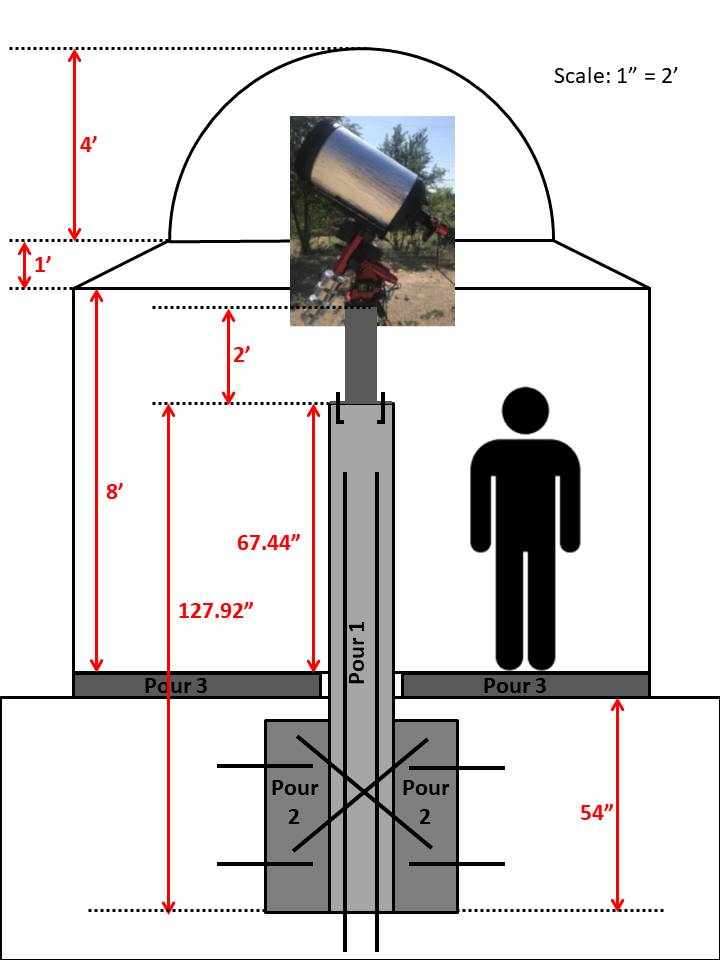
So Barry started designing our building. We wanted a fairly large footprint (12'x 12') and, most importantly, a full size door, with standard 8' high walls. We had struggled with reduced height doors on our observatory in Georgia and it was impossible to buy a short door even by special order. Since the dome would sit on top of this, it meant that the telescope would need to be mounted 6-8 ft. in the air which also drove the height of the concrete pier we would have to install.
After much research into domes, Barry decided to get the 8' Exploradome with rings and full automation kit. This dome is a single piece molded plastic construction made by a company in Minnesota. He ordered it in early January 2021 with a promised delivery in approximately 4 months.
*-*-*
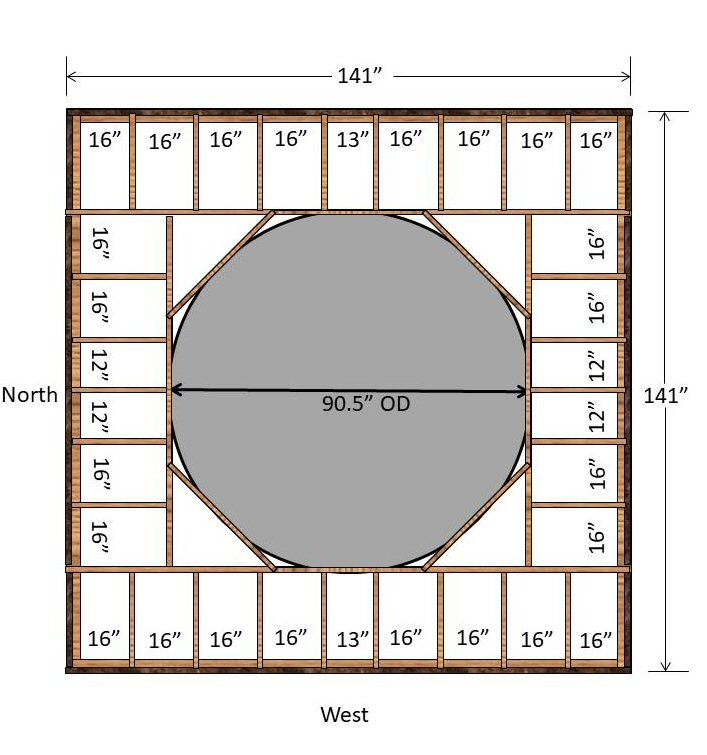
Here is the sketch of the plan for the observatory.
*-*-*
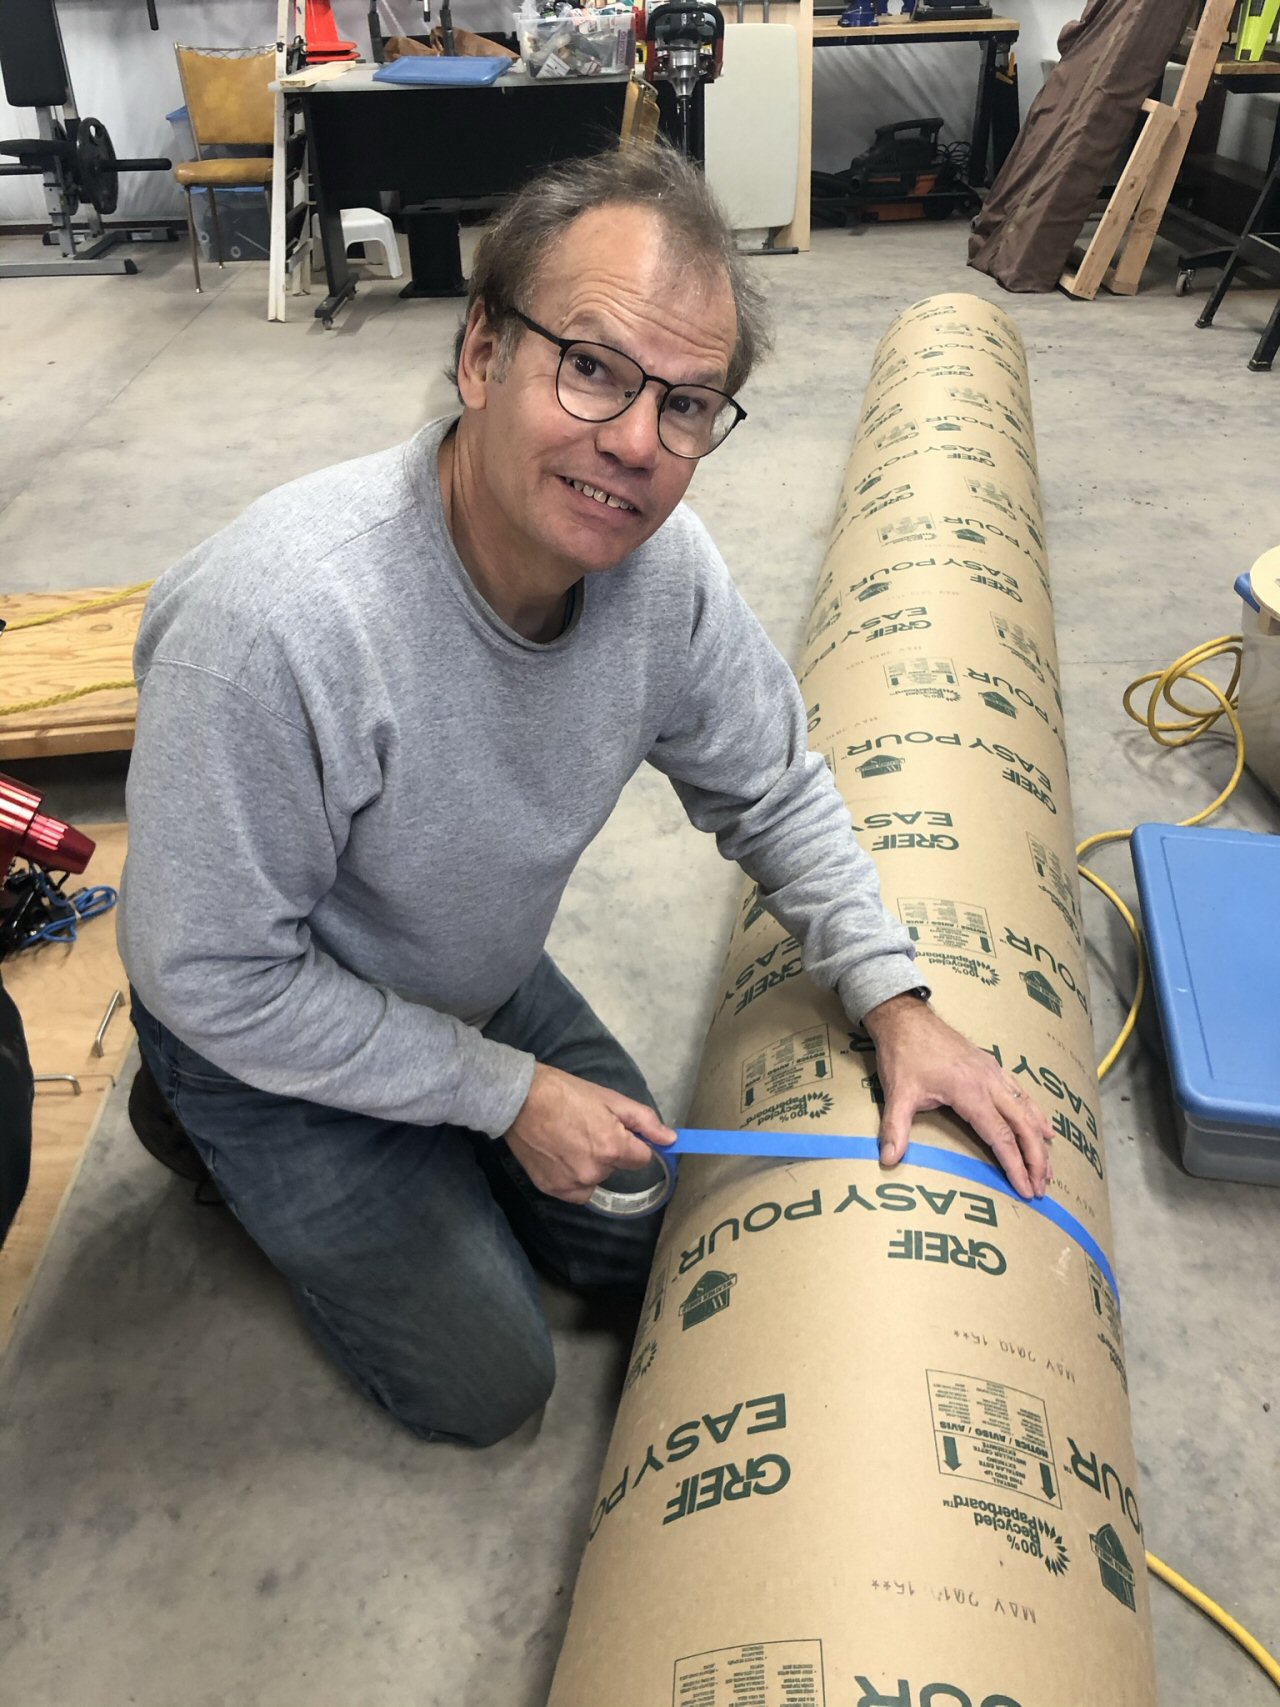
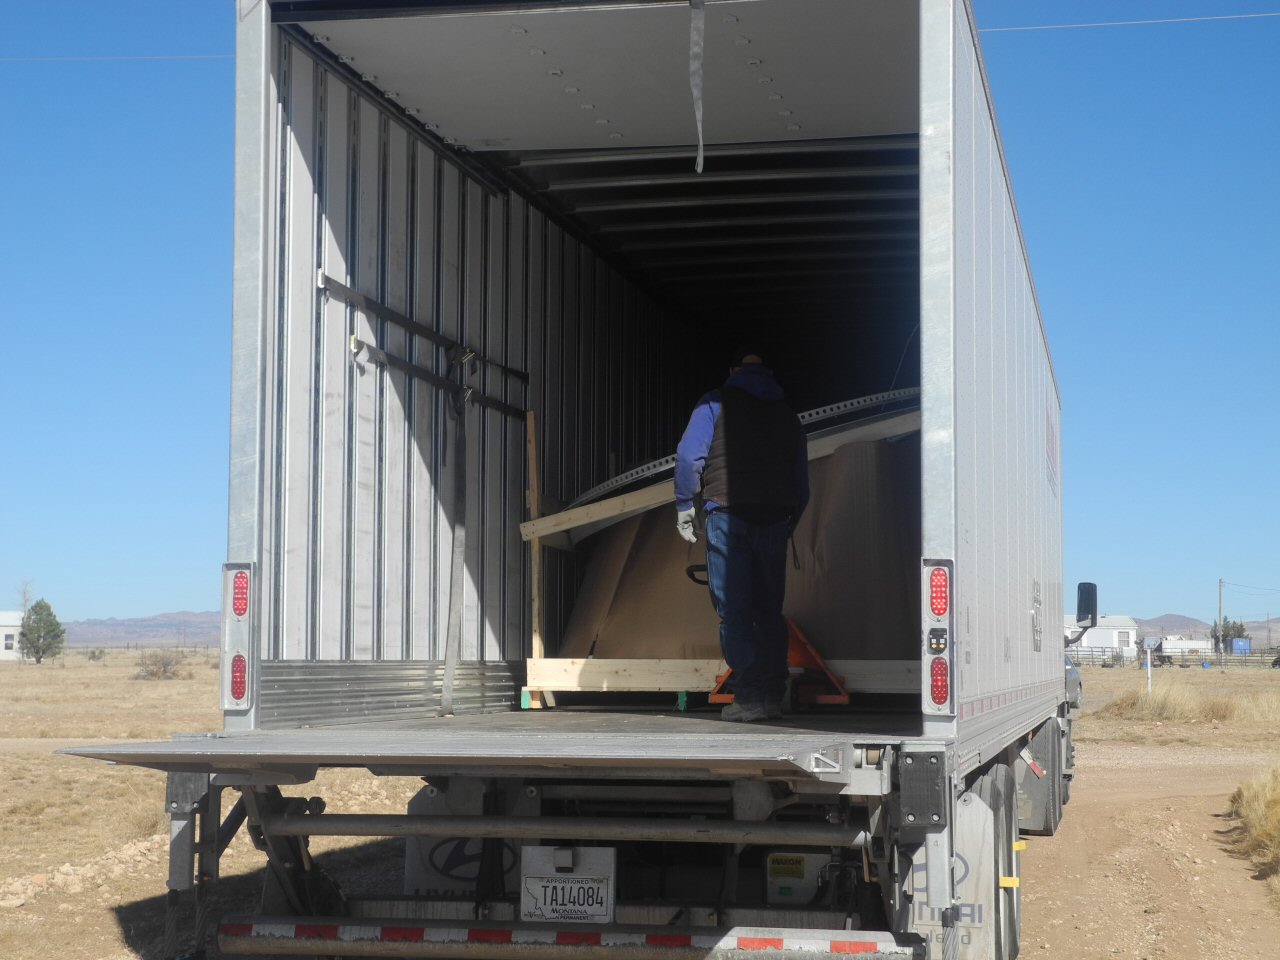
We had to order the cardboard sonotube concrete form from Las Cruces - 16 inches in diameter and 12 feet long. It will allow us to pour the pier for the telescope. Here we have it loaded in the van for the drive back from Las Cruces.
*-*-*
Barry marking the sonotube to be cut to the correct length.
*-*-*
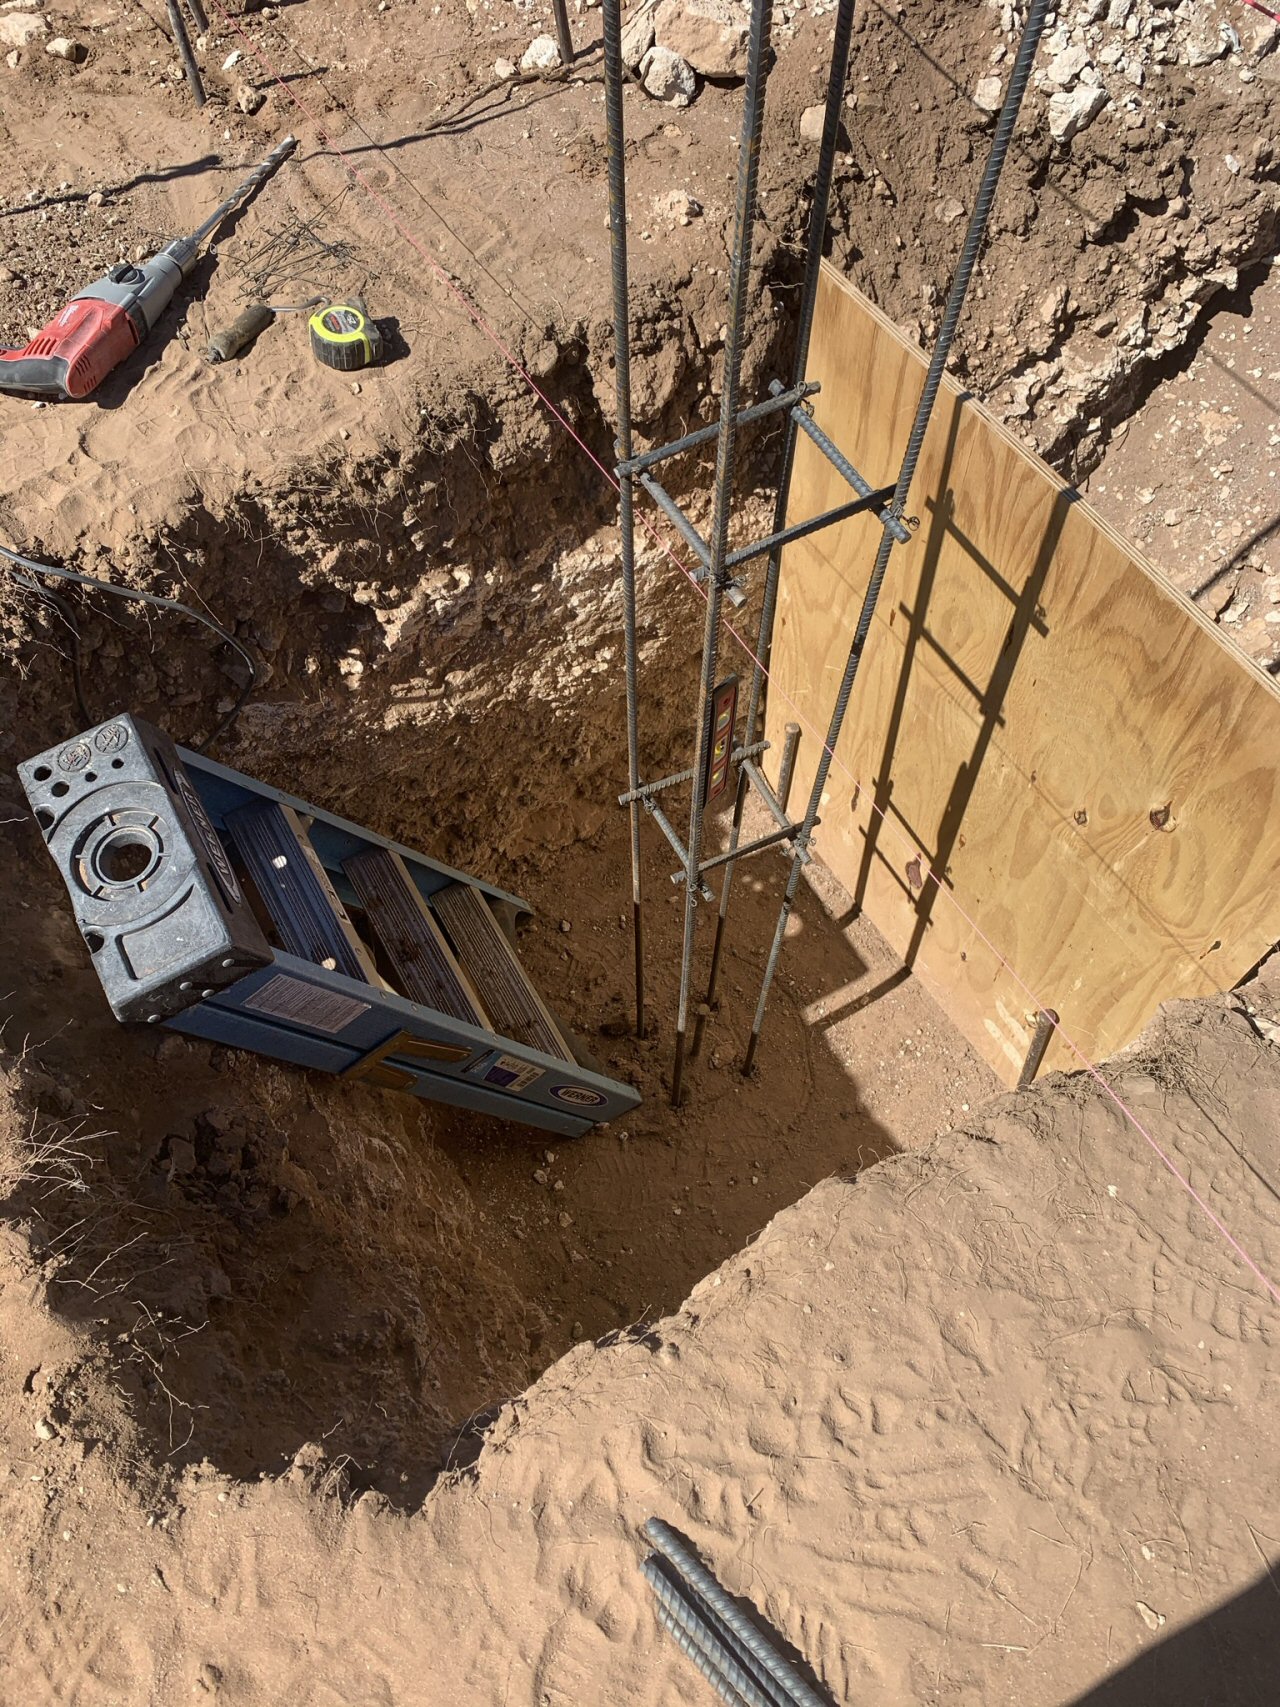
We had staked out the observatory first and then arranged the other buildings around to get the maximum benefit of blocking any ground-based lights. When the foundations and trenchs for the other buildings and electrical and plumbing were dug, we also had them lay wire for the observatory and dig the hole for the base of the pier. So now that we are starting the pier, no further excavation is required. Here is the rebar cage to support the pier.
The rebar has been driven into the ground for added stability of the pier.
*-*-*
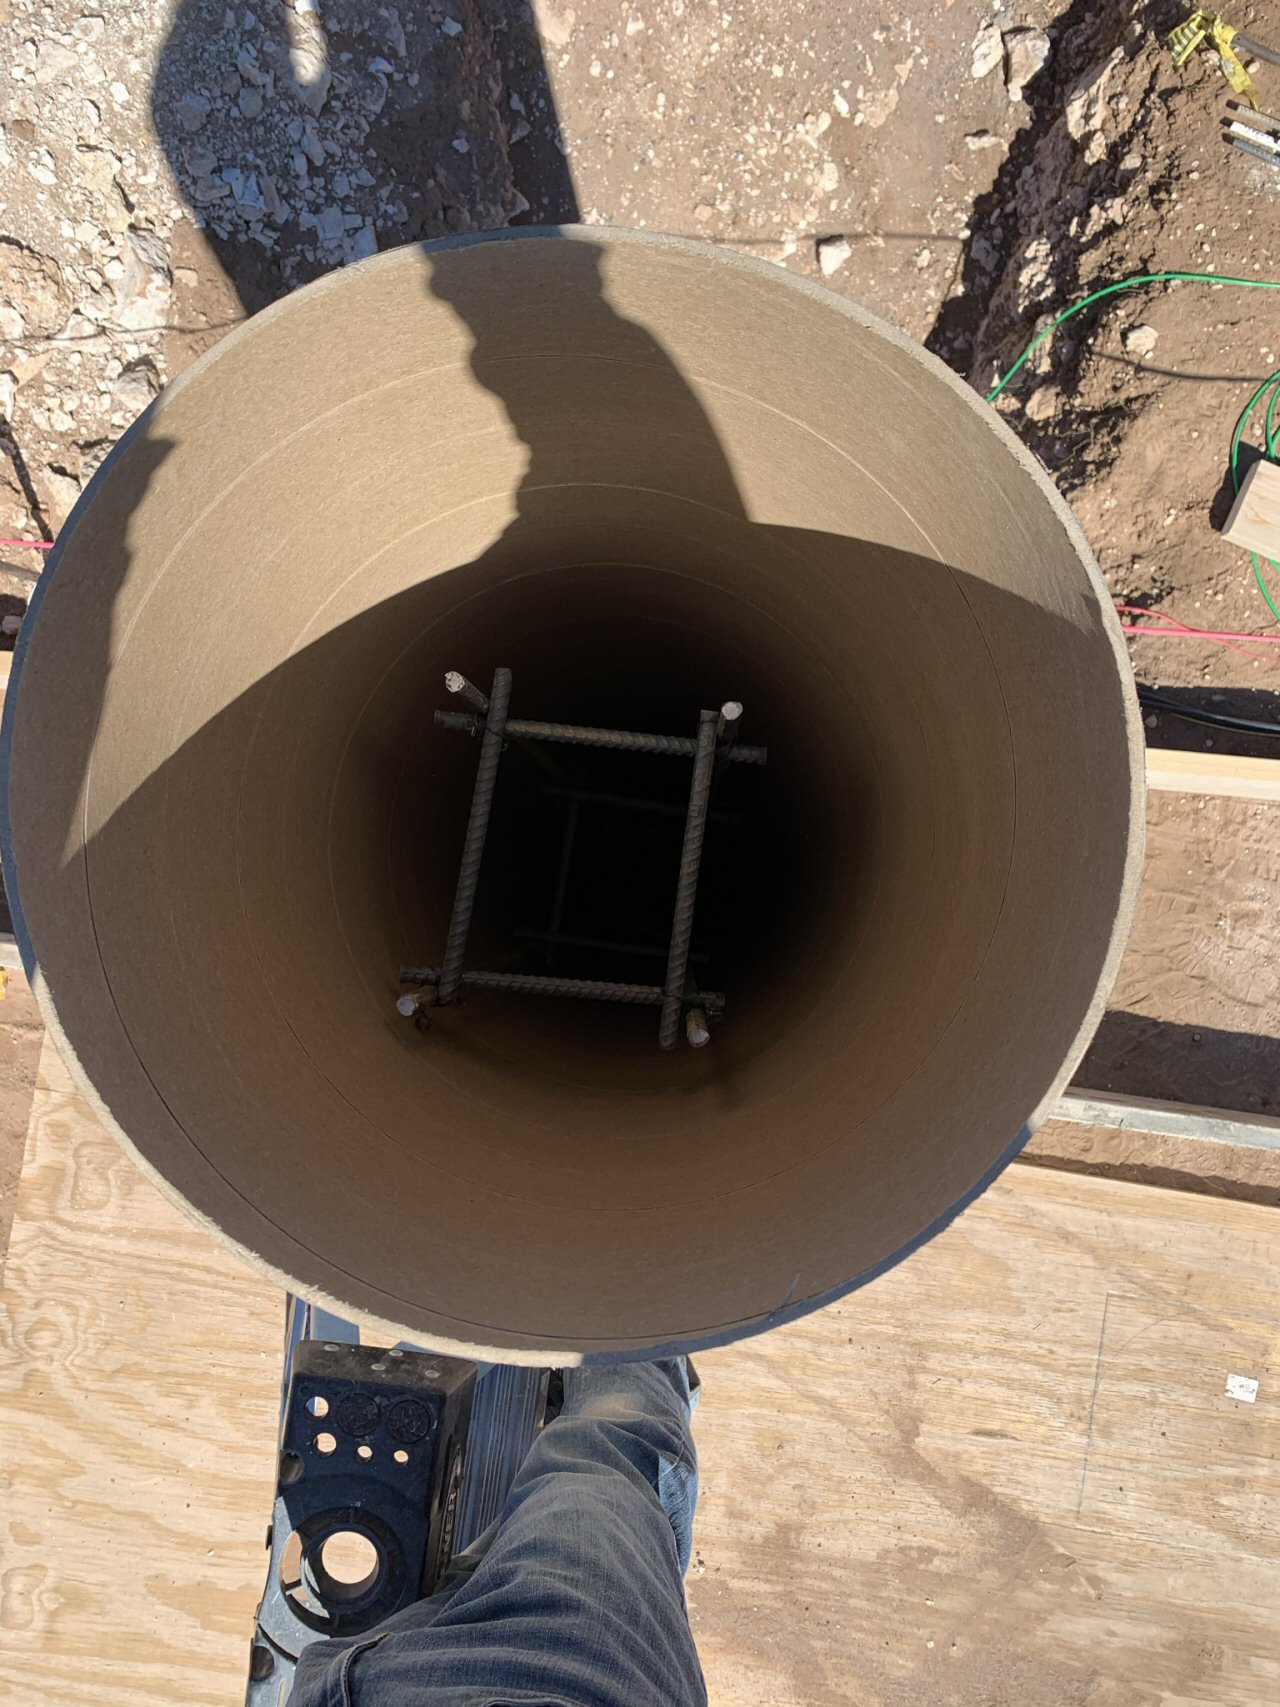
A view looking into the sonotube with rebar in place.
*-*-*
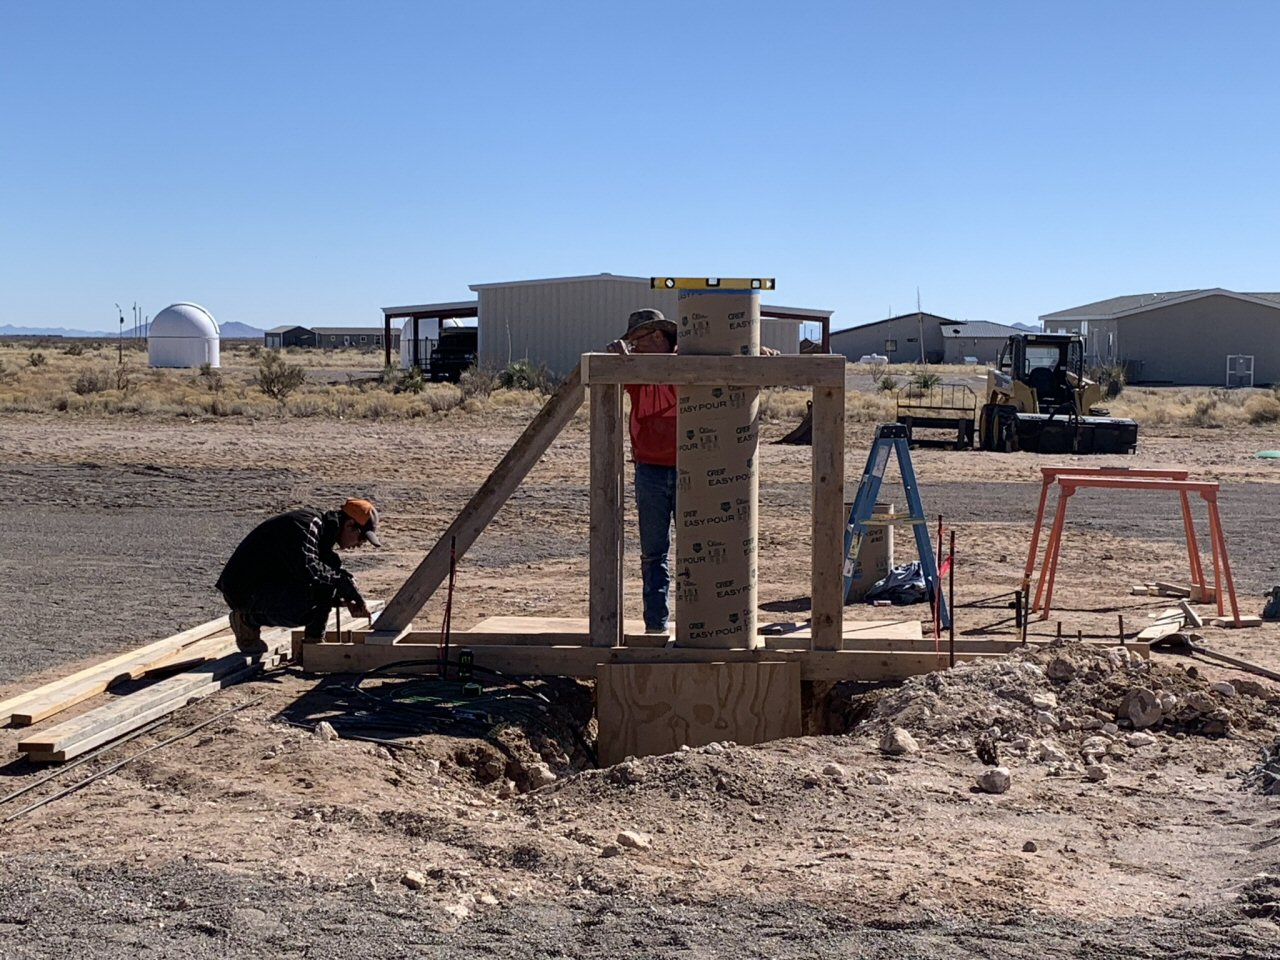
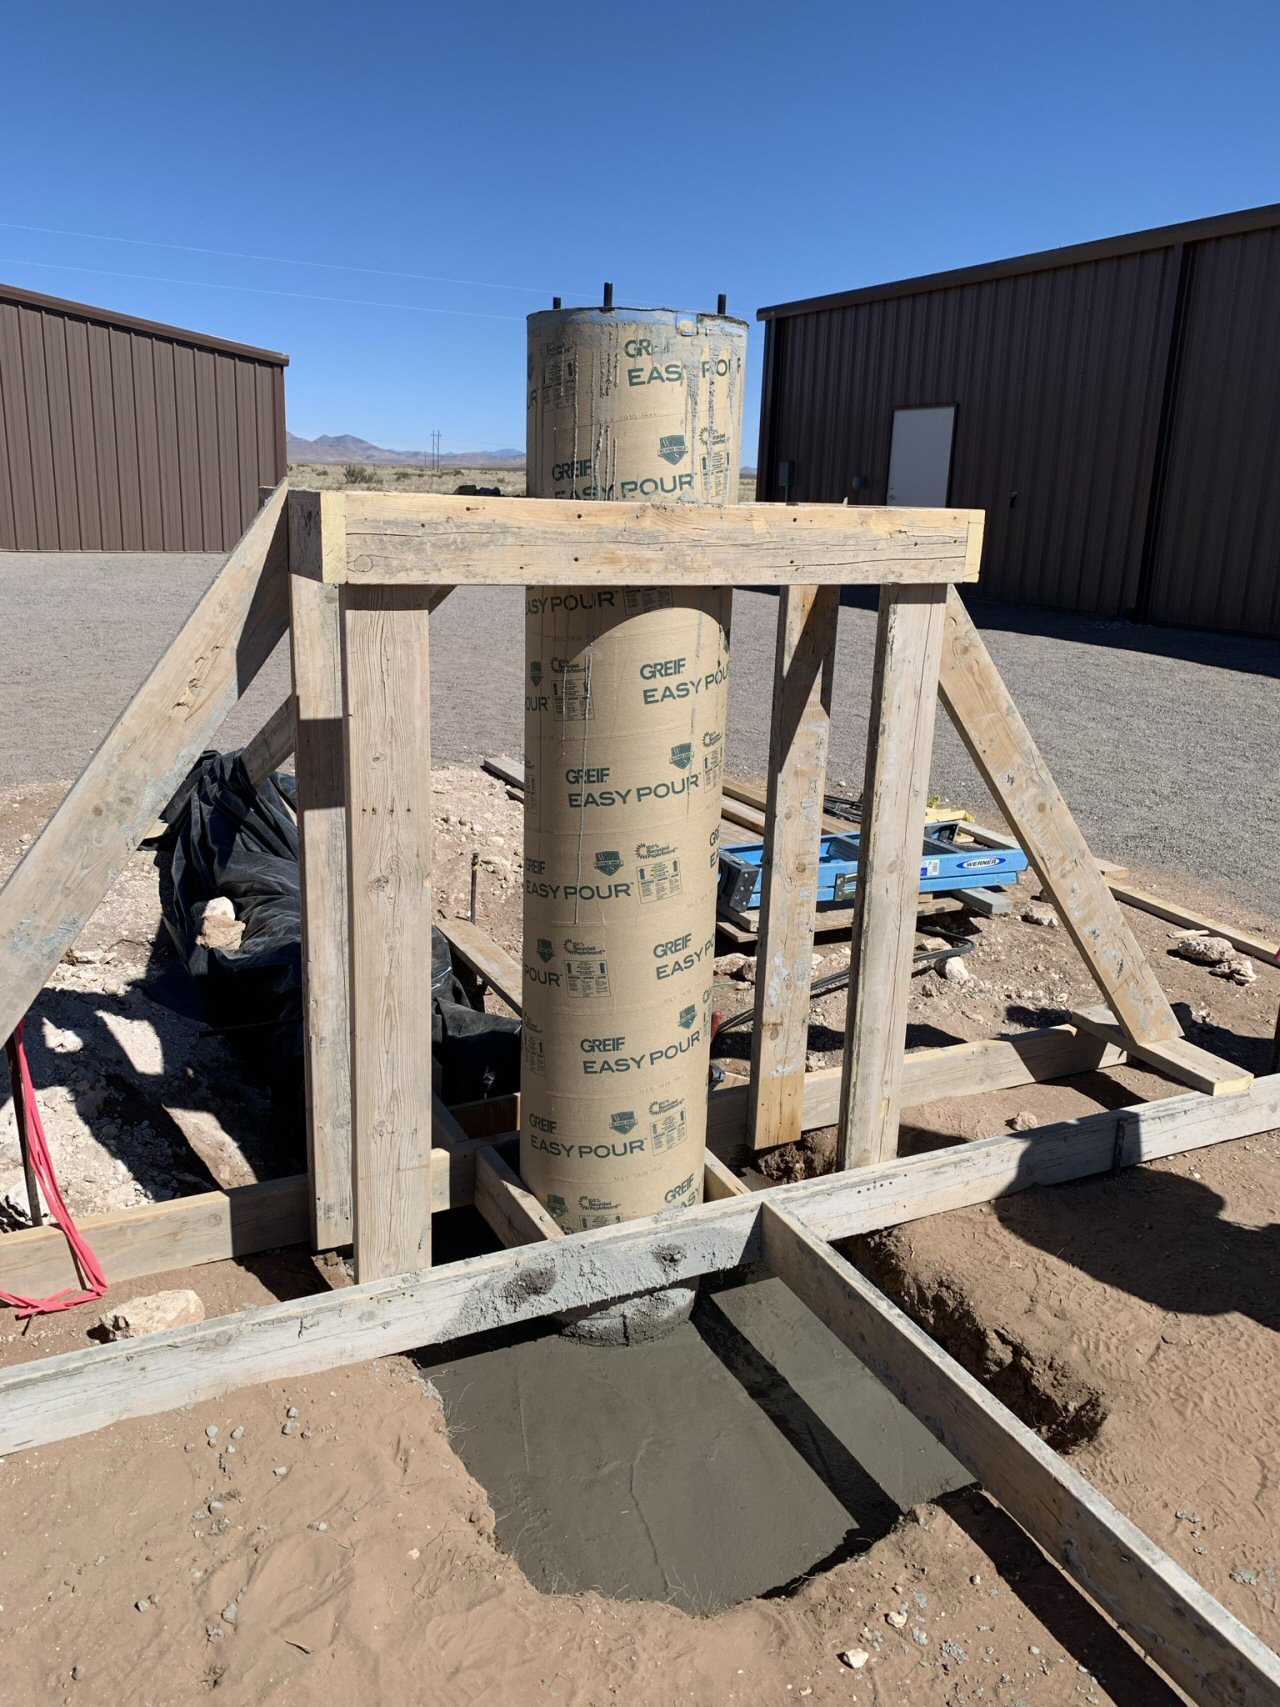
Here the crew is bracing the sonotube so that when the concrete is poured for both the pier and, later, the pier base it won't tip or shift.
*-*-*
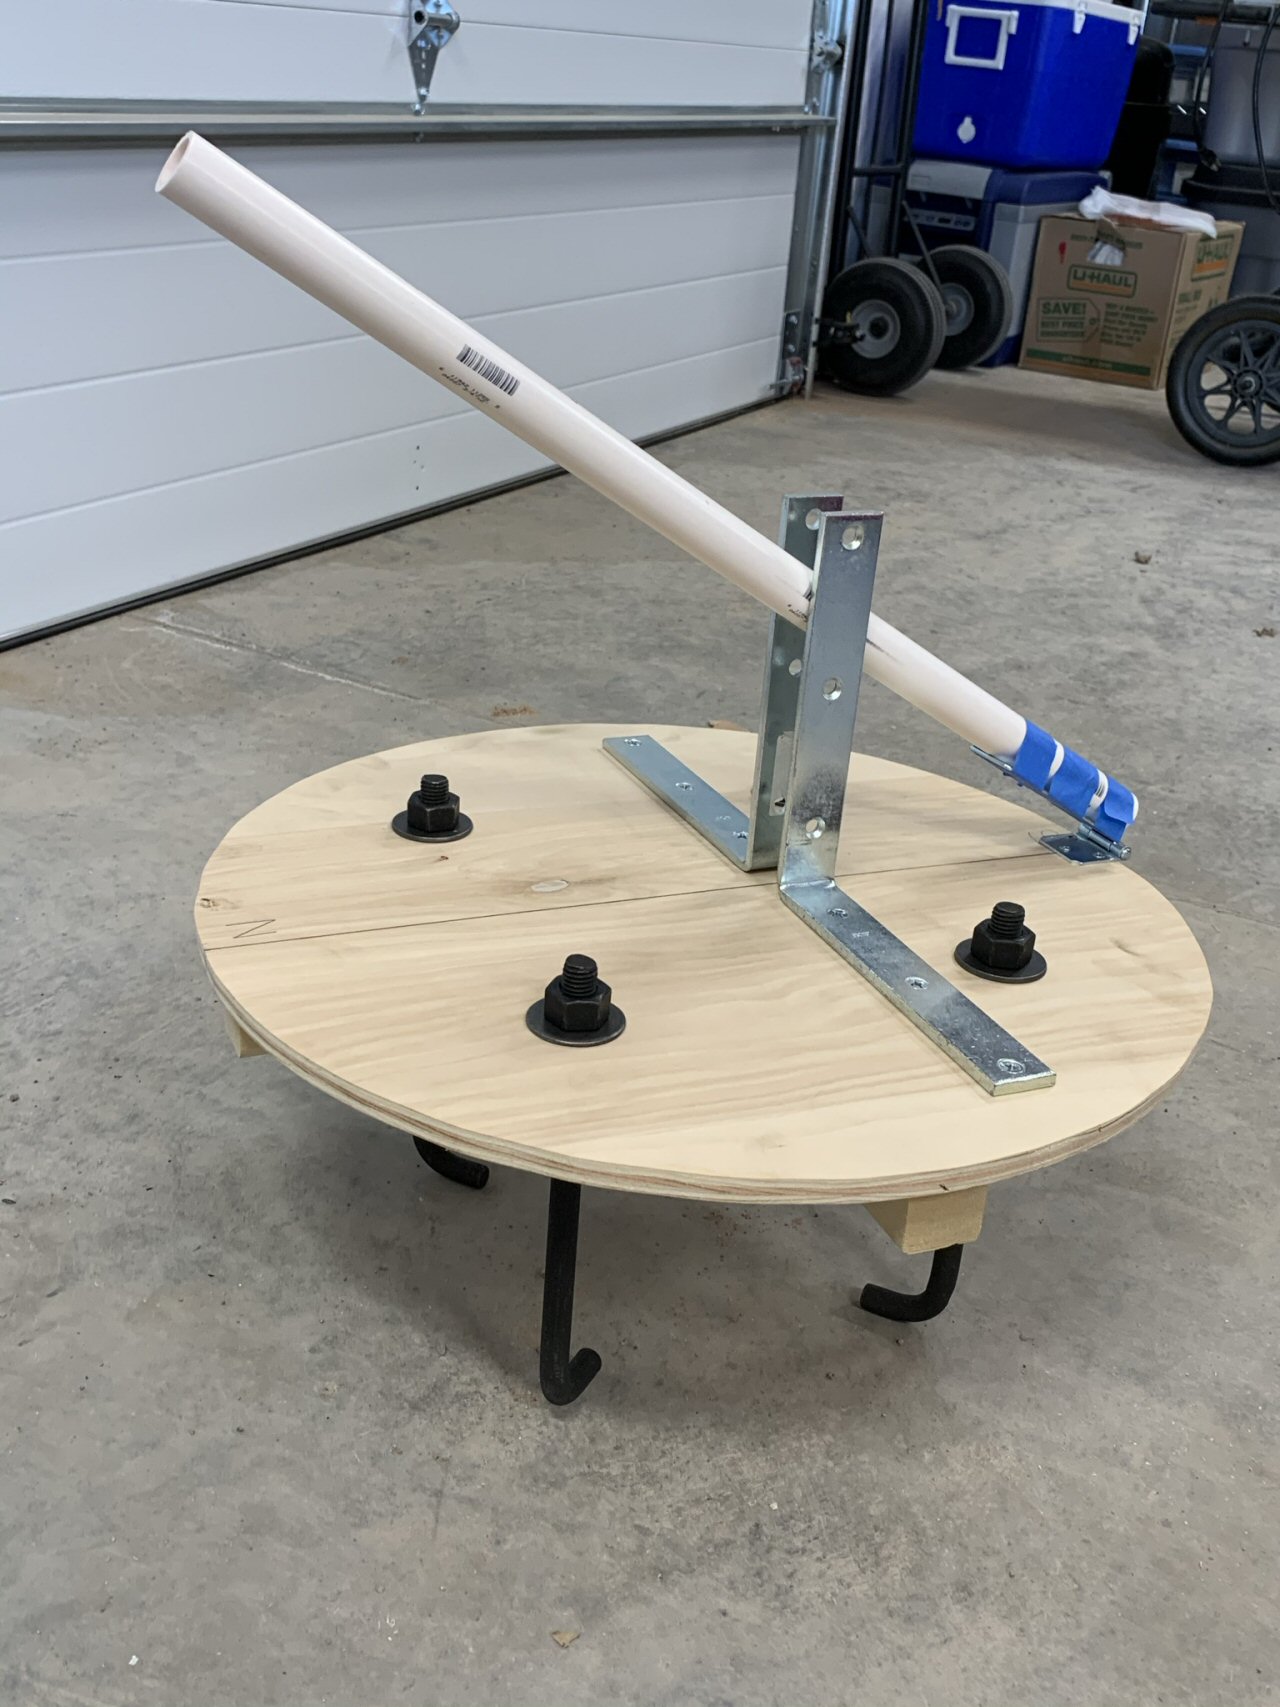
Because there are going to be J-Bolts embedded in the concrete pier to support the shorter removable steel pier and telescope mount, the J-Bolts need to be aligned to the polar axis of the earth. Barry designed this simple tool to be able to sight in Polaris for this alignment to properly place the J-Bolts in the pier.
*-*-*
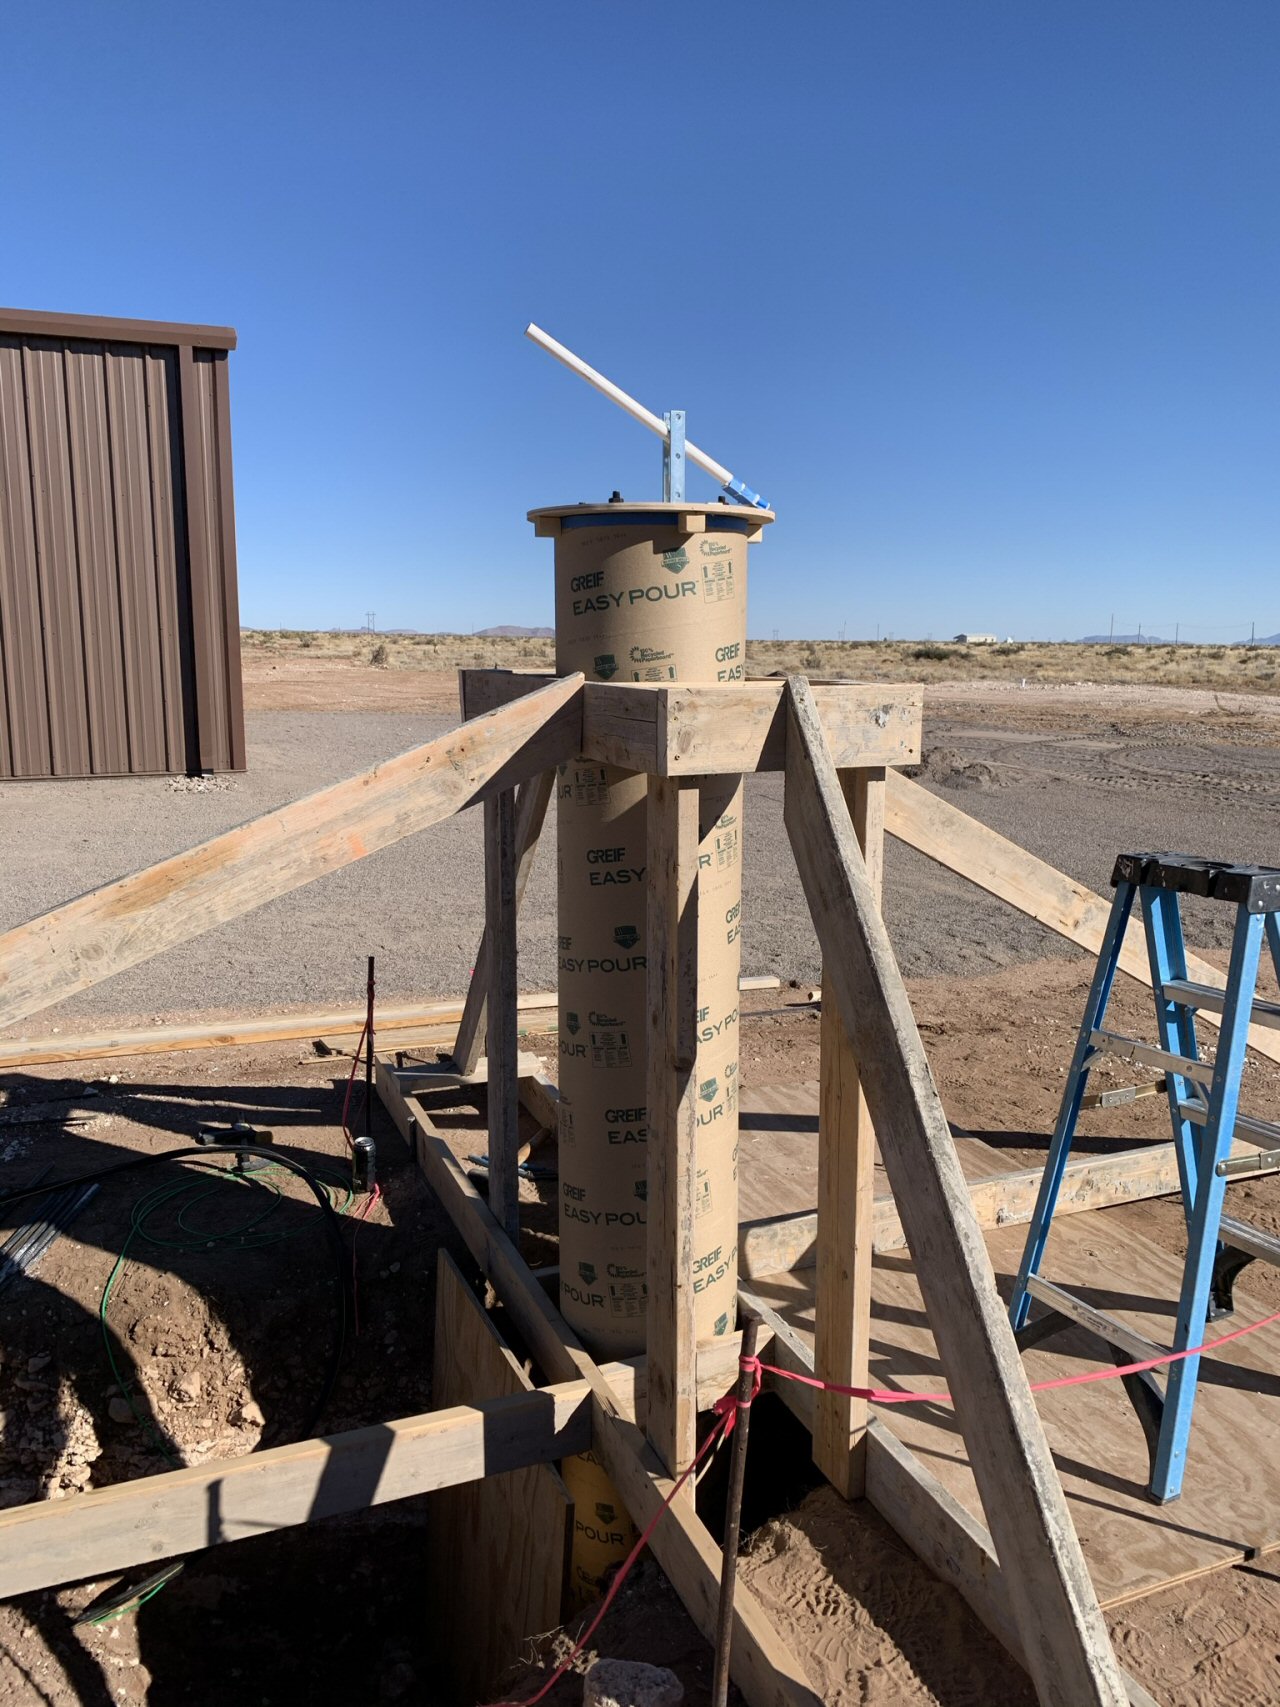
Here the alignment tool is being test-fitted on the braced sonotube prior to the concrete pour. Barry sighted in Polaris the night before and placed some registration marks on the sonotube for aligning the tool.
*-*-*
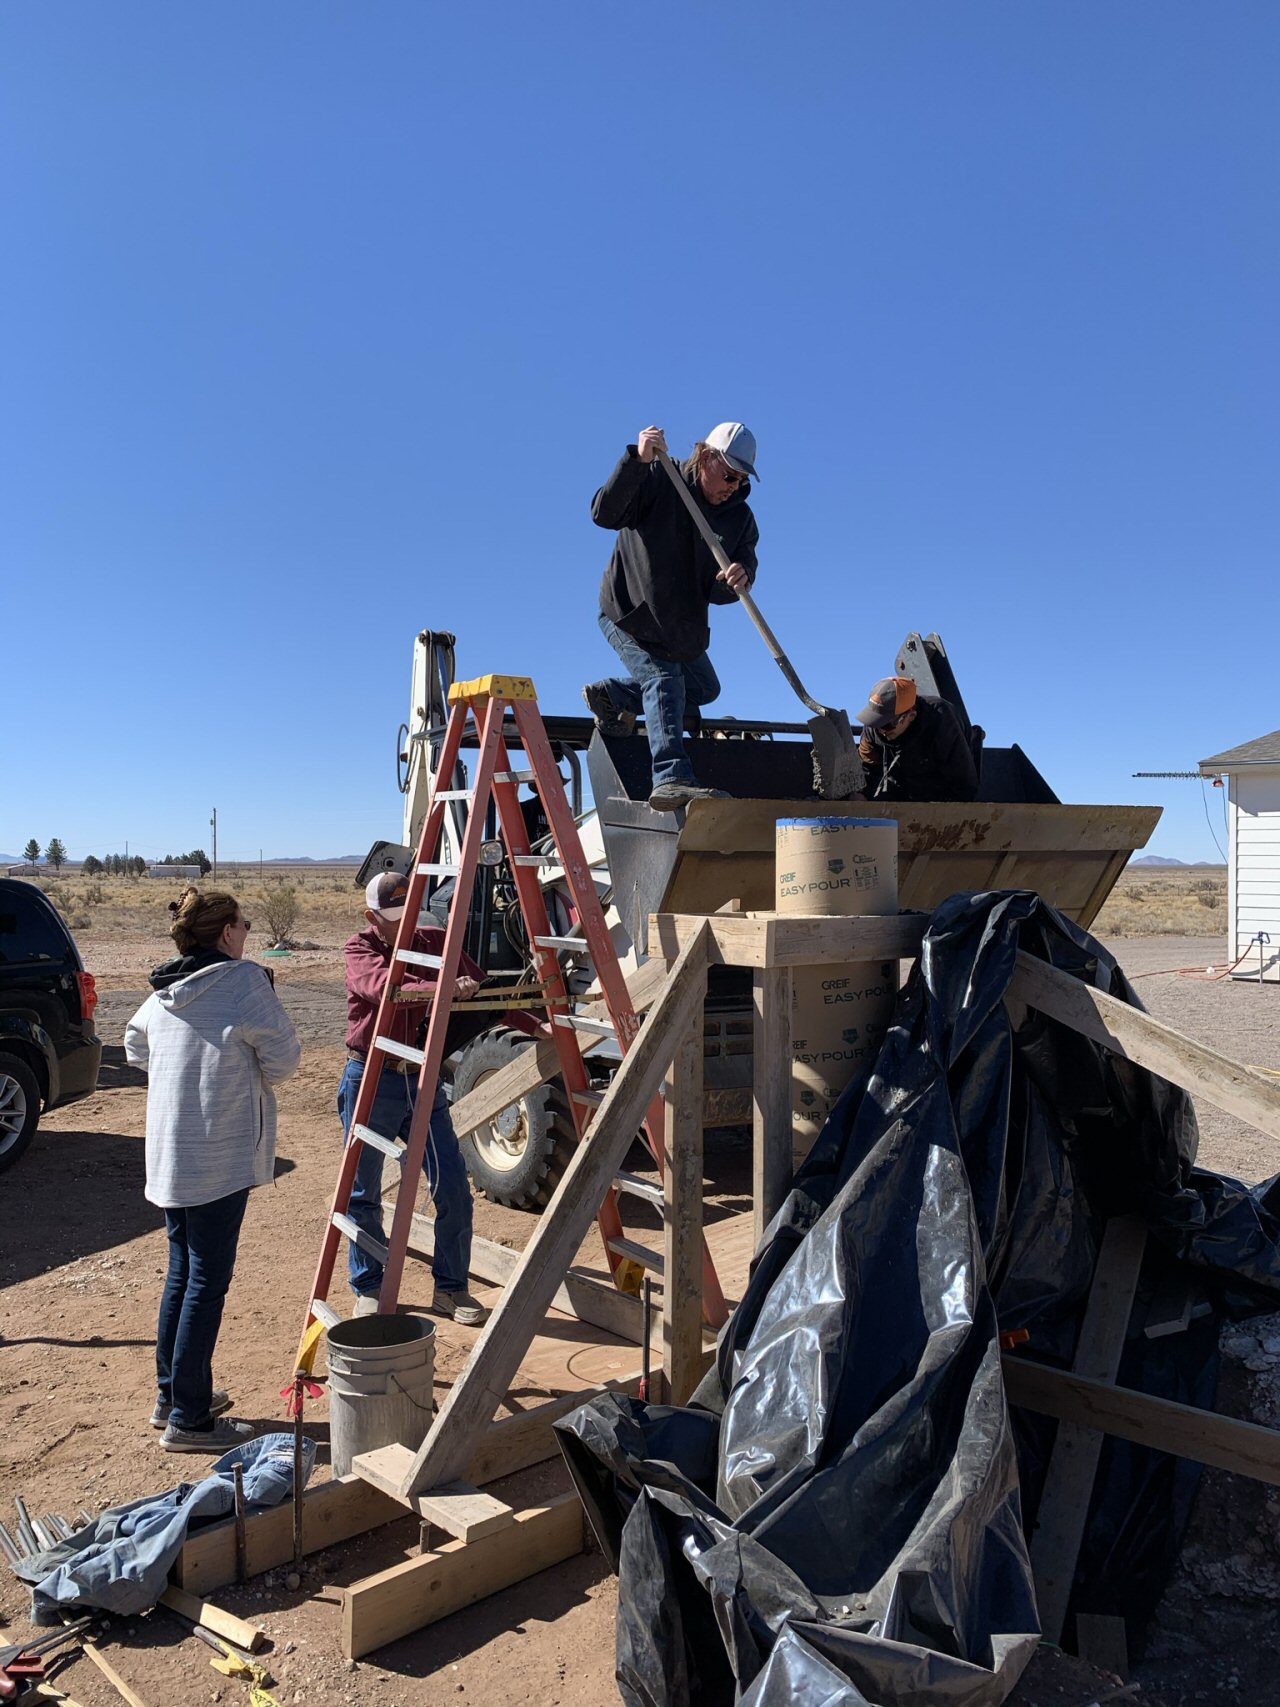
February 22, 2021 we poured the pier. Concrete was loaded into the frontloader and painstakingly shoveled into the sonotube. After it was filled, a long vibrator was inserted and the concrete bubbles/ air pockets removed.
*-*-*
This video shows the tedious filling of the pier form with concrete.
*-*-*
This video shows the use of a long vibrator for vibrating the concrete in the 10' tall pier.
*-*-*
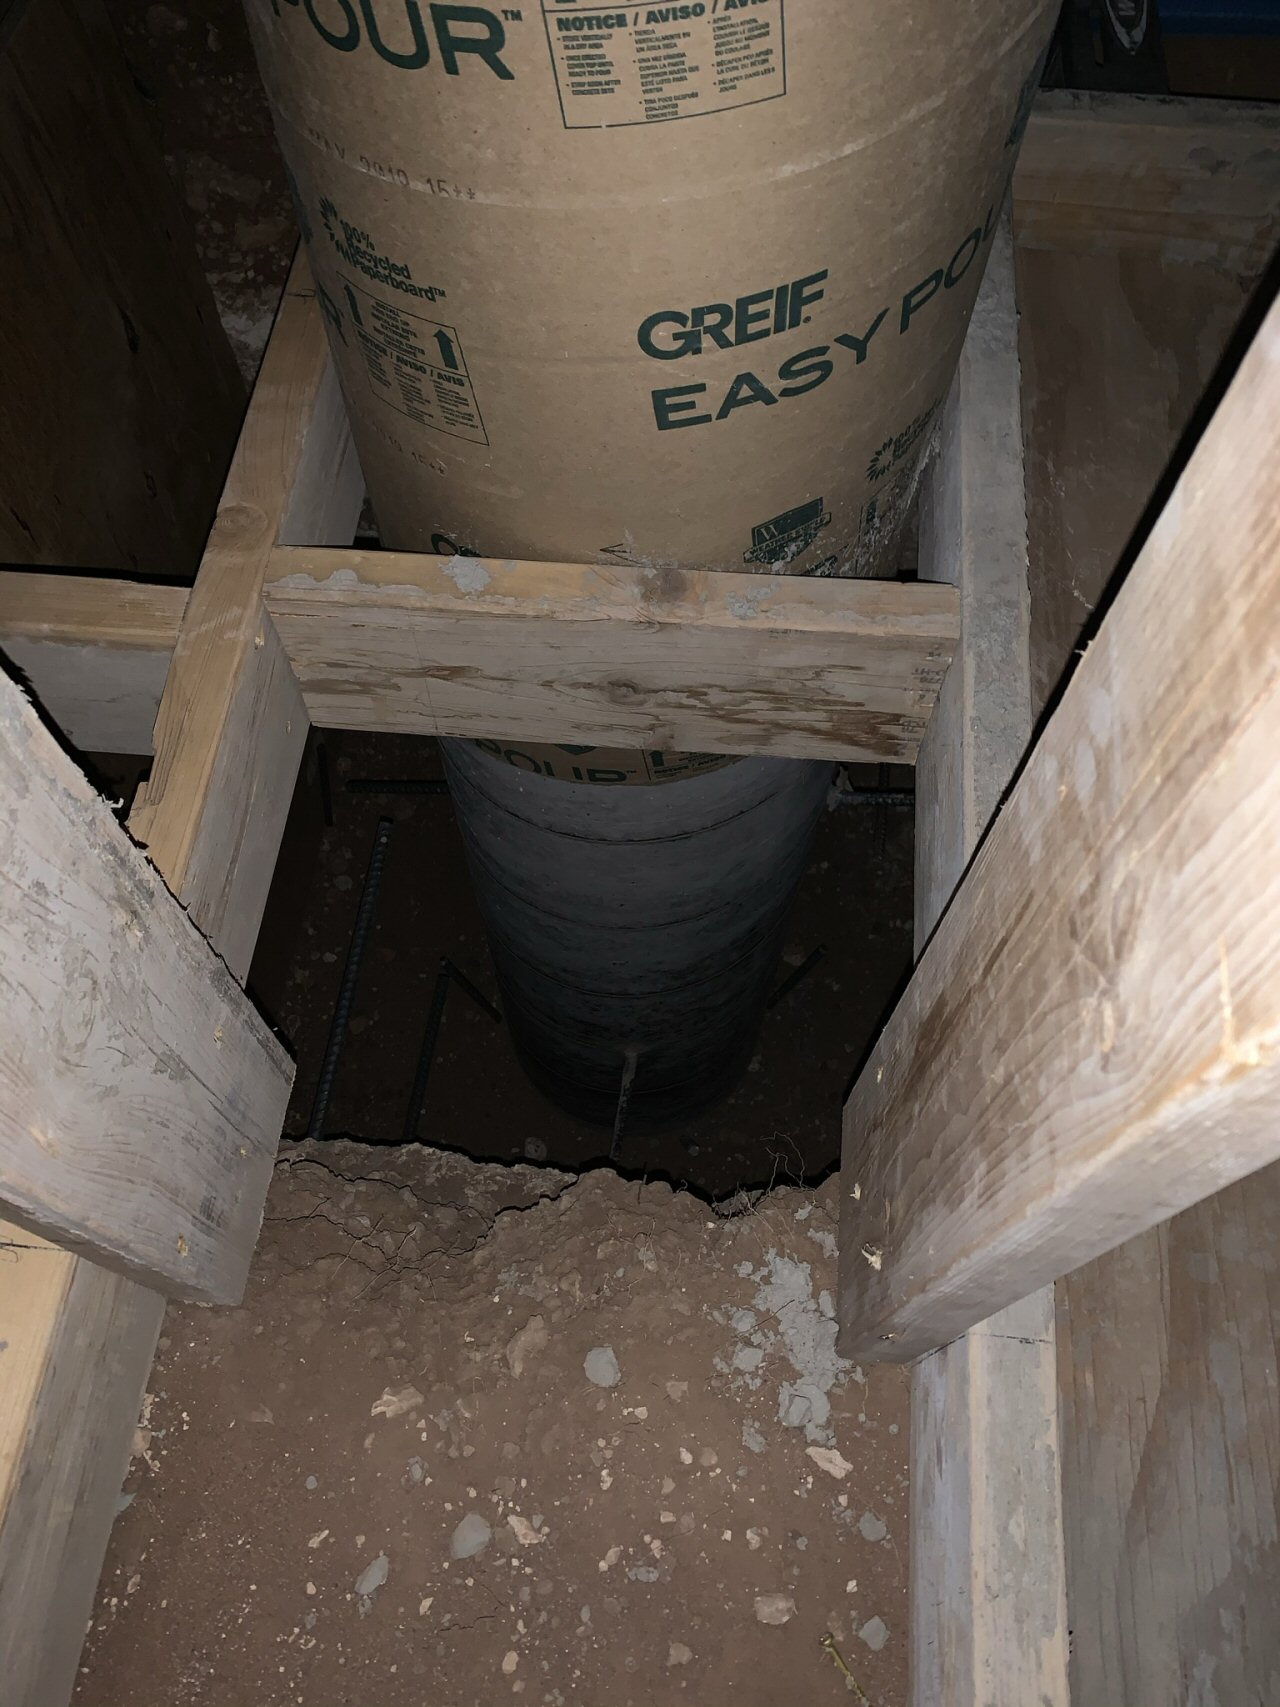
After the concrete for the pier had cured for a few days they could pour the base of the pier. Here is a view looking down into the hole for the base. The sonotube paper has been removed from the bottom of the pier.
*-*-*
Here is a short video showing the concrete pour of the base which will support the pier. This is a 4' x 4' x 4' cube of reinforced concrete.
*-*-*
The pier and base curing.
*-*-*
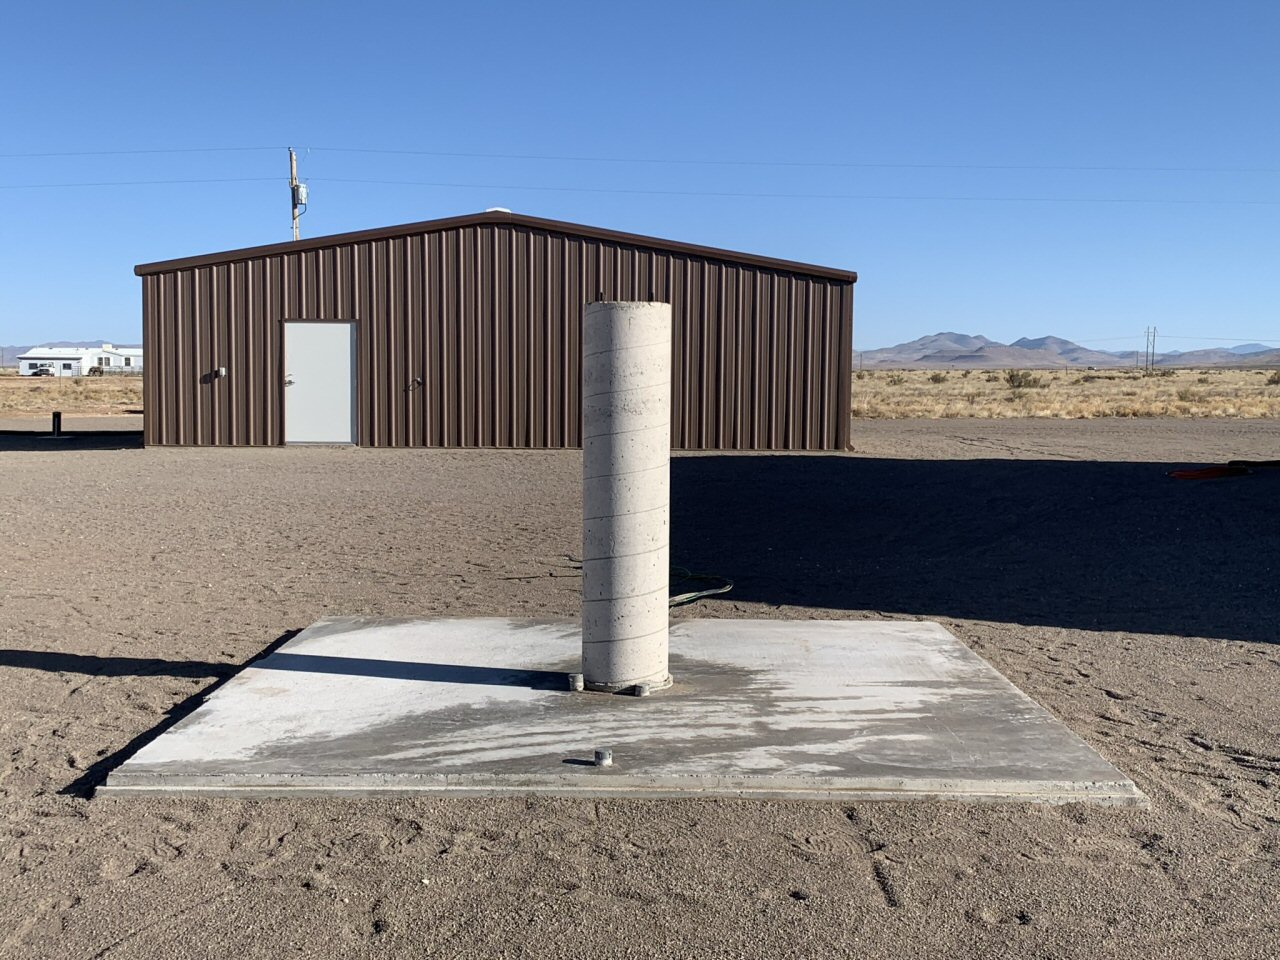
Here is the completed pier and base. Goodness it seems tall and will stand a little over 6' above the building foundation. Next we need to pour the building foundation.
*-*-*
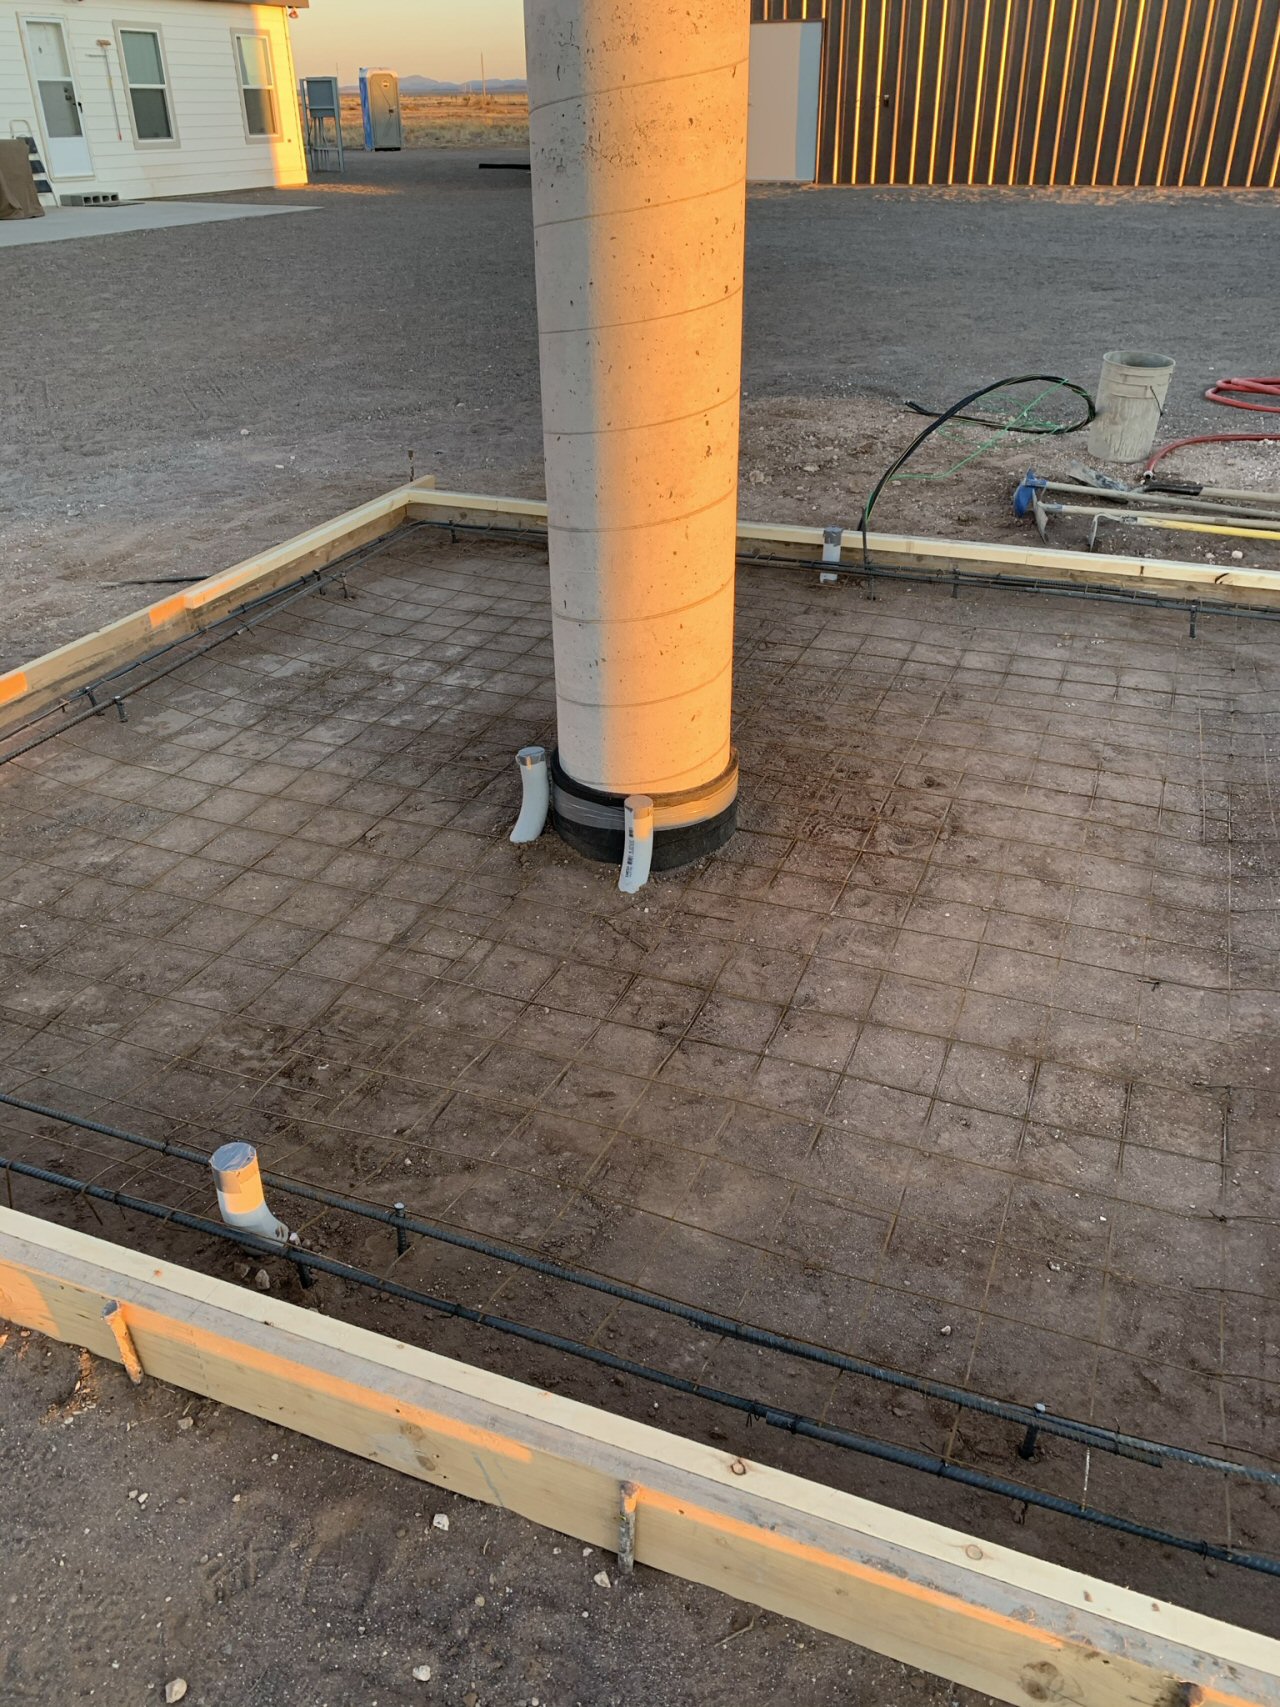
The foundation forms have been prepped to pour the concrete. It is 12' by 12'. The pier has been wrapped with a rubber sheathing to isolate it from the floor to stop vibrations.
The conduits are for getting electricity into the building, and communications cables from the pier to the computer station along the south wall and from the pier into the office inside our house. Barry will be able to control the telescope from
either inside the observatory or inside the house.
*-*-*
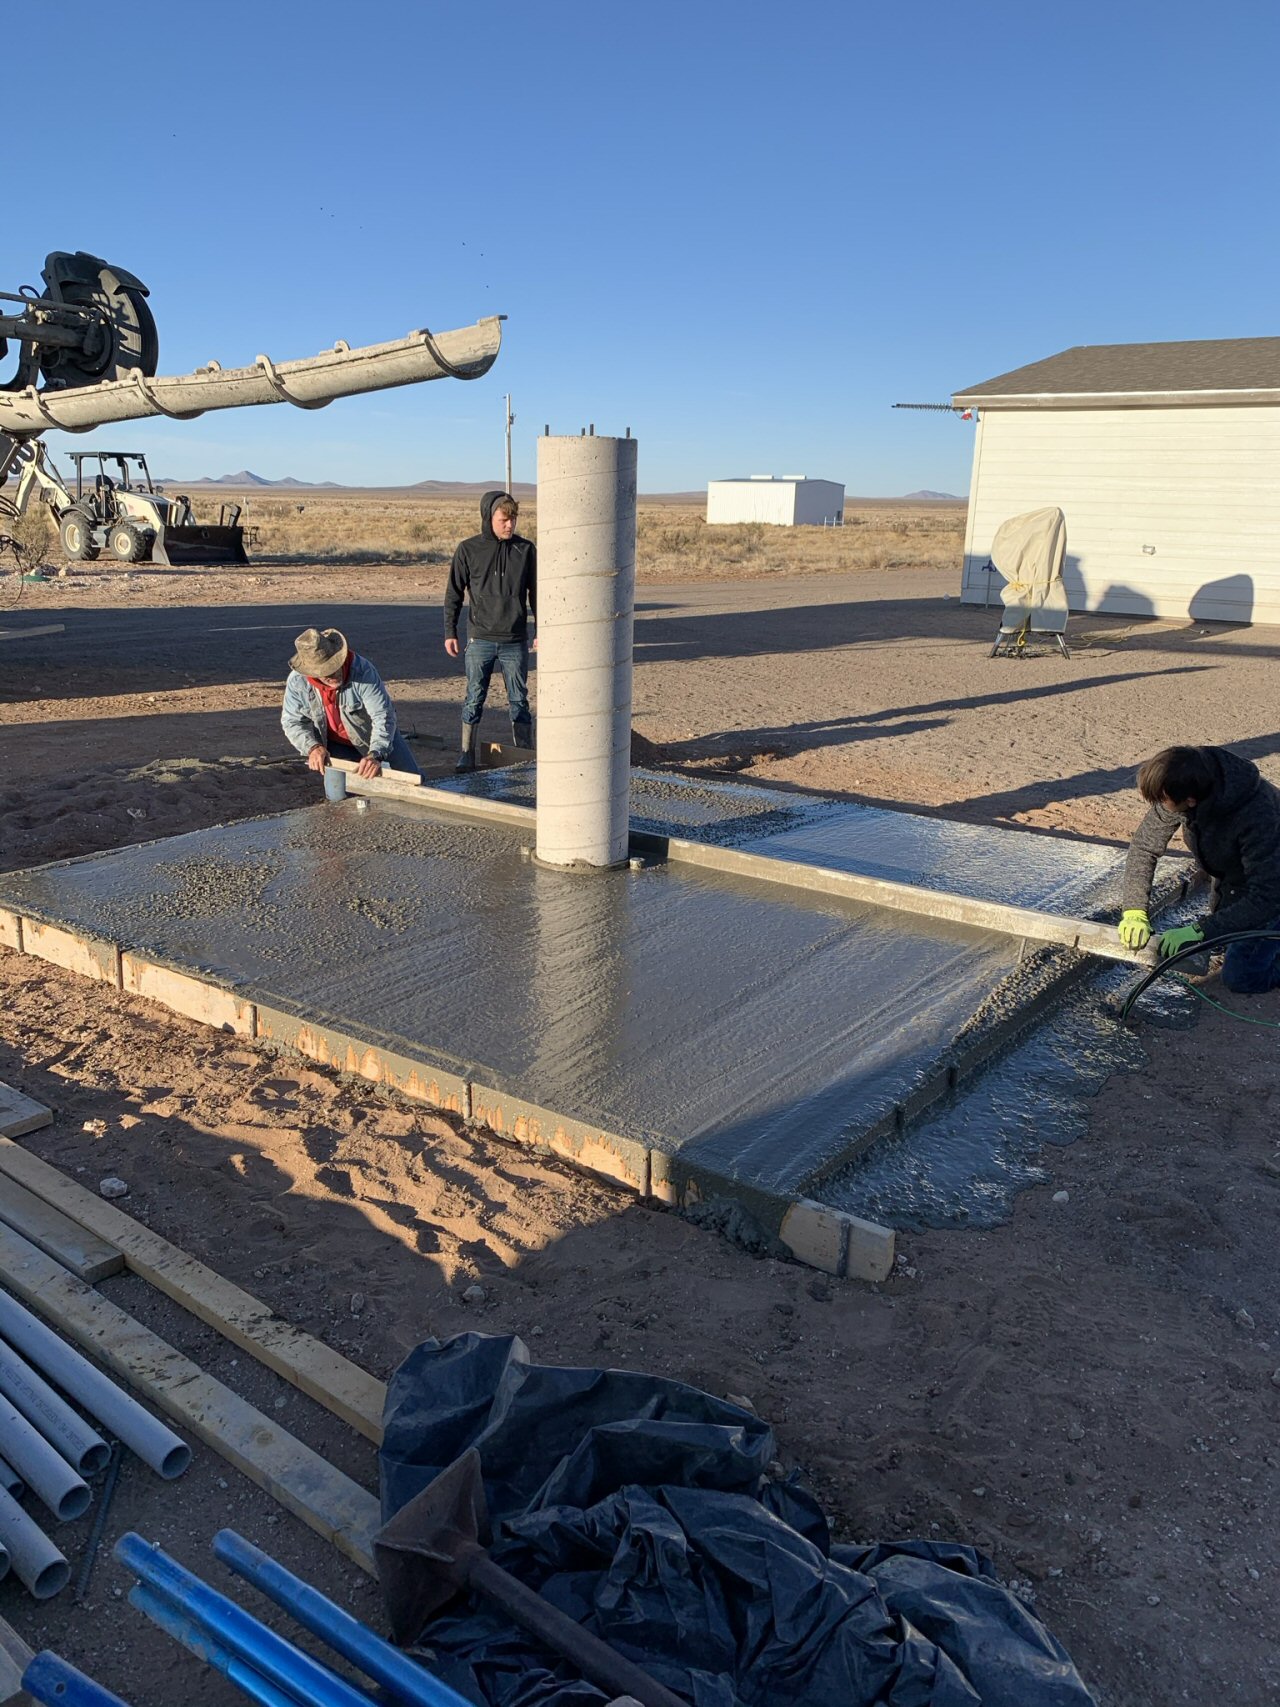
March 5, 2021 The observatory foundation is poured!
*-*-*
We are making progress - the foundation and pier are complete. No more concrete work is required.
*-*-*
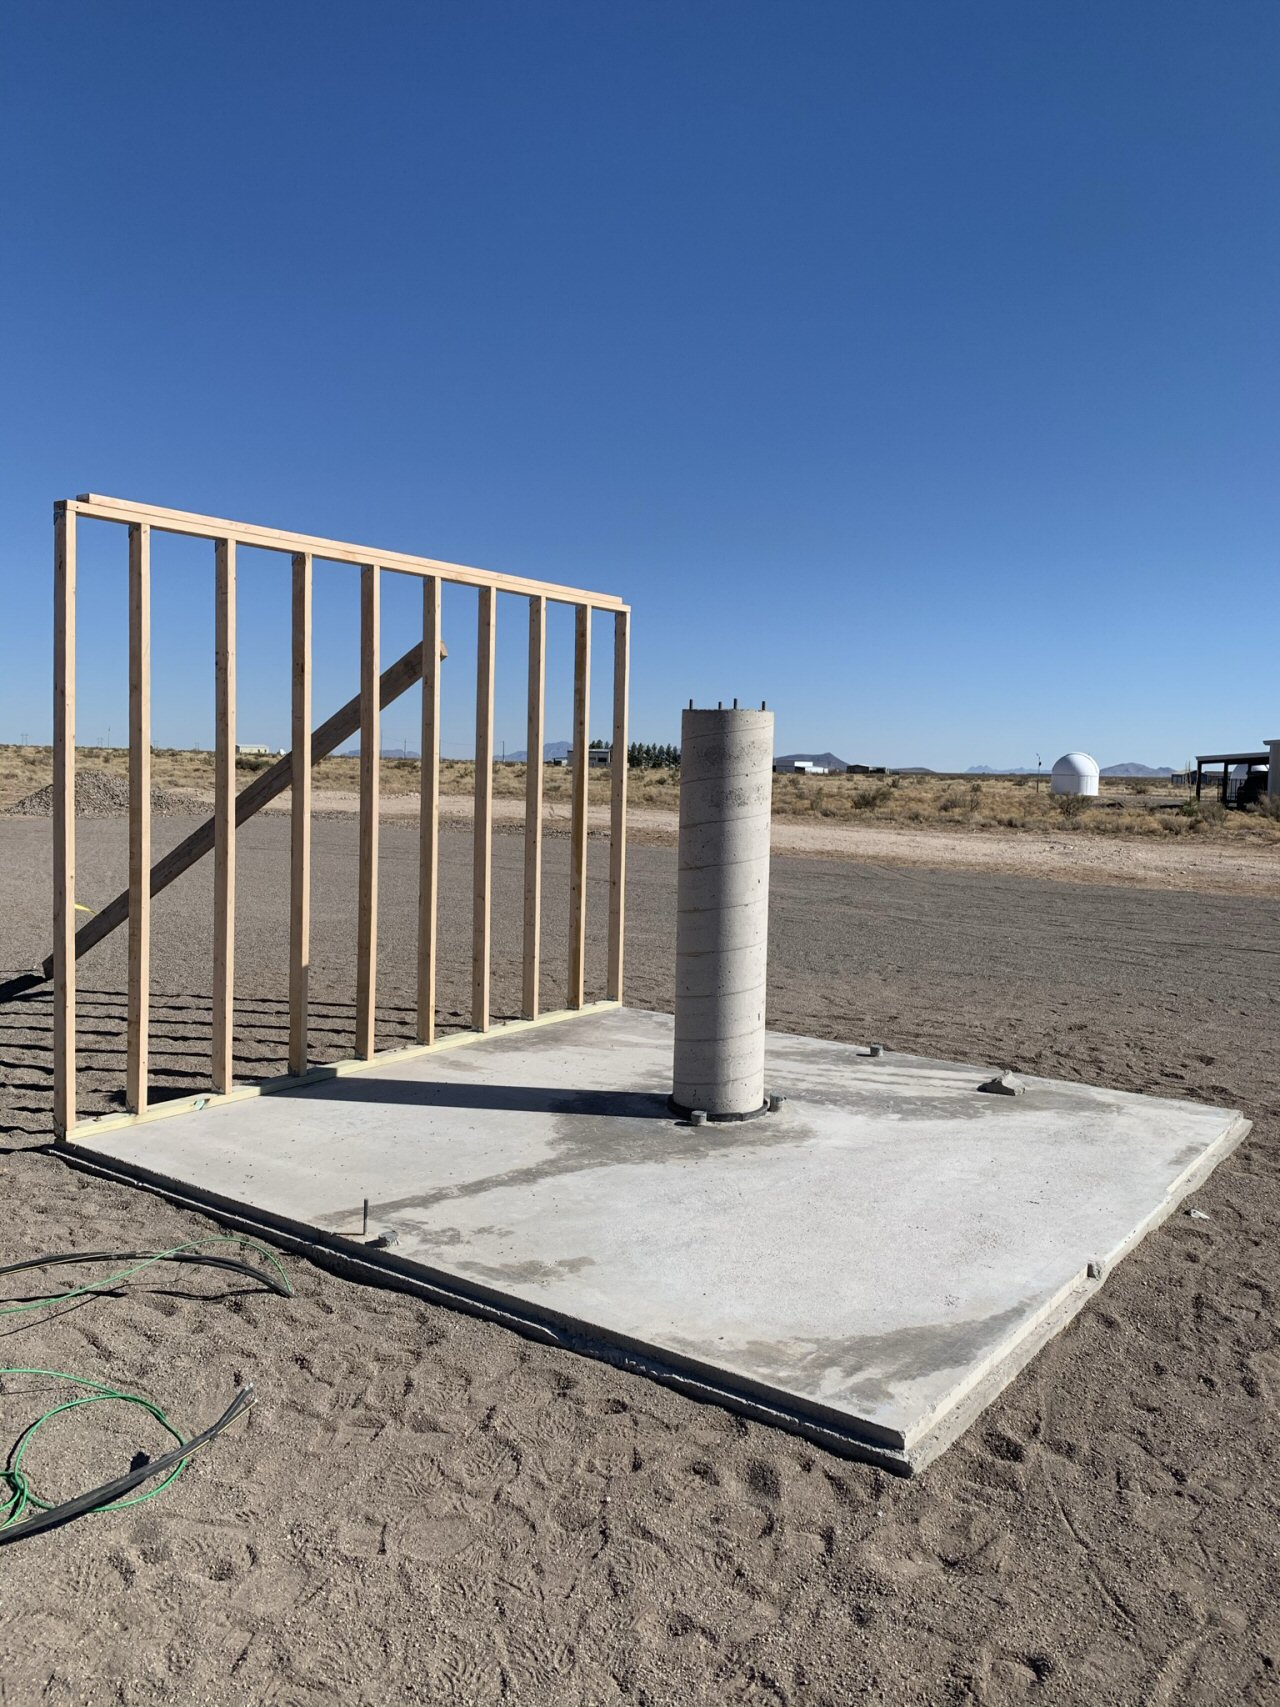
March 17, 2020 The concrete has cured, the weather has cleared for a few days and we made the run to Las Cruces Home Depot for supplies. The studs for the first wall have been assembled and placed. Barry and Donnie build the stud wall in the shop and then bring it out and put it up on the building.
*-*-*
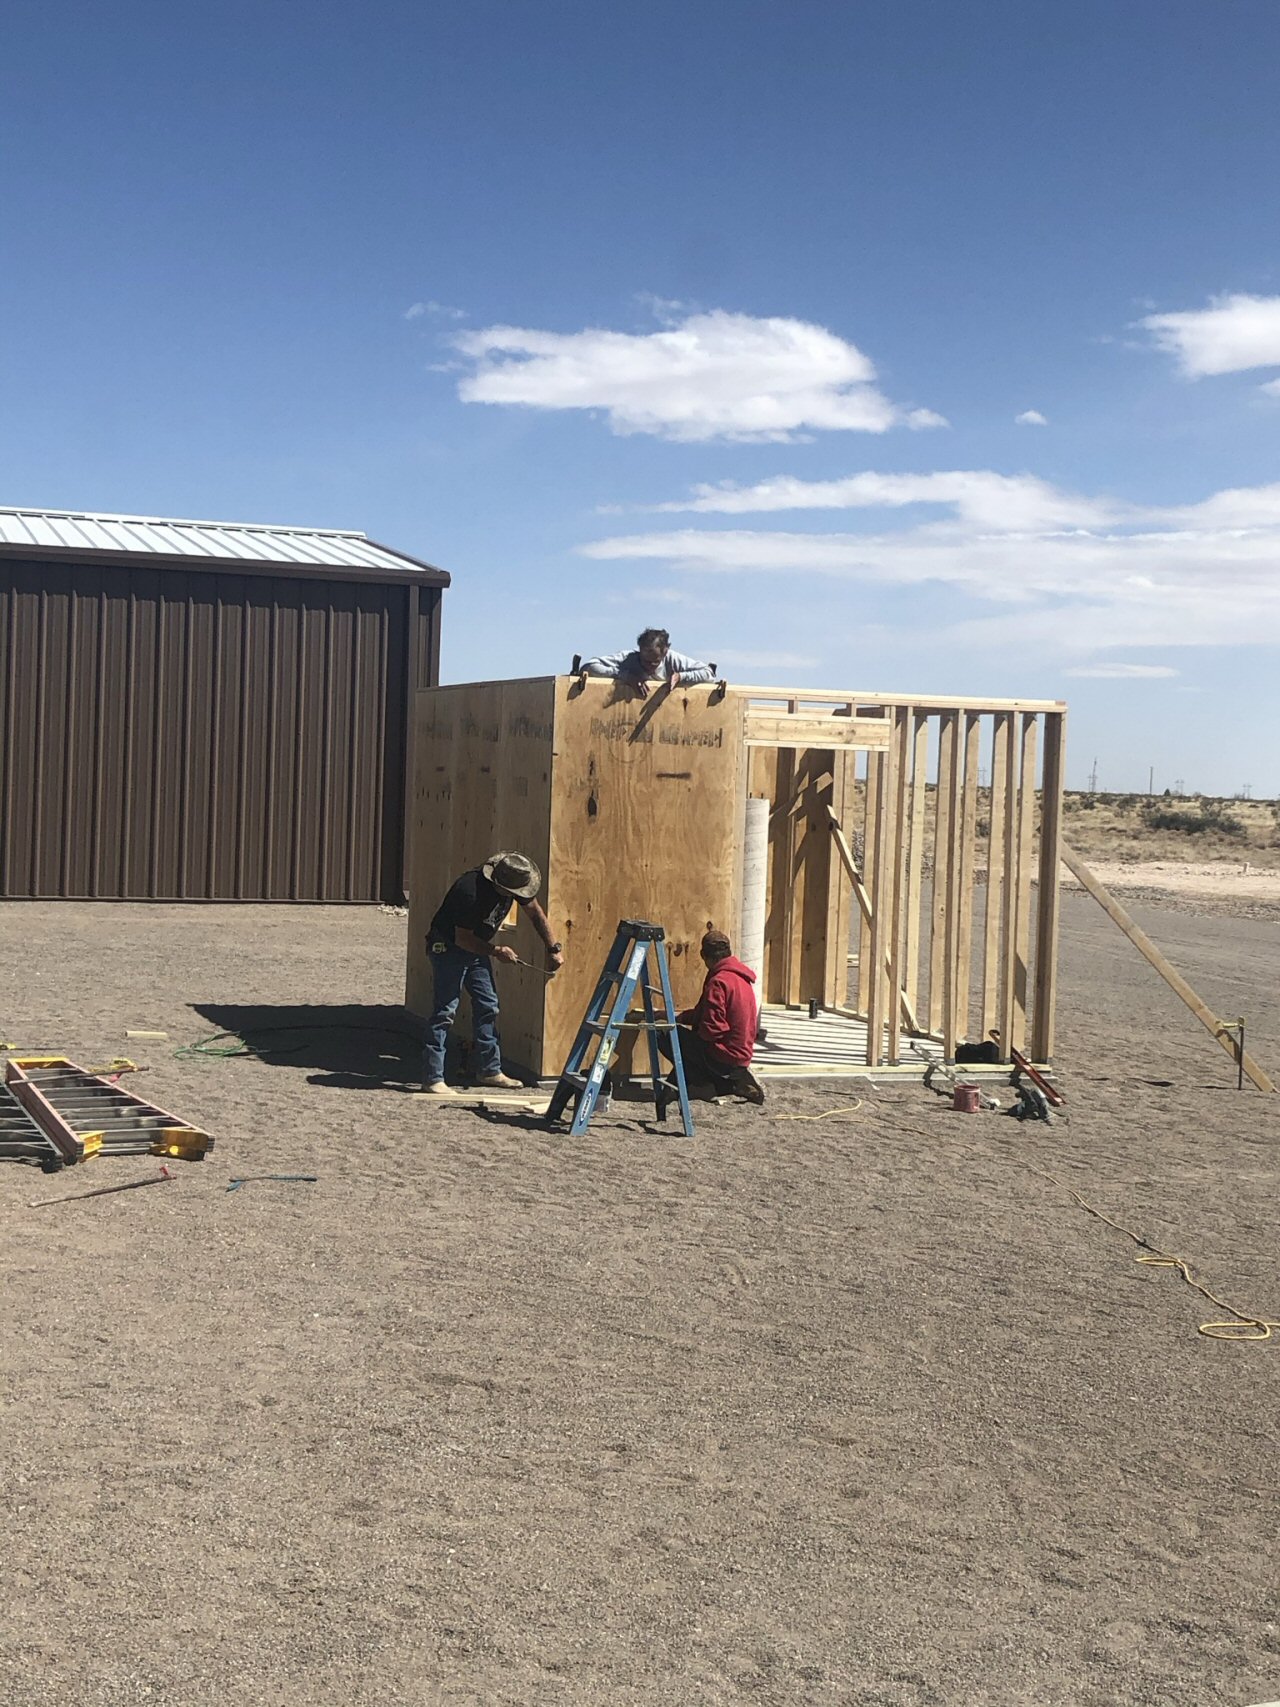
The studs are all up and now the team applies sheathing to the building. Barry holding it at the top and Donnie and Michael nailing in place.
*-*-*
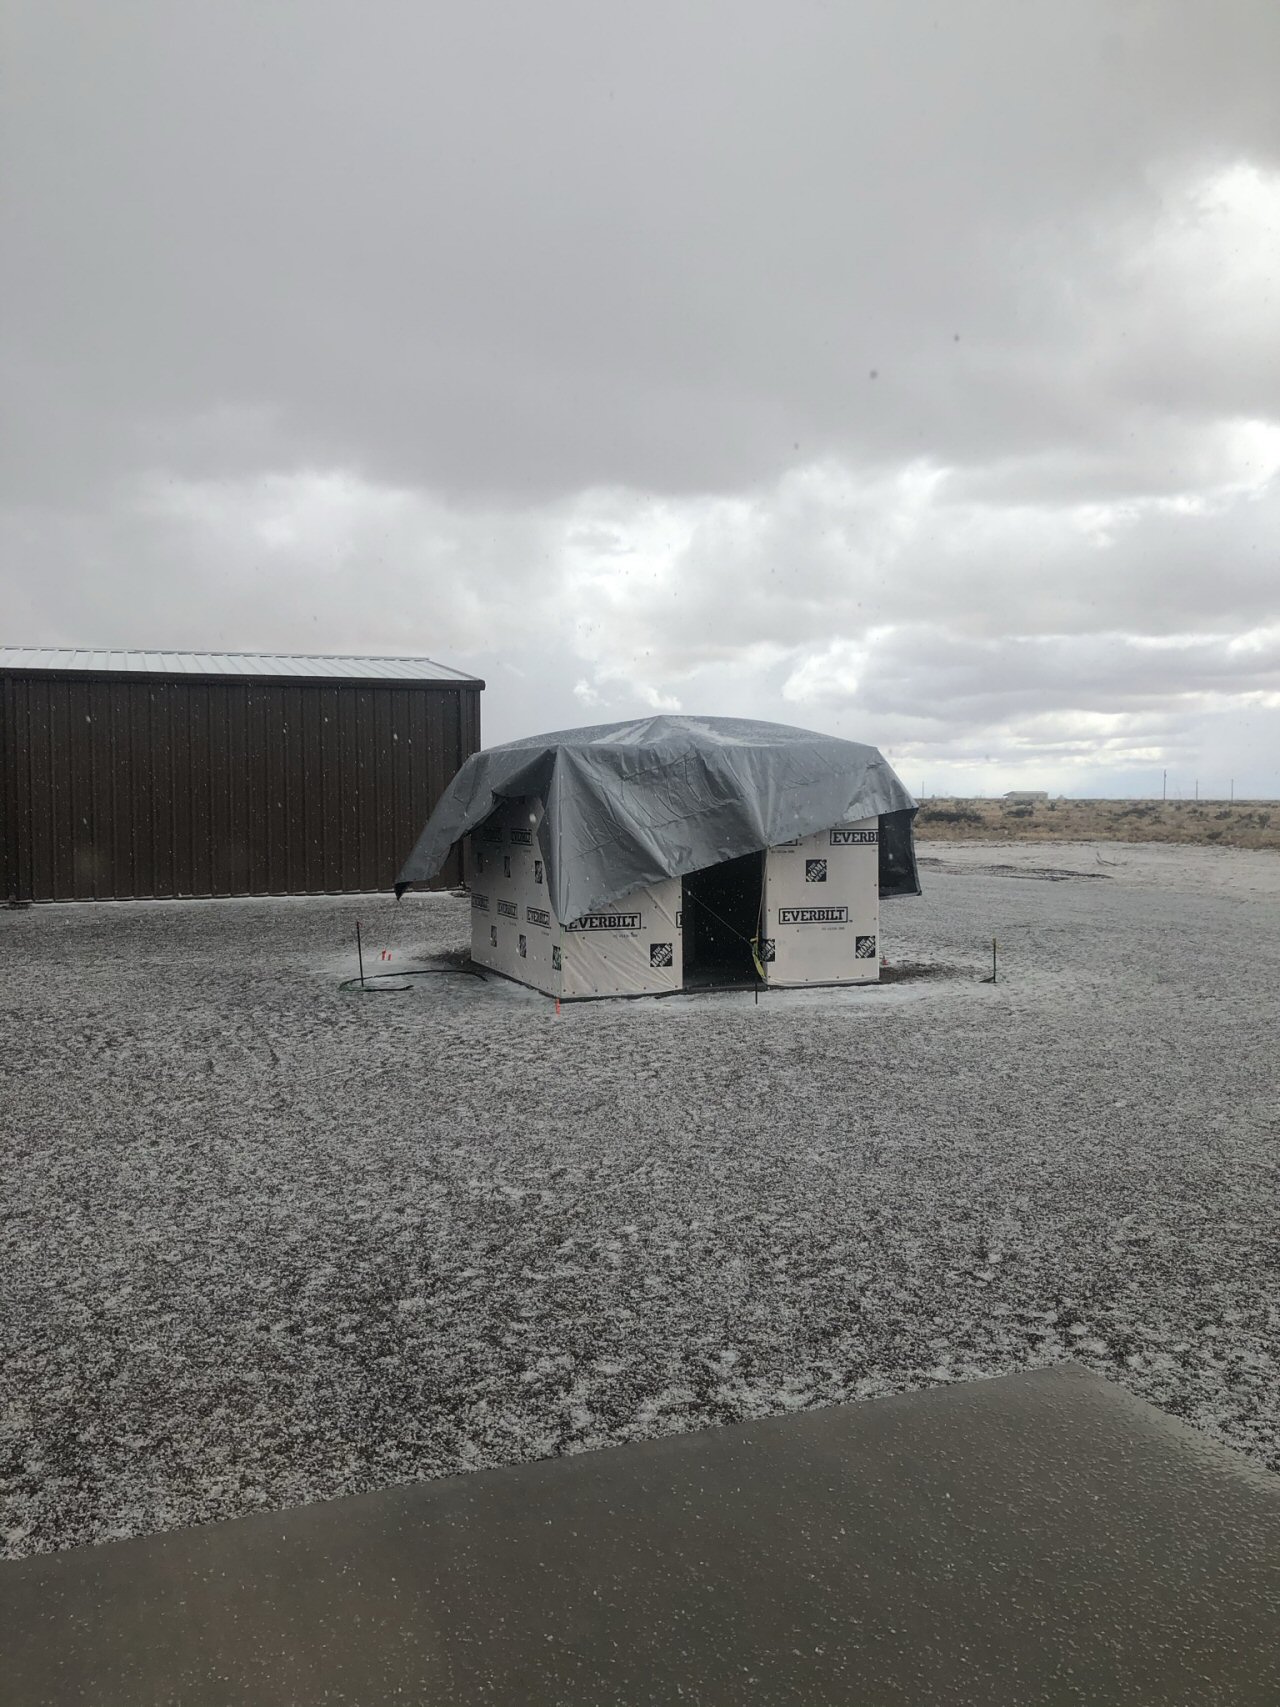
The team got the building wrapped and then the weather turned. This was the first tarp design - tied down to stakes. It did not work as the stakes would pull out of the ground in the wind. Little did we know that we would still be using a tarp almost a year later...
*-*-*
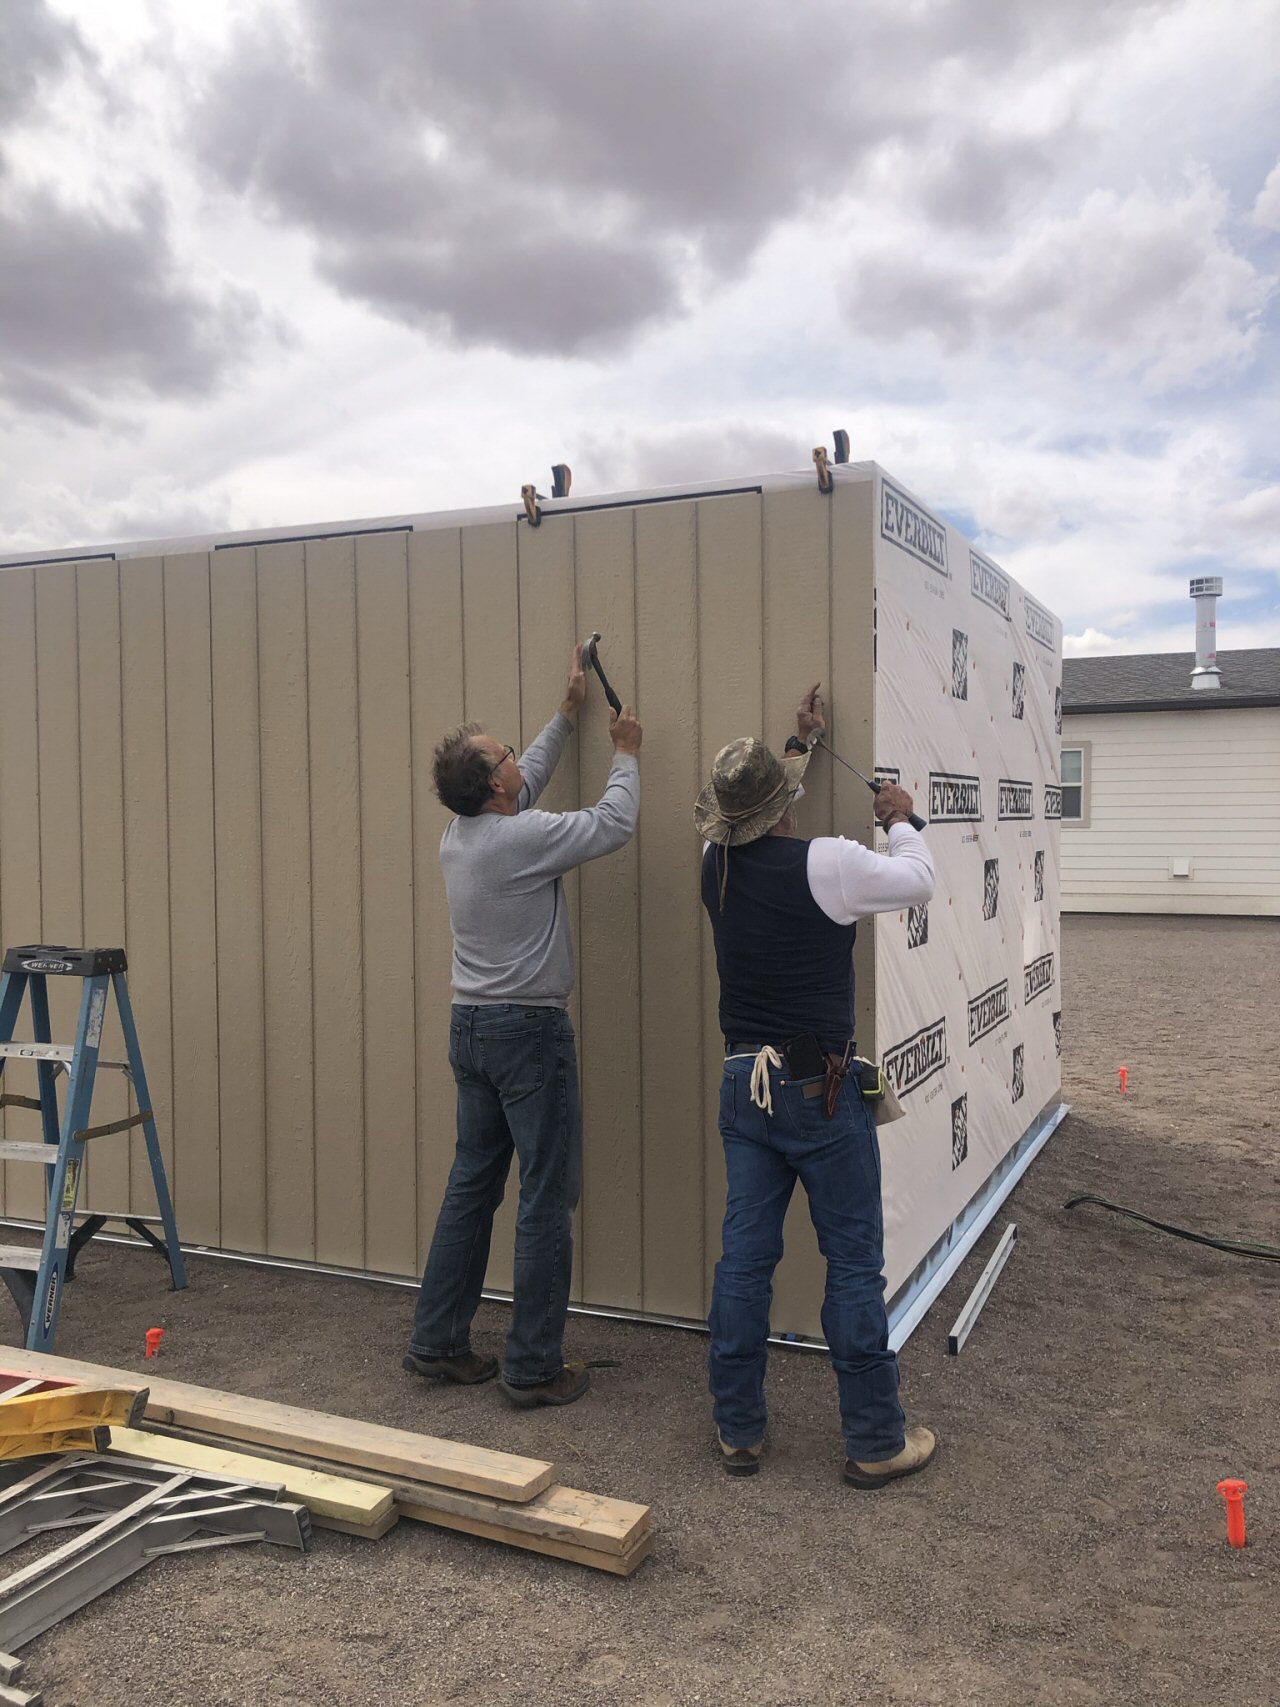
The weather cleared and Barry and Donnie installed the building siding.
*-*-*
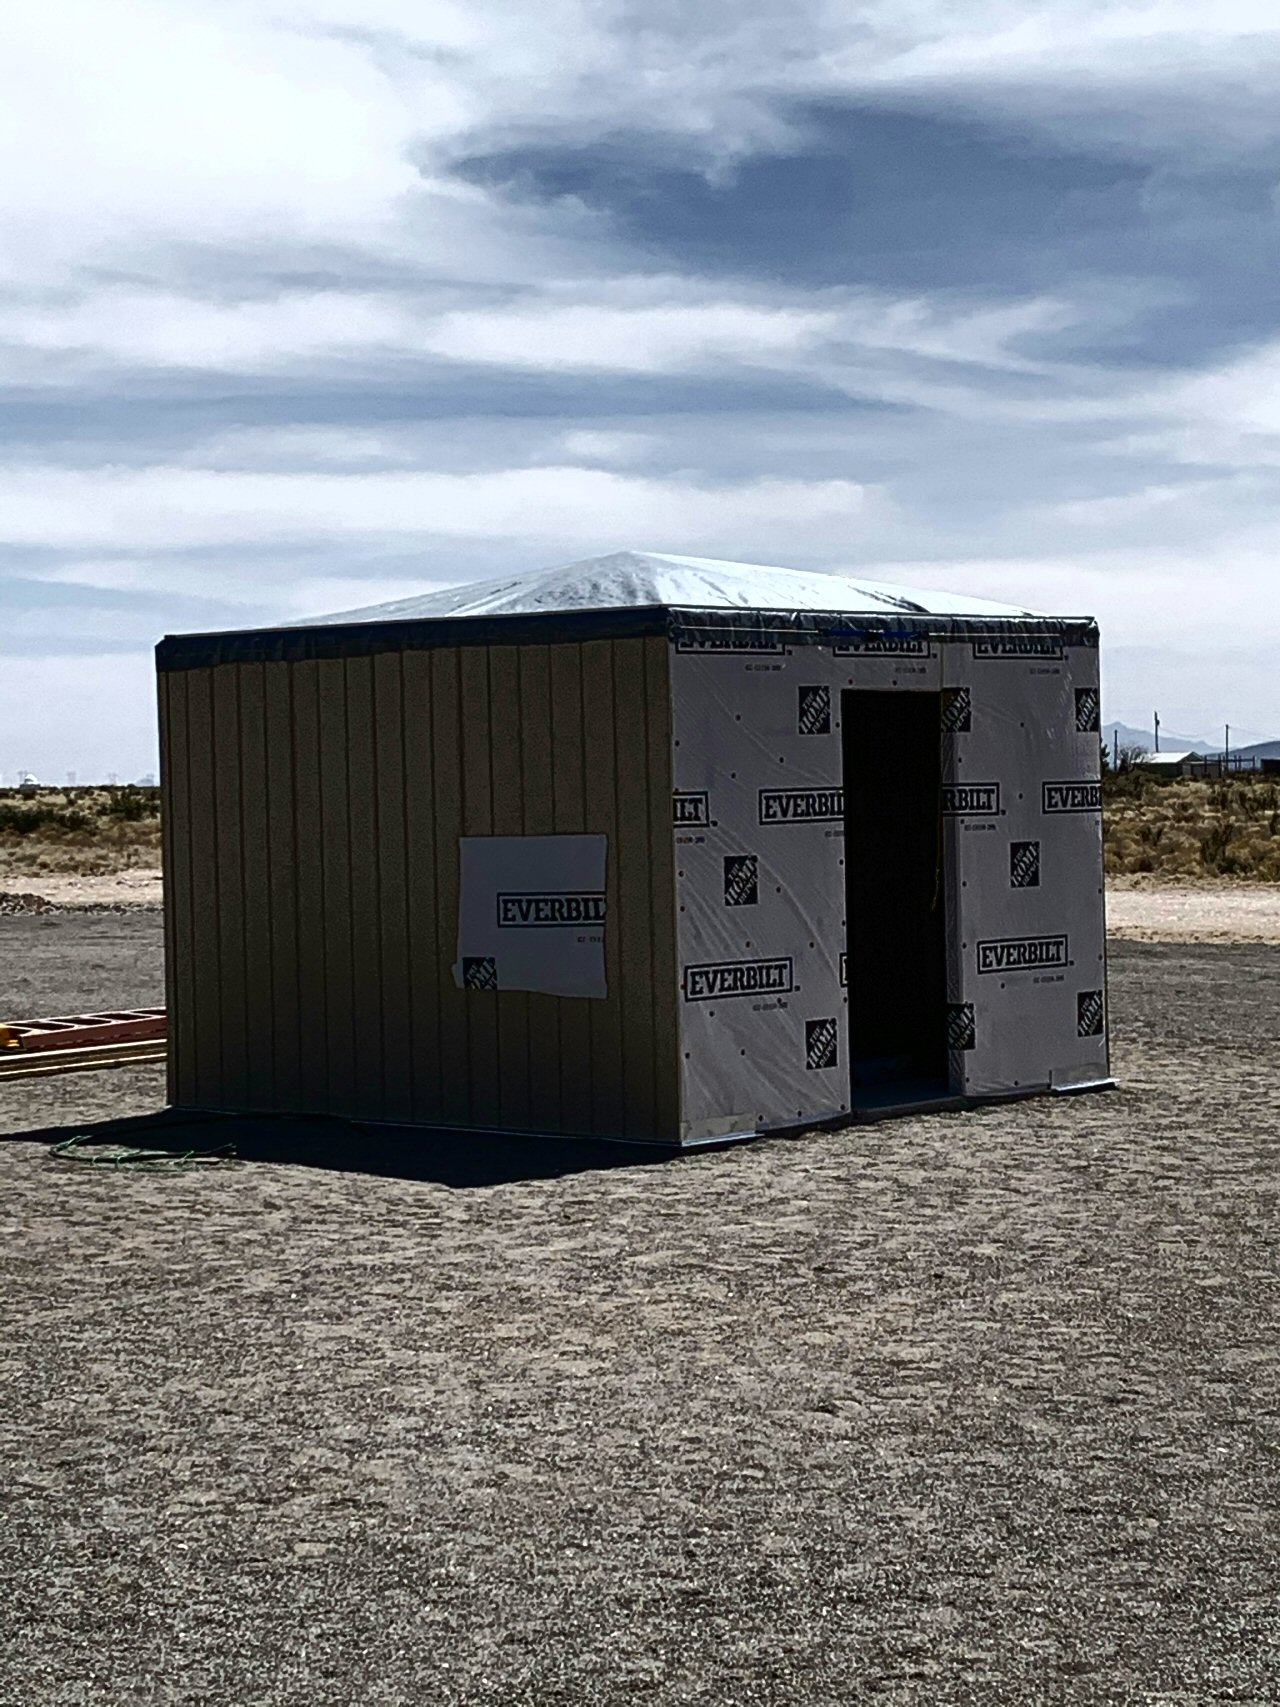
The building exterior is done and we are awaiting the door installation. This is Version 2 of the tarp. It is attached all around the perimeter of the roof with horizontal 1 x 4 boards that nail into the top of the stud walls. It works pretty well but the short sides of the tarp flaps up and exposes the top of the siding/sheathing. Less than ideal.
*-*-*
April 17, 2021 The building exterior is complete (and has been for a few weeks). Barry has talked with Exploradome and the dome has been delayed for a month or two.
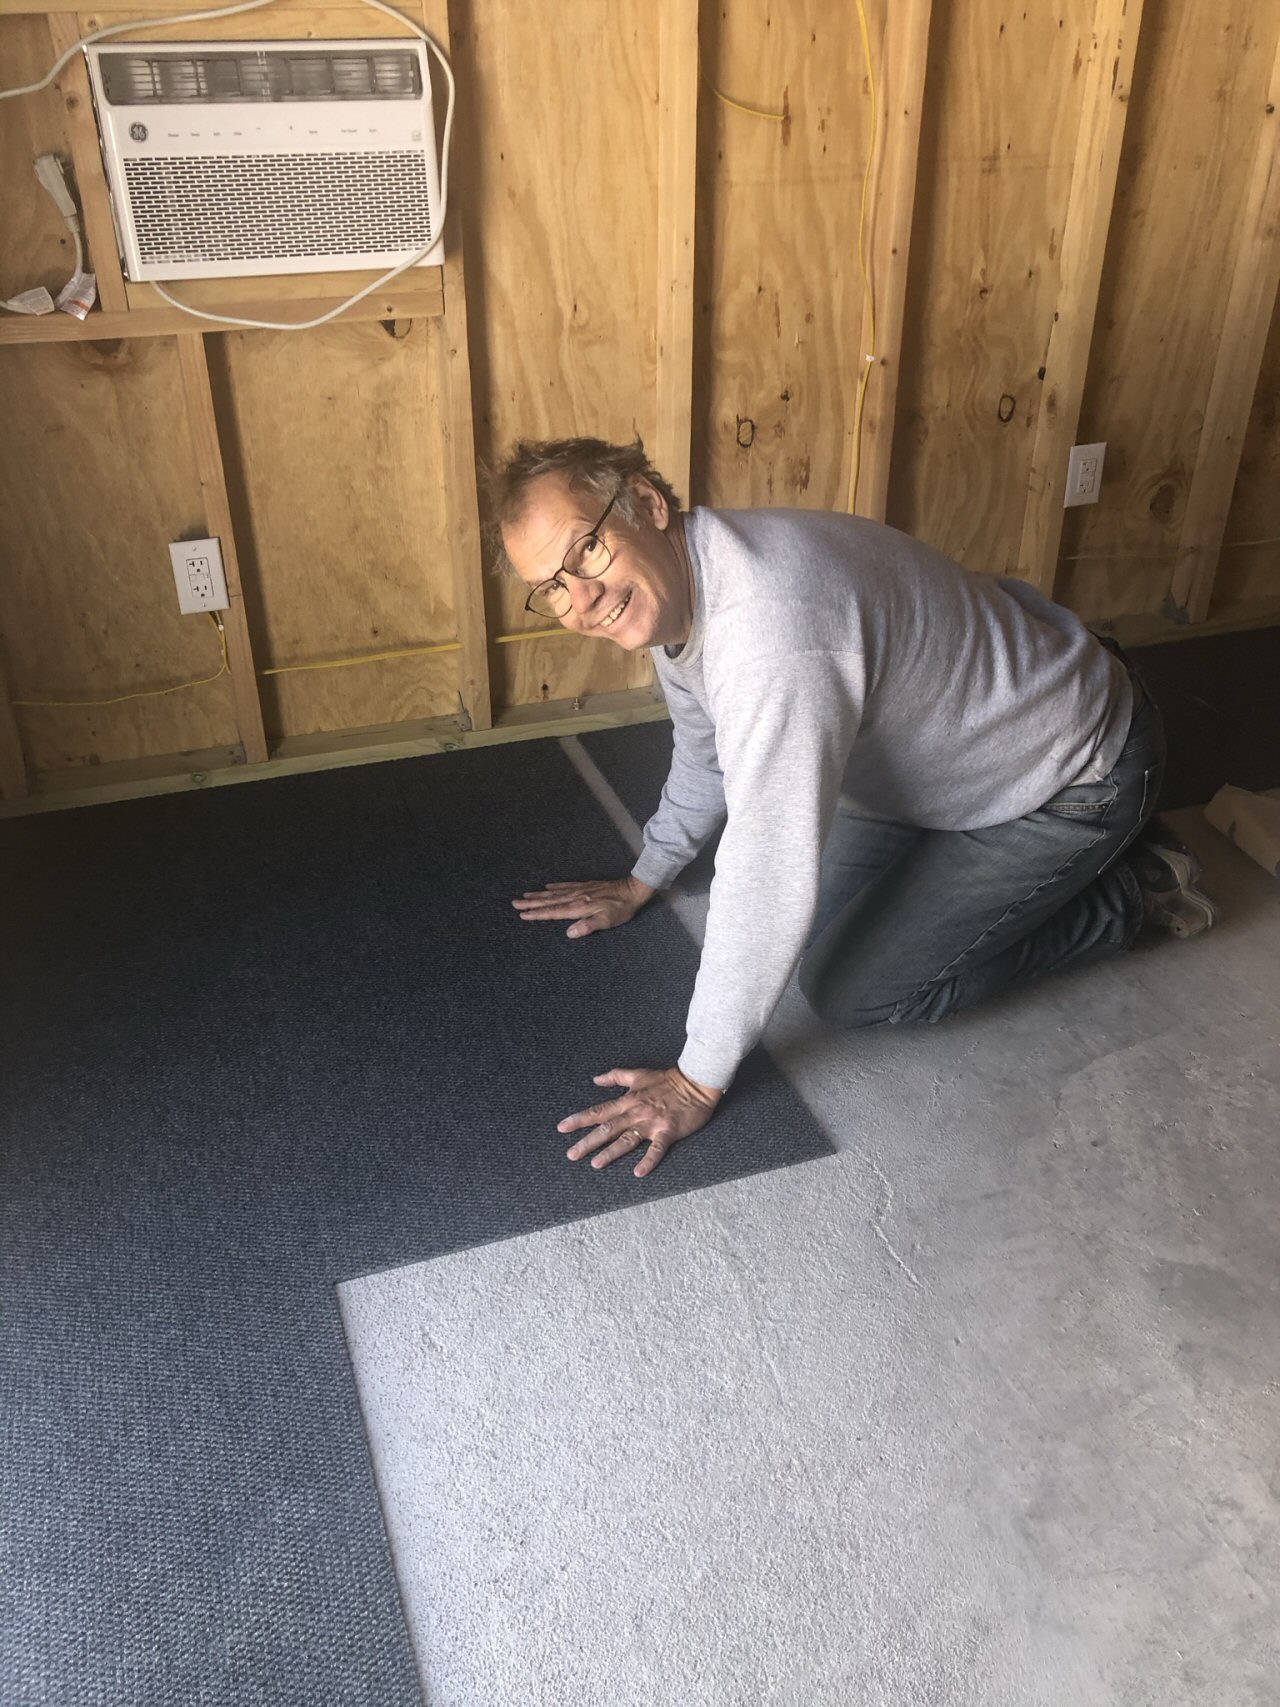
Now Barry is working to complete the interior as much as he can. He has already run the elctricity to the outlets, pier and dome. Next he puts down the carpeting.
*-*-*
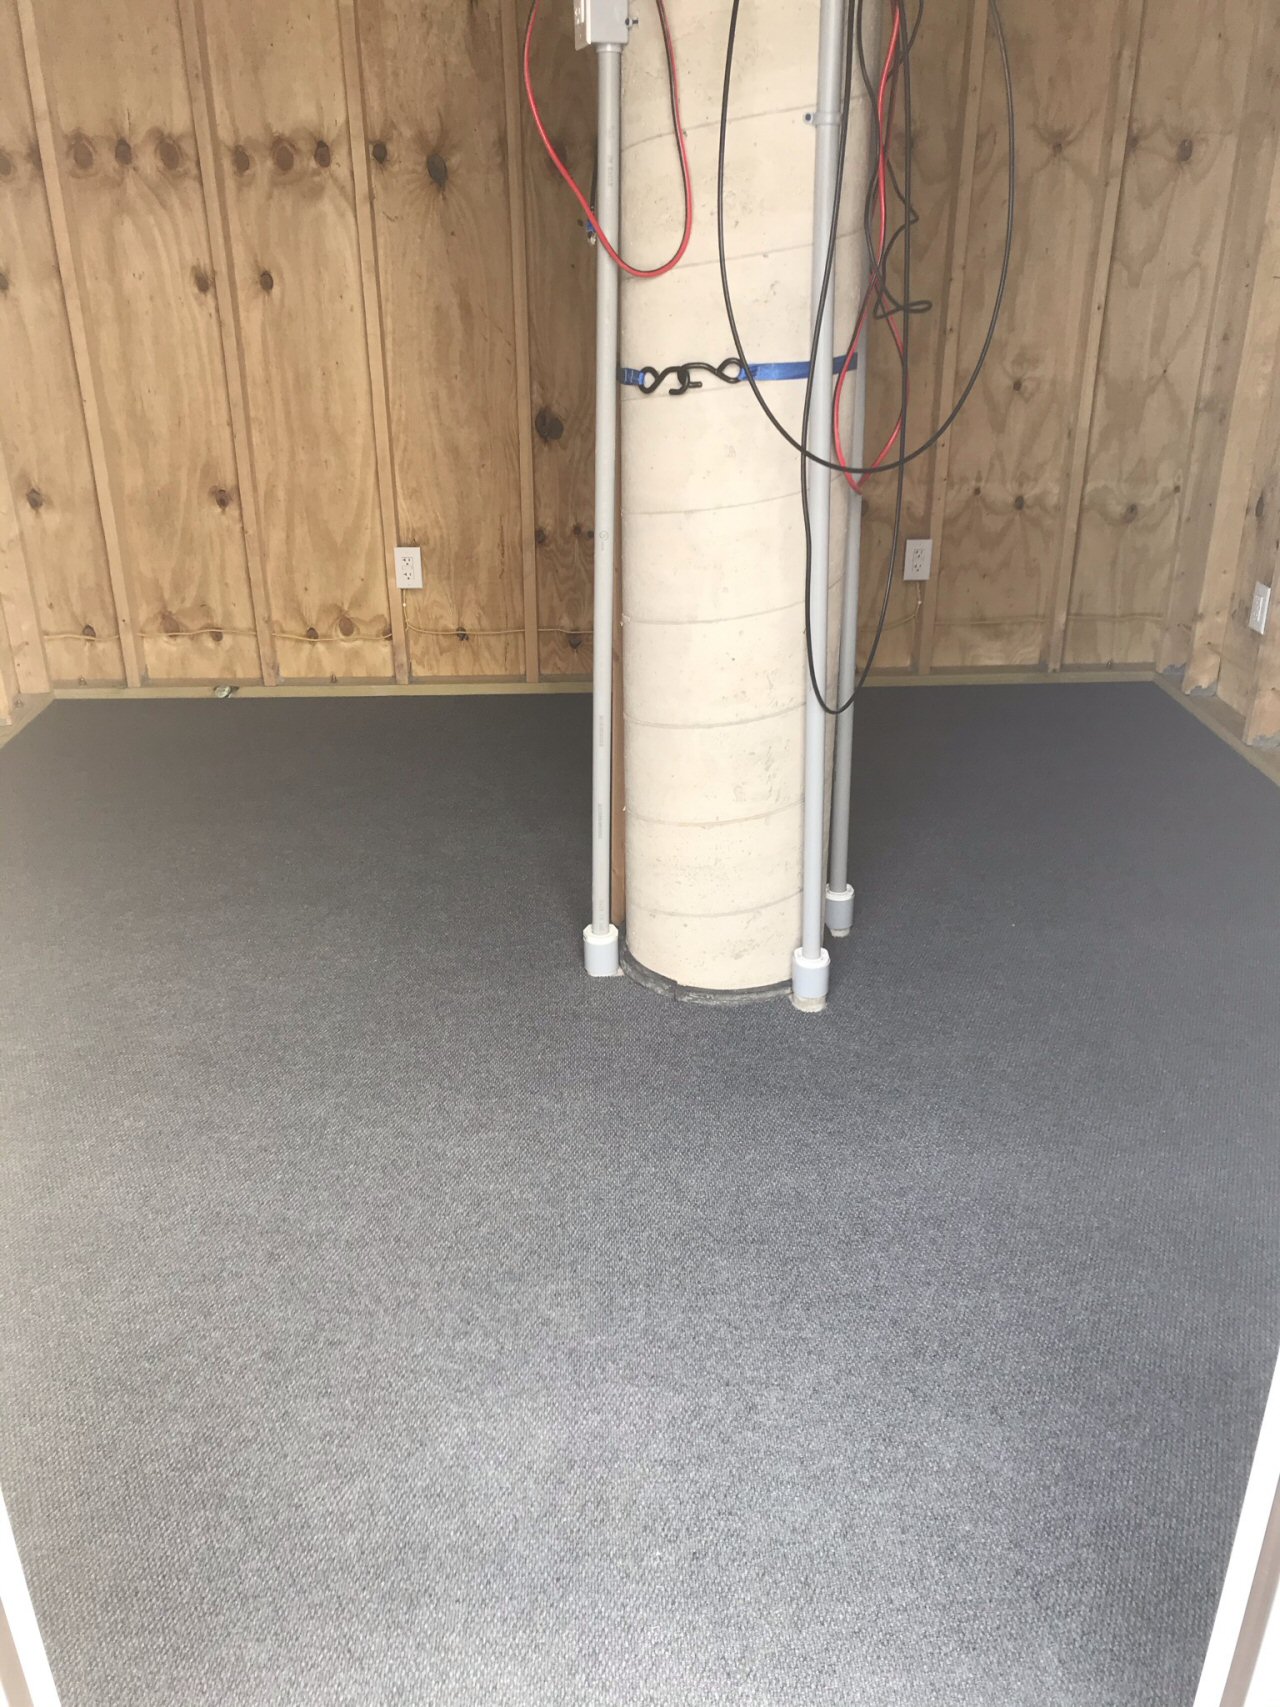
A day later the carpet is complete. You can see the conduits which run up the pier for electrical and communications cabling.
*-*-*
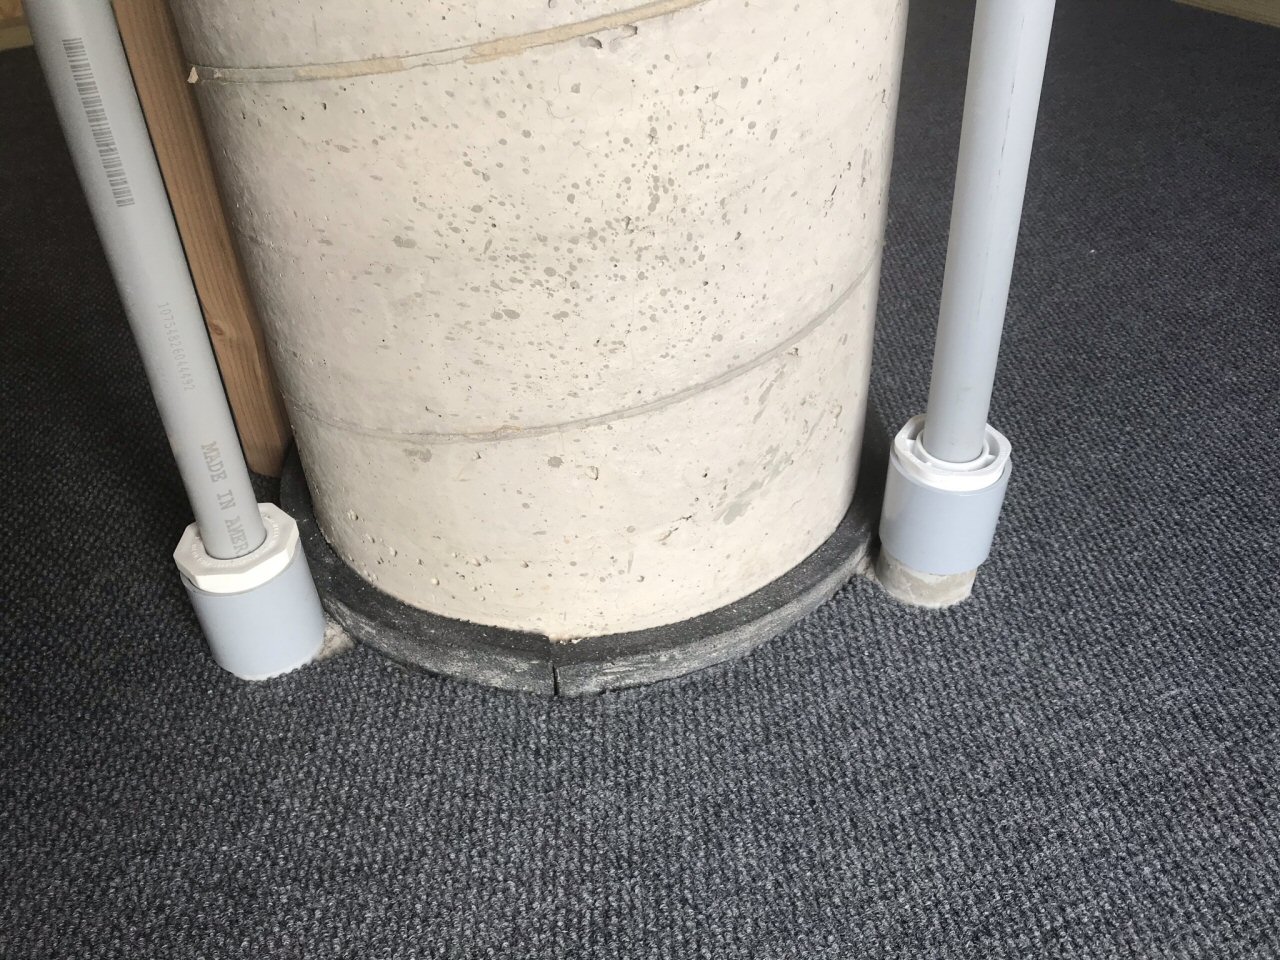
Here is a close up view of the base of the pier with the carpet installed. You can see the rubber isolation layer at the base of the pier.
*-*-*
June 4, 2021 Still no definitive word on the dome delivery date. The latest is a plague of parts shortages, so probably another month. We have been reluctant to finish out the interior since we still have the roof covered with a tarp and while it is waterproof, if it fails, anything permanent could be ruined. Barry decides to go ahead and do the interior insulation.
*-*-*
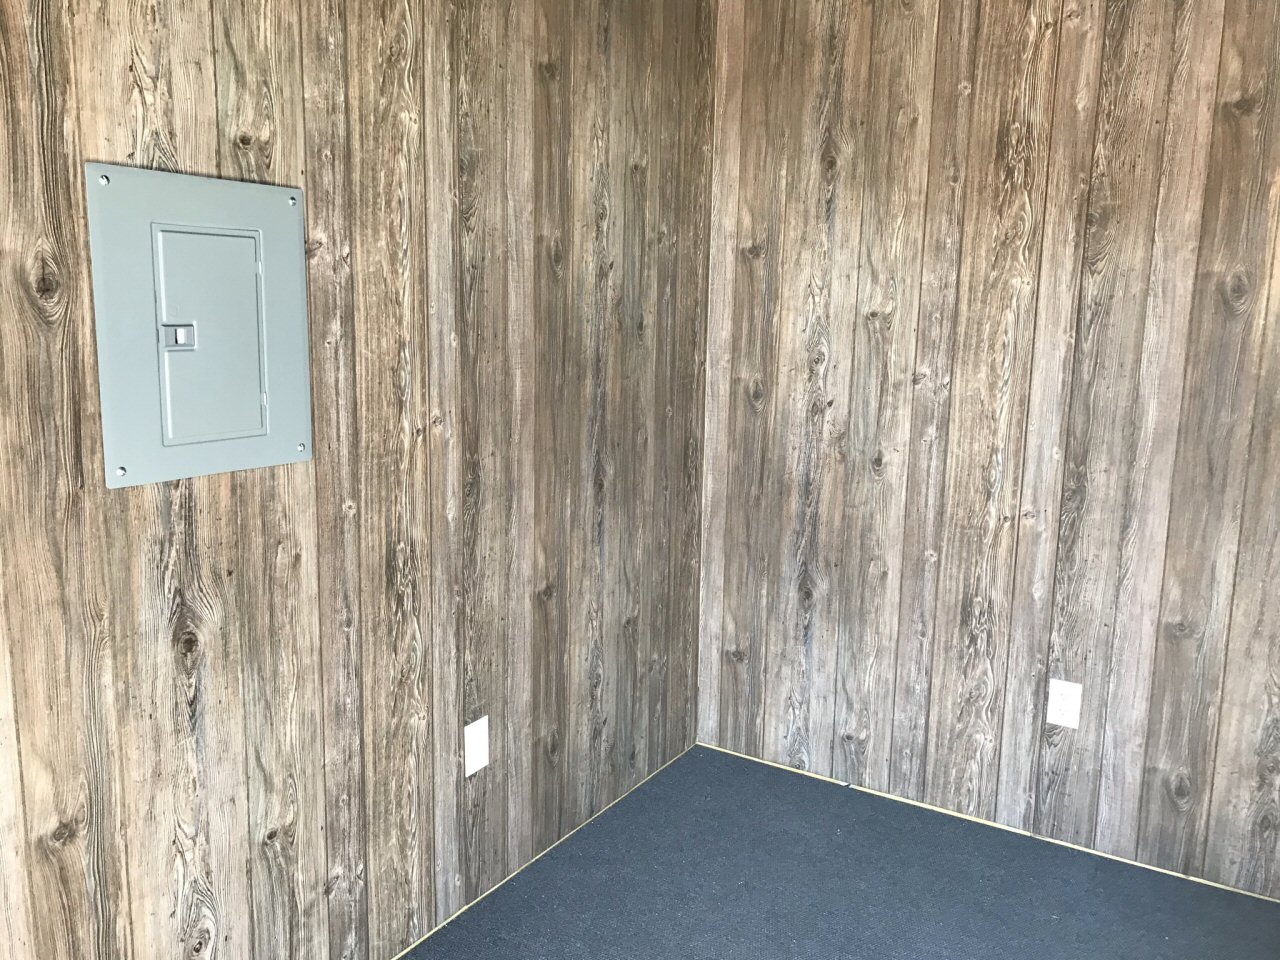
And then he installs the paneling. It is a pretty light gray color.
*-*-*
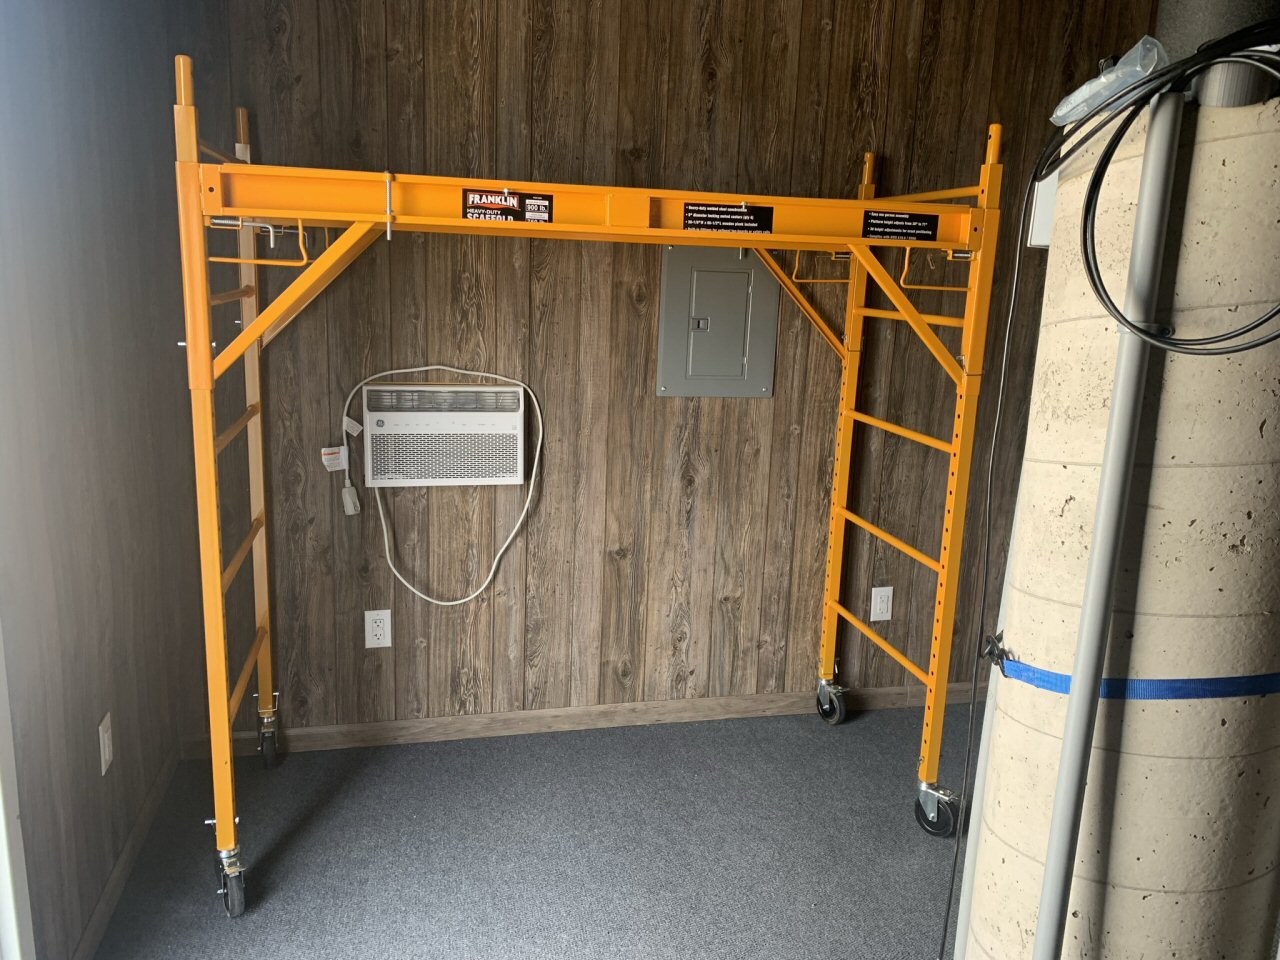
July 8, 2021 The interior is complete. Shown here is the scaffolding we got to allow Barry safe access to the telescope when it is up on the pier plus any maintenance he might need to do on the ceiling or dome.
And now we wait...and wait and wait.
*-*-*
Just before we are due to leave on our Thanksgiving cruise we are notified that our dome is ready for shipment. In a panic we were resigned that it would arrived while we were not home and a neighbor would have to receive it. But as it turned out "ready for shipment" didn't really mean that and it arrived on December 20, 2021 - well after we returned home.
*-*-*
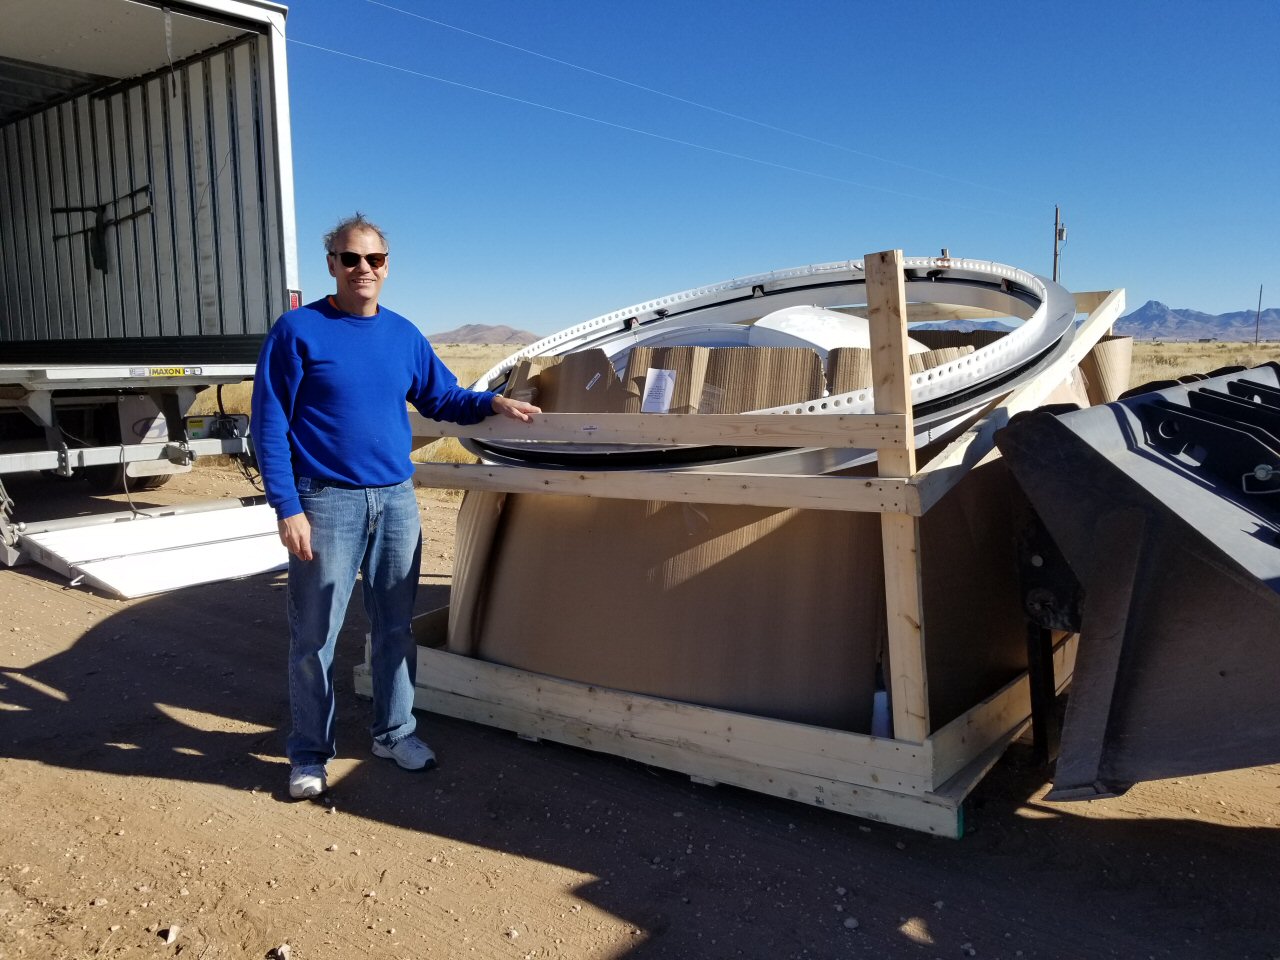
December 20, 2021 - Barry arranged for Donnie to help us get it off the truck with the frontloader. It was delivered into the middle of Loco Rd. in front of our house. Now we just had to get it into the shop.
*-*-*
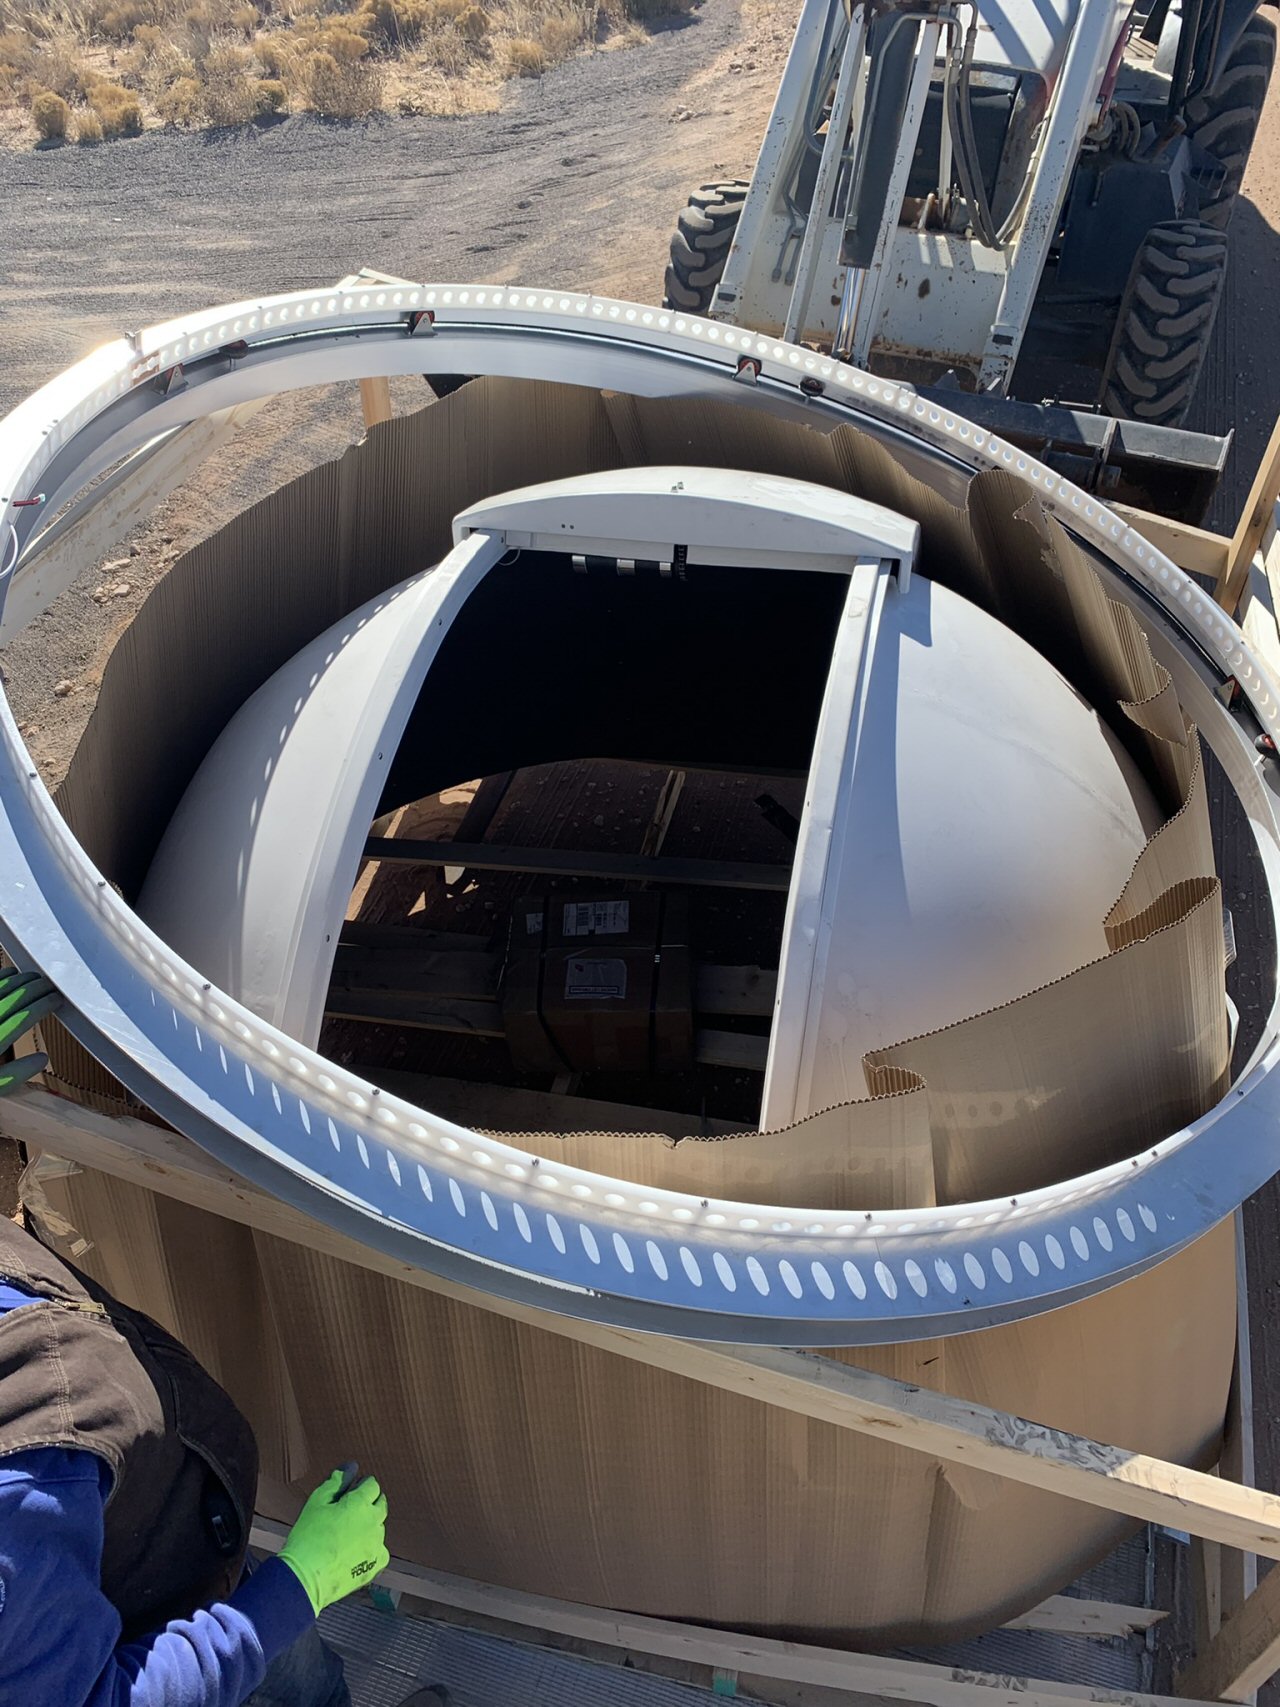
Here is a view of the dome and rings in the "crate." We are amazed that the rings are just sitting on top of the dome and not tied down. Also the crate doesn't really provide any material protection to the dome. Presumably the boxes inside are the dome automation equipment.
*-*-*
The dome is finally here!
*-*-*
Initially Barry and a neighbor tried using handtrucks to help Donnie balance it on the frontloader/forklift. That was both dangereous and didn't work well.
*-*-*
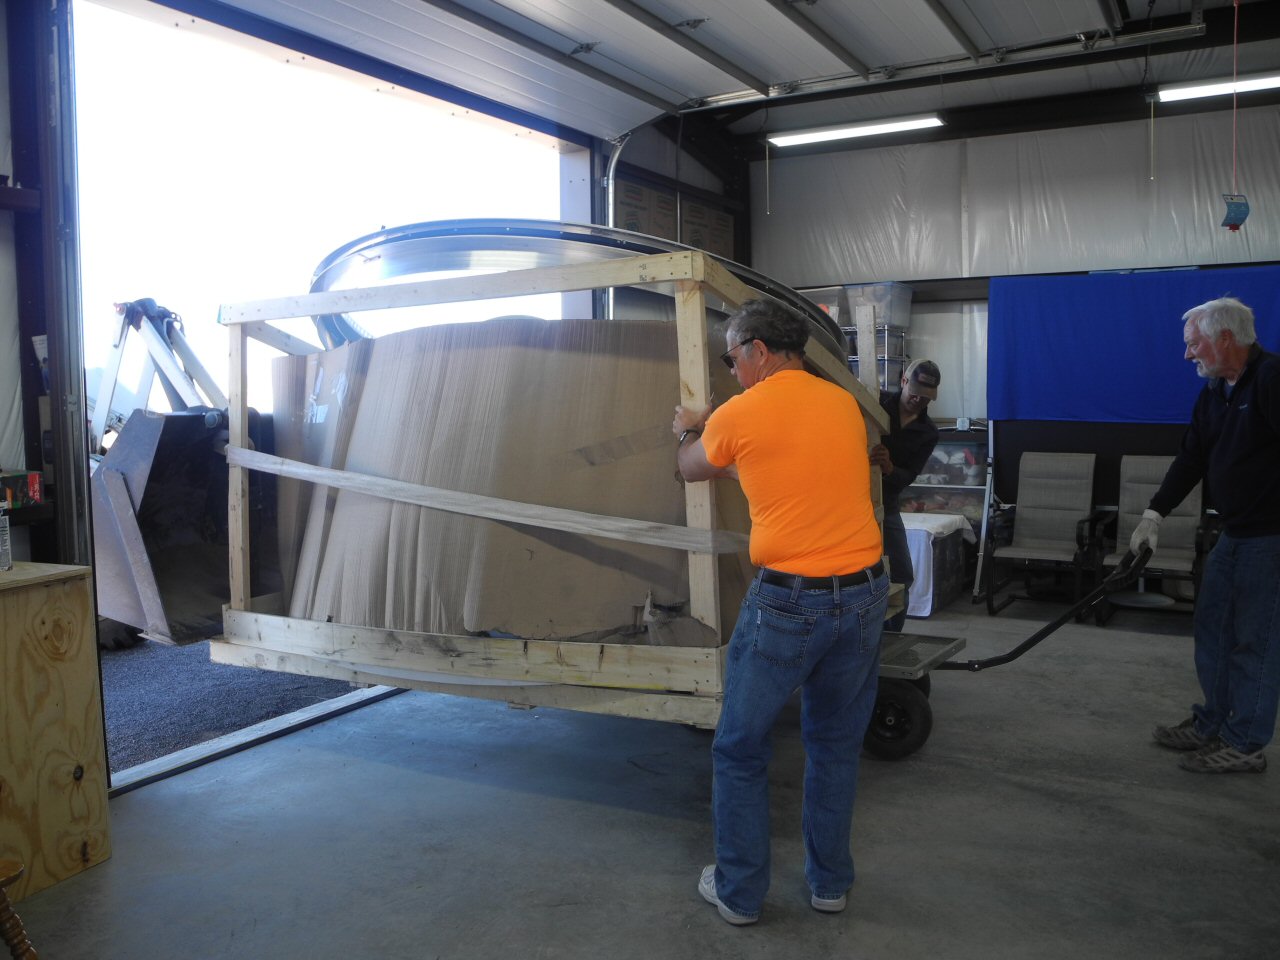
This is a video showing the move of the dome from the road into our workshop using the frontloader and a garden cart.
*-*-*
With the help of a frontloader/forklift, a garden cart and two neighbors we finally get the dome into the workshop!
*-*-*
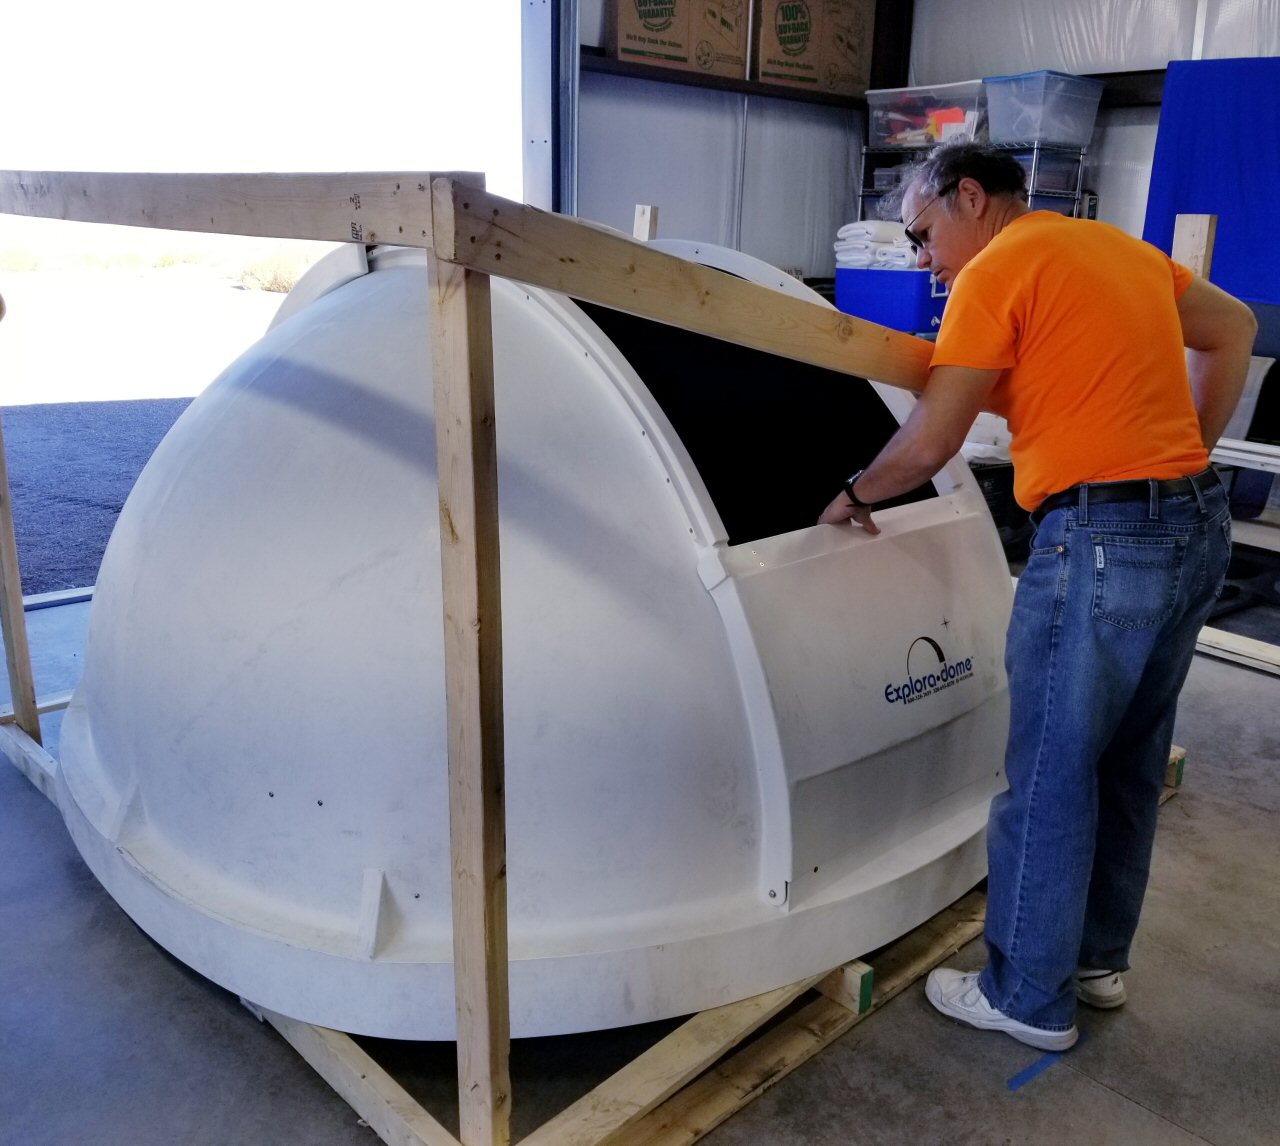
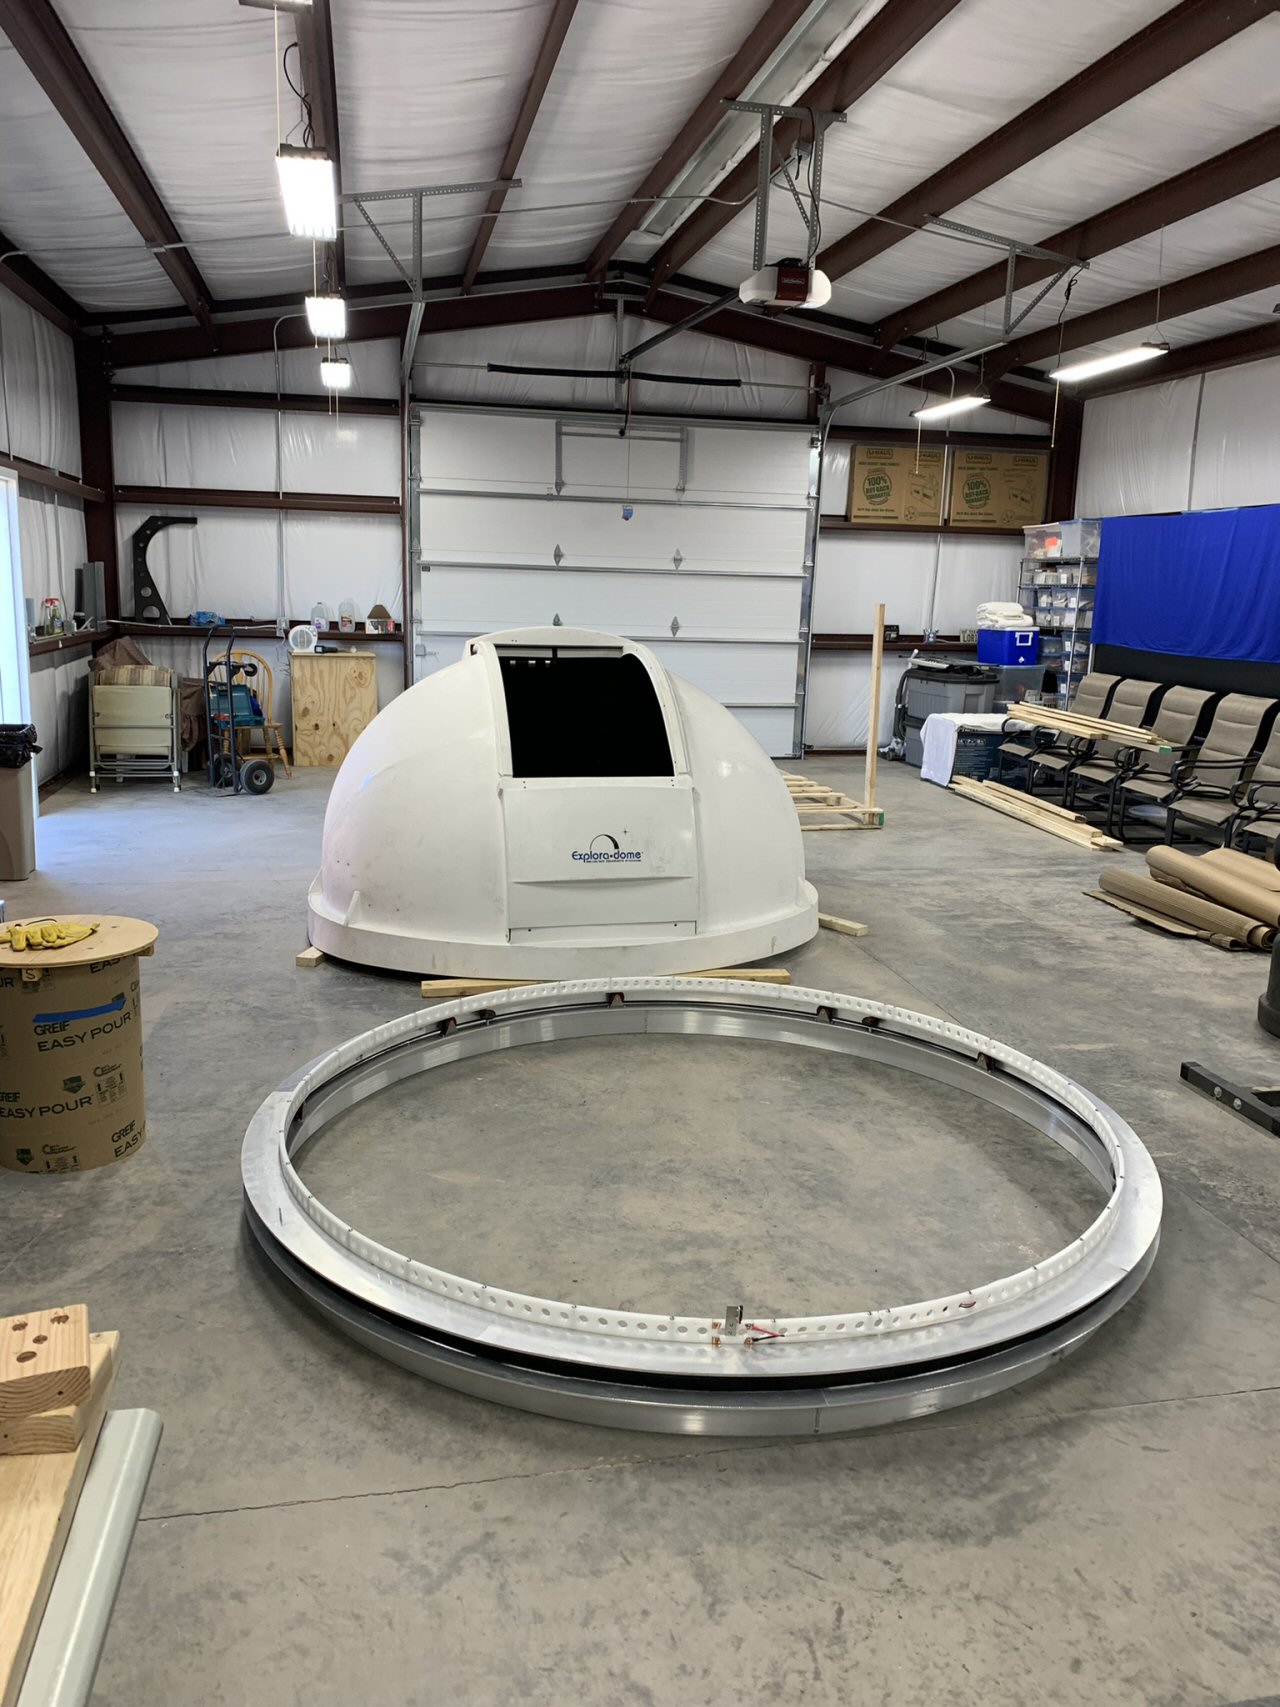
We have removed the rings and Barry inspects the dome. The first thing we notice is how dirty it looks.
*-*-*
Four days after the dome arrives, Barry has hooked it up inside the workshop and can open and close the shutter.
*-*-*
The dome and rings in the shop. Barry spends the next few weeks assembling (temporarily) the dome to the ring and getting the automation to work in the shop.
Also we spend a lot of time trying to decide the final design of the roof. We want to give it some slope to help keep the observatory watertight, but we are putting a round dome on a square building and maintaining any sort of slope is not possible. Barry finally convinces us of this by building a scale model of the dome support structure and the roof.
Then we discover a roofing material that is an EPDM "rubber" sheet, intended for flat industrial roofs and we decide to go with the simplicity of a flat roof.
*-*-*
Here is the plan for the roof support structure. The dome rings sit on a wood octogon made from 2" x 6" wood beams.
*-*-*
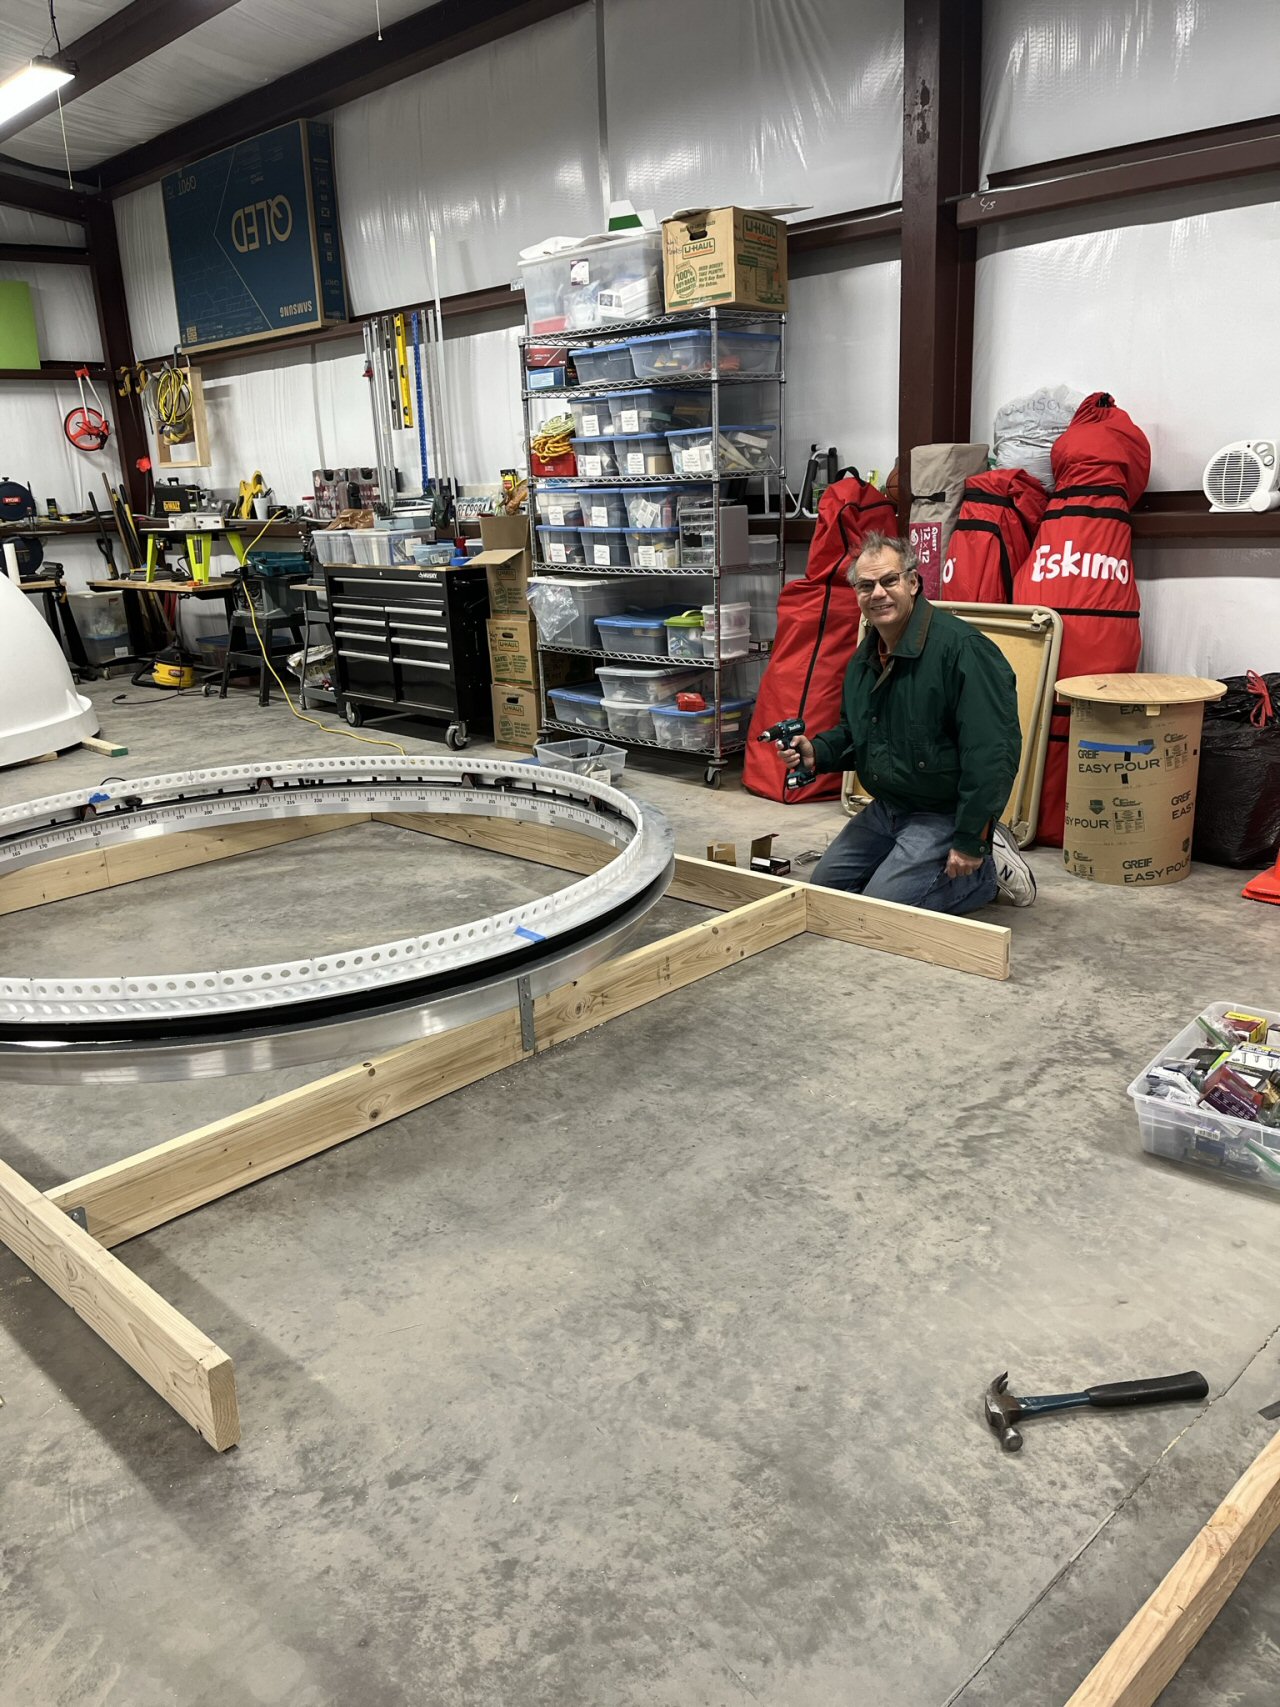
Although we knew we needed to support the ring, because we wanted the support to accurately fit the ring we needed to wait for the dome to arrive to start building it. Here Barry starts building the ring frame in the shop. When it is done and the ring installed it will be lifted onto the observatory.
*-*-*
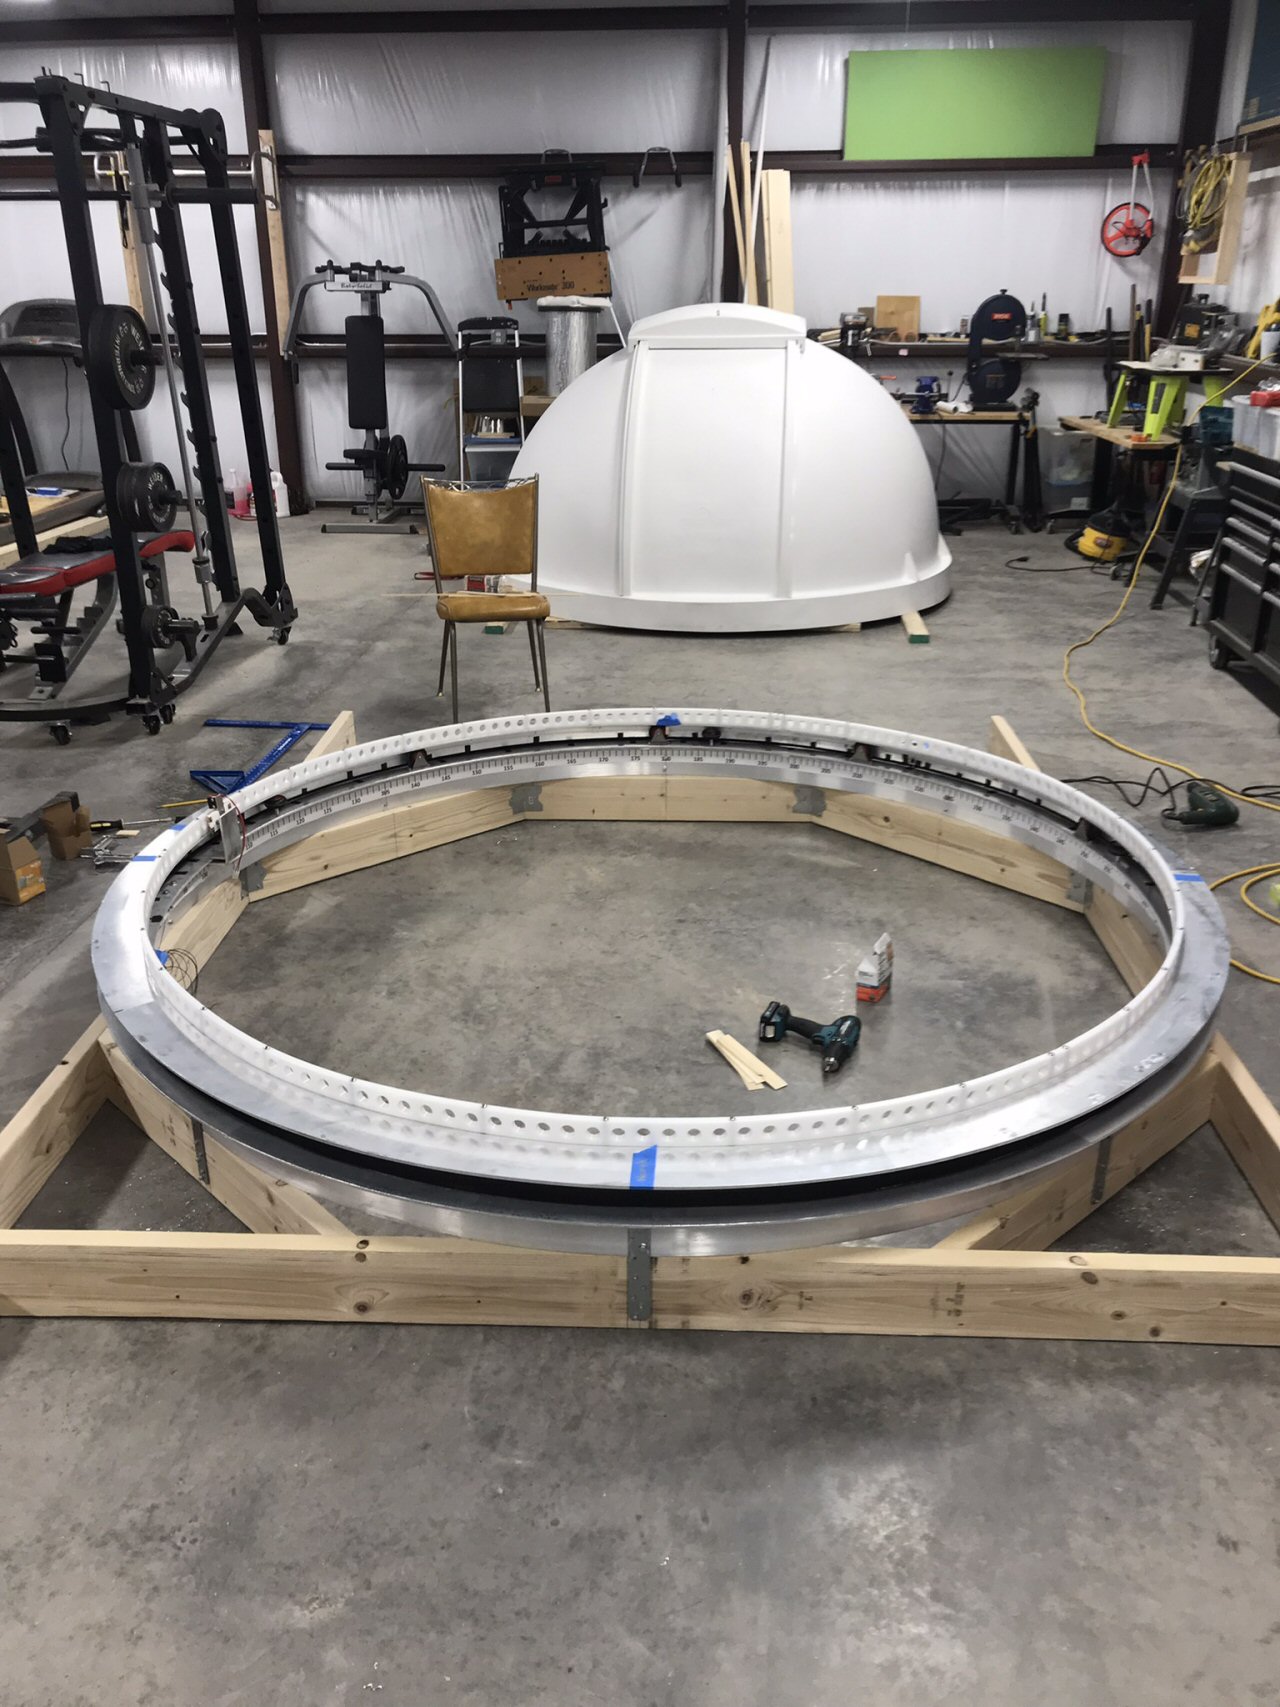
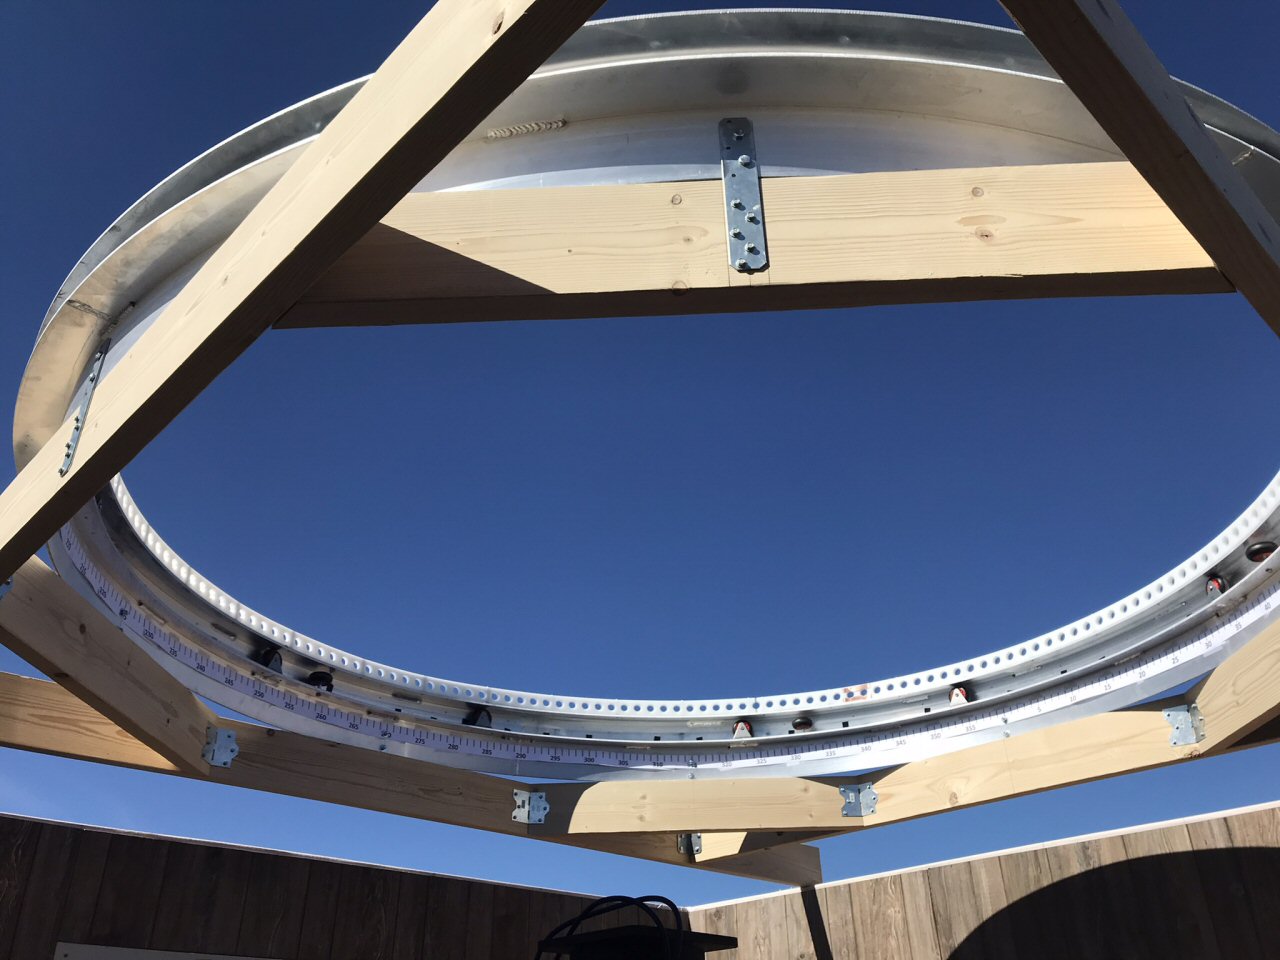
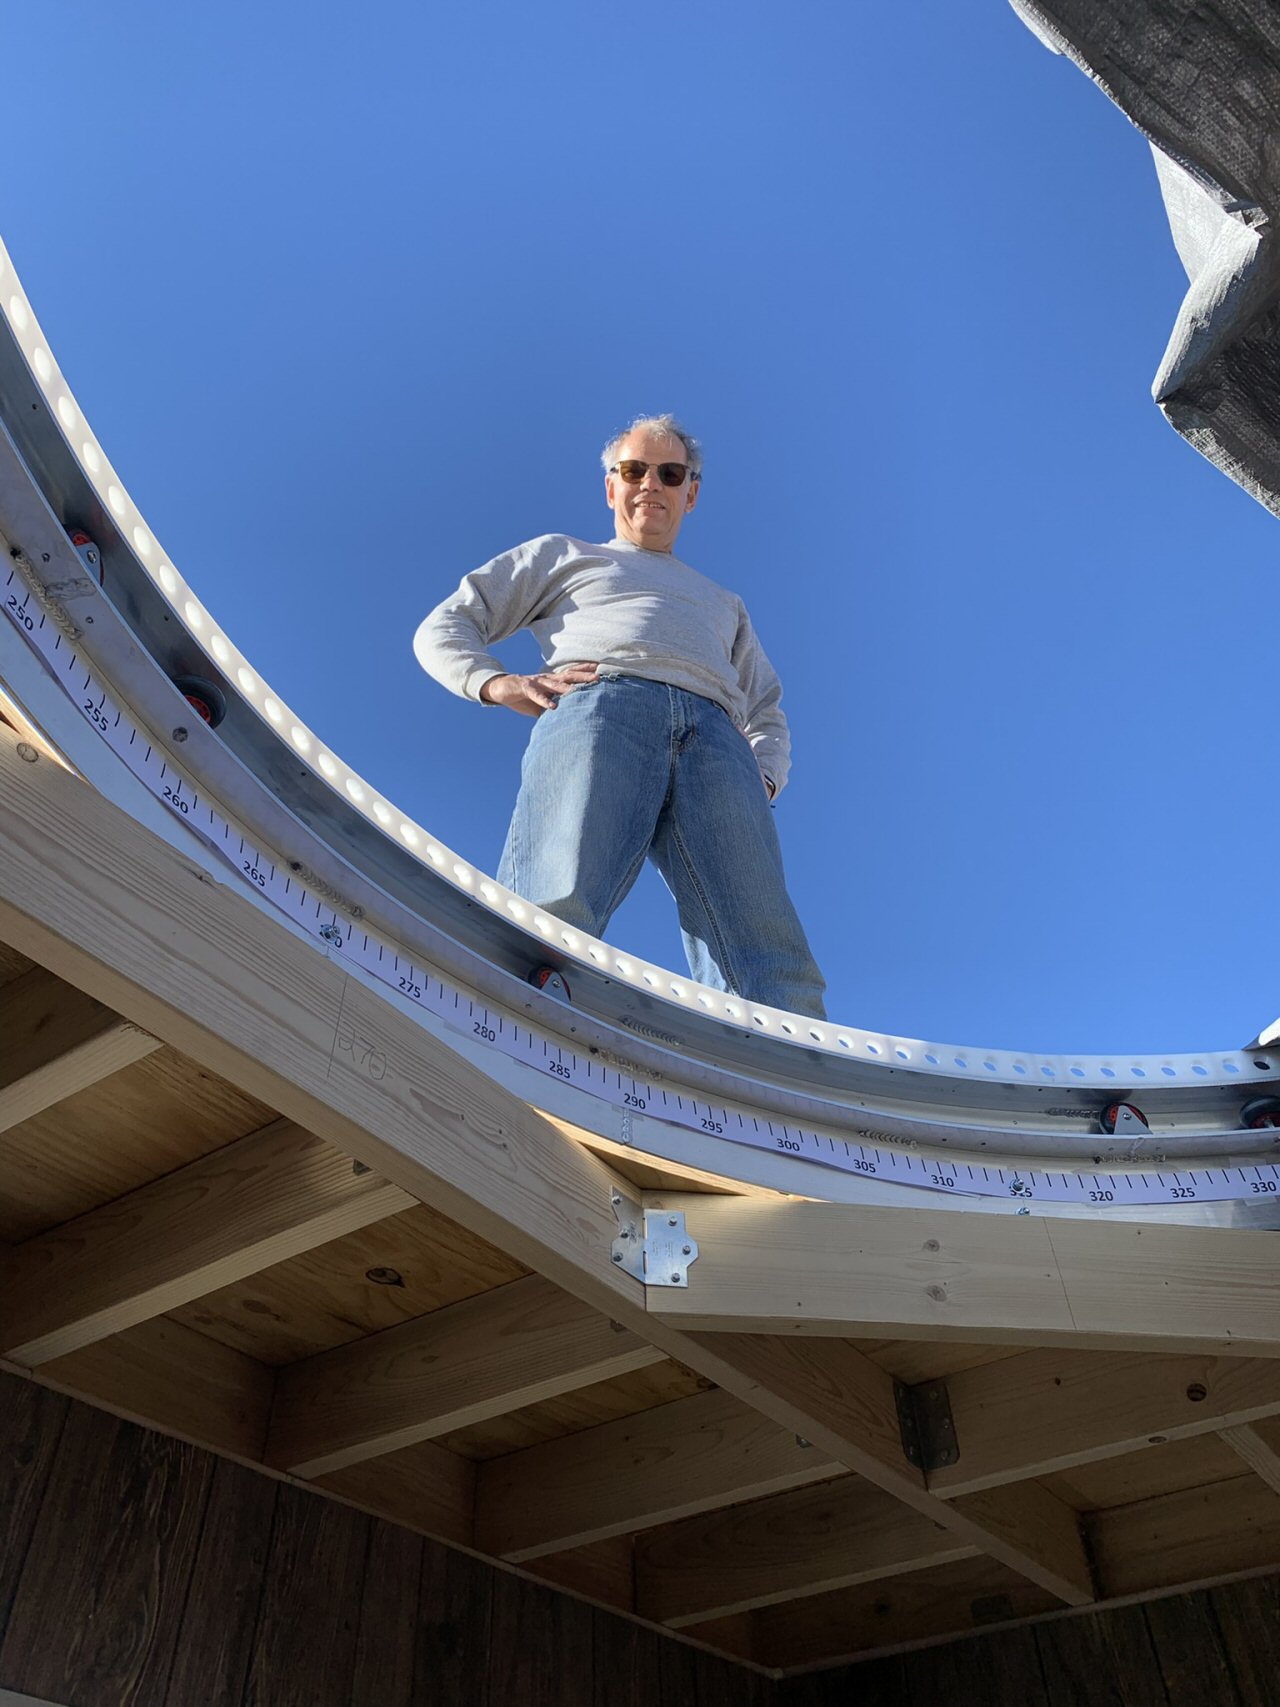
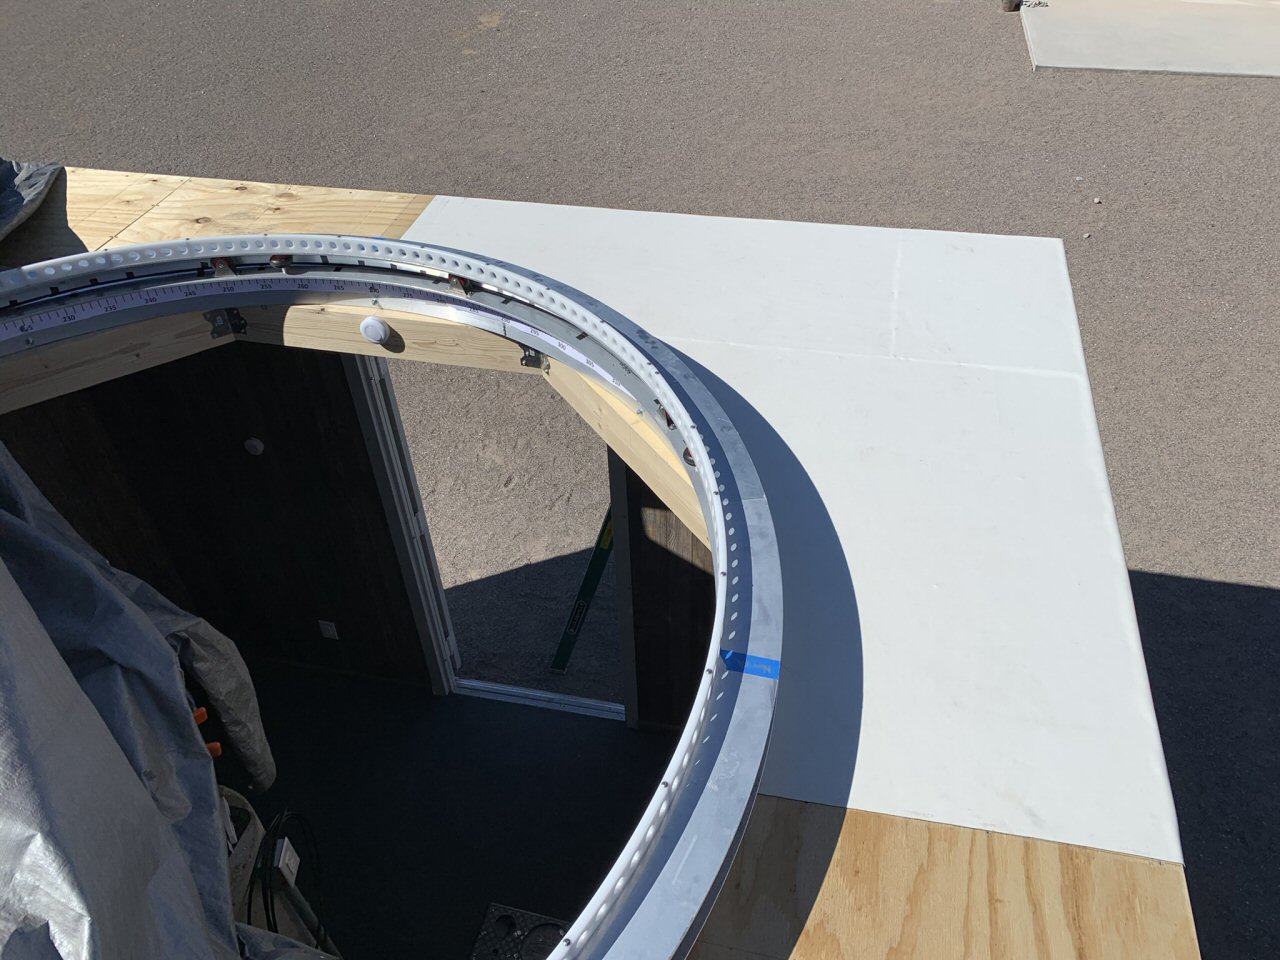
The ring support is complete and ready to be lifted onto the roof. Time to call in the neighbors! Notice the degree markings on the lower ring. Barry printed and installed those on the fixed portion so that when the dome rotates he knows where it is pointing.
*-*-*
The ring support has been located and installed on the roof. Now we can construct the remainder of the roof support.
*-*-*
Looking up at the ring support structure from inside the observatory. Steel straps tie the fixed aluminum dome ring to the wooden octogon in eight places.
*-*-*
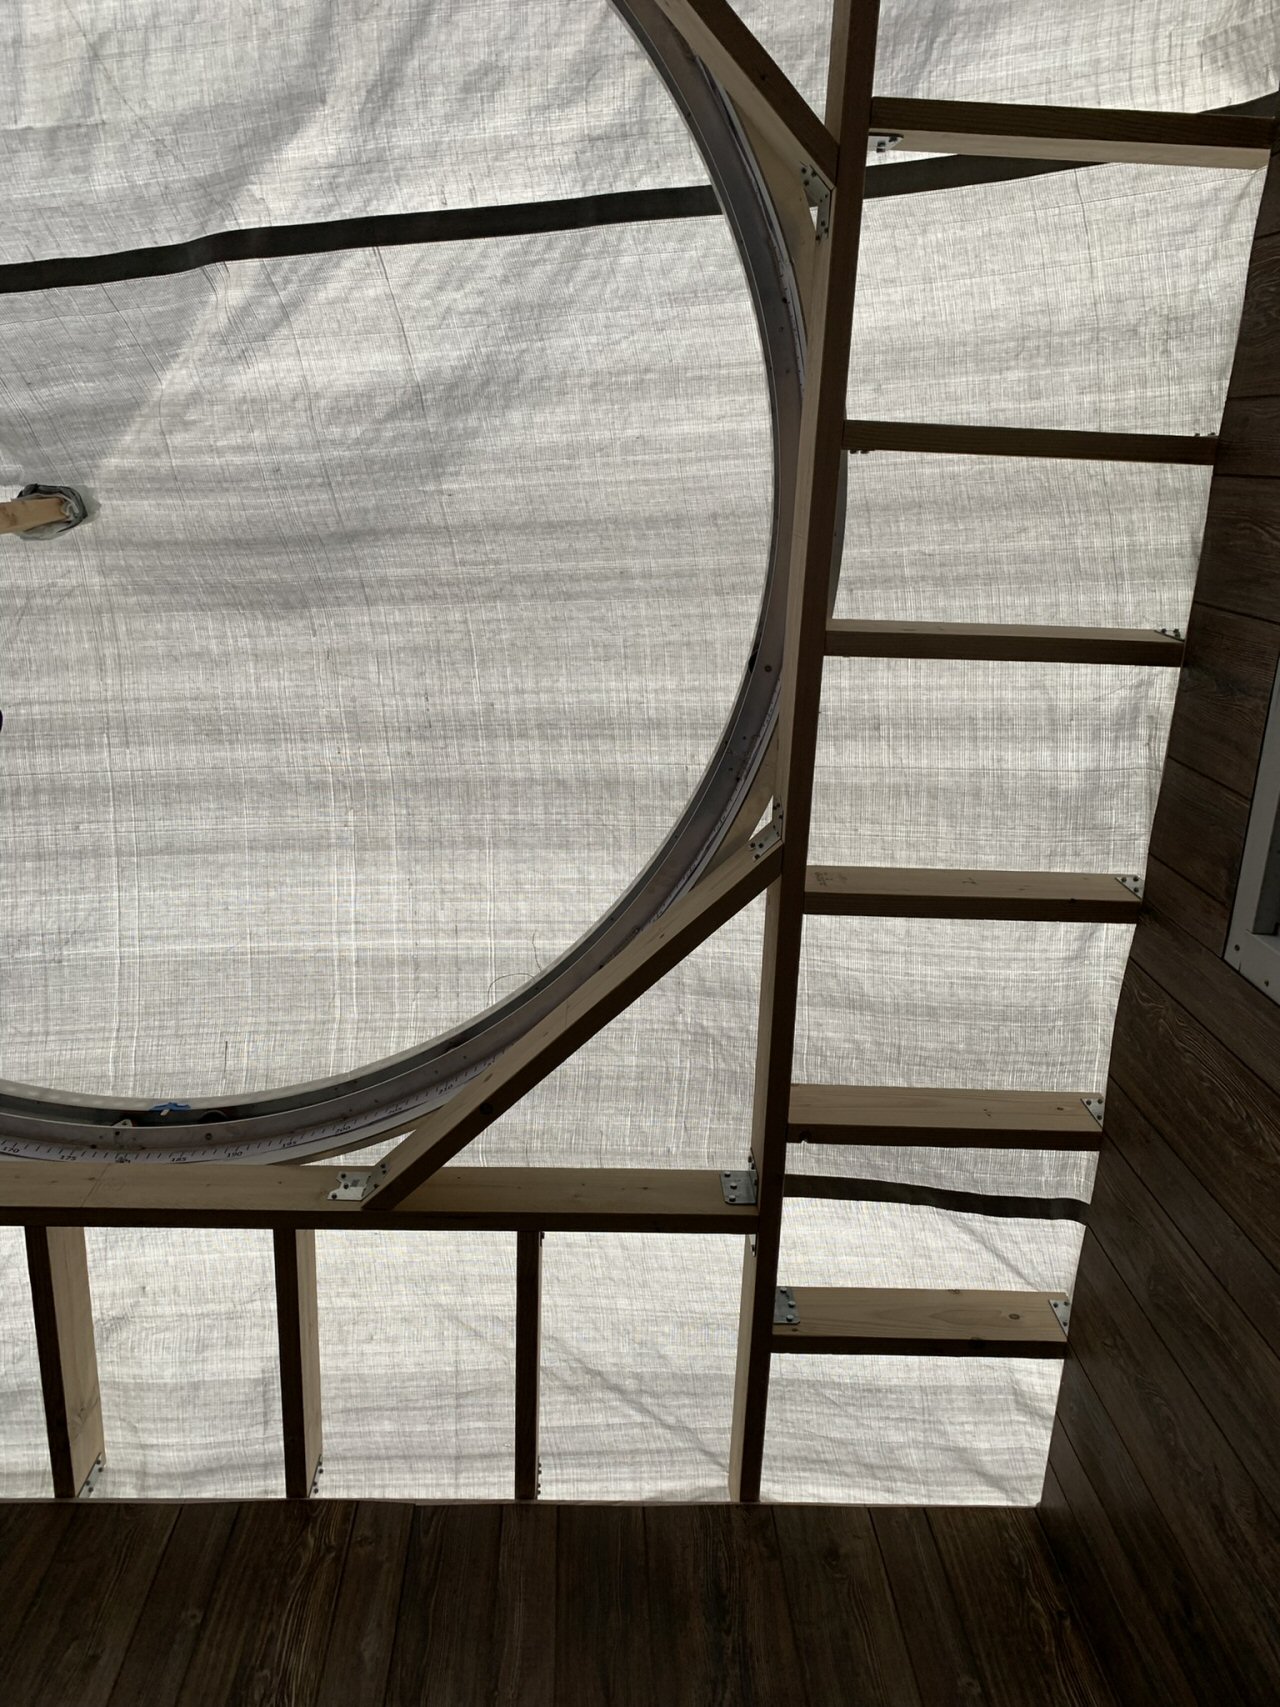
The remaining roof beams have been installed and the roof support structure is now complete. Looking up throught the beams at the tarp.
*-*-*
Version 3 of the tarp which is held on along the sidewalls by being sandwiched between the wall and 1" x 4" boards screwed to the wall. This is also tarp number 4. Surprisingly, they don't stand up to the New Mexico winds and sun for months on end.
Hopefully we won't be using a tarp for much longer.
*-*-*
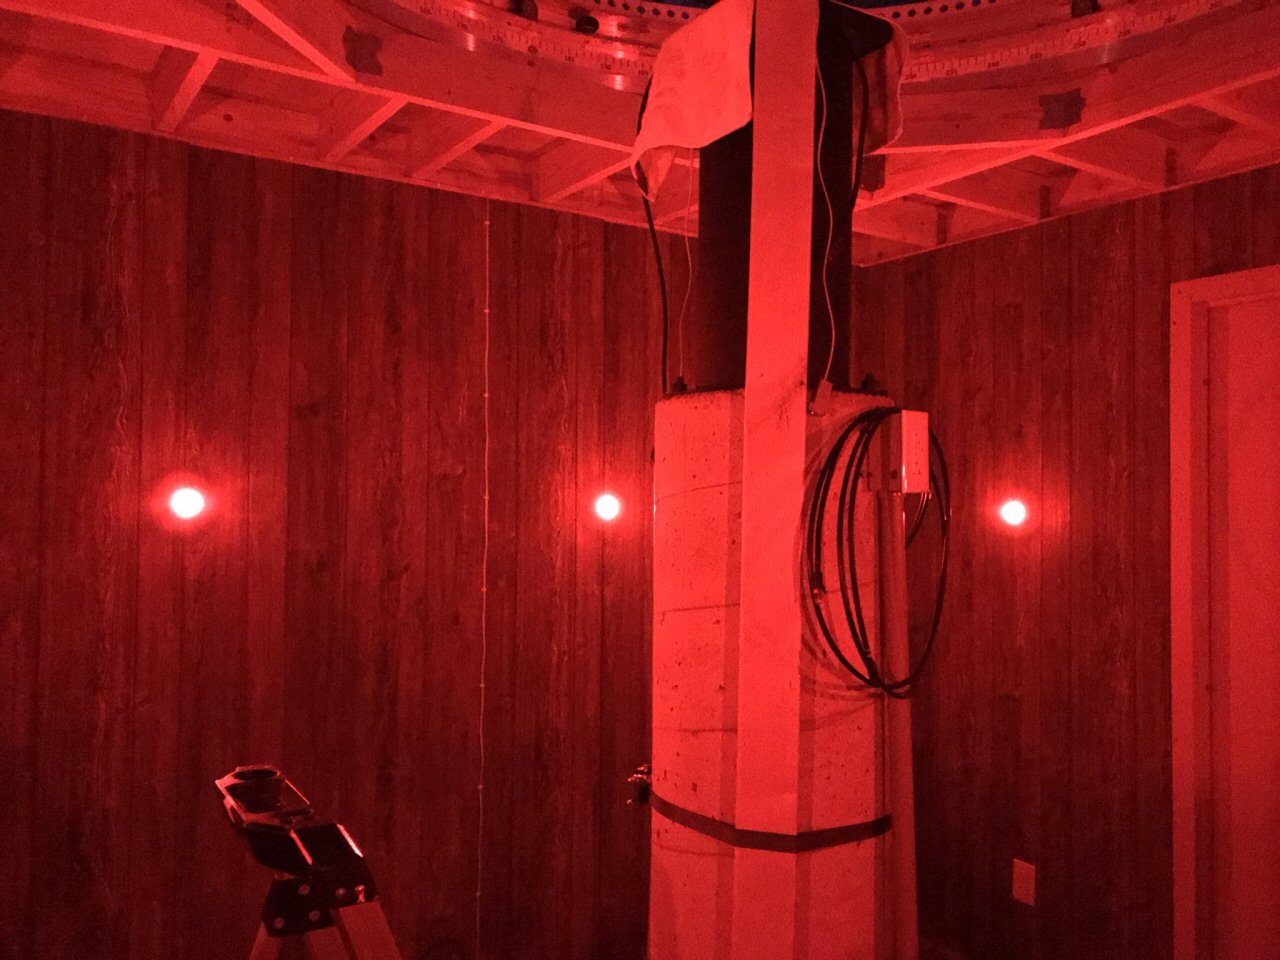
When the weather didn't allow Barry to work outside, he was busy inside the observatory installing the lights. He opted for battery-powered lights which changed colors so he could have red or white depending on what he was doing.
*-*-*
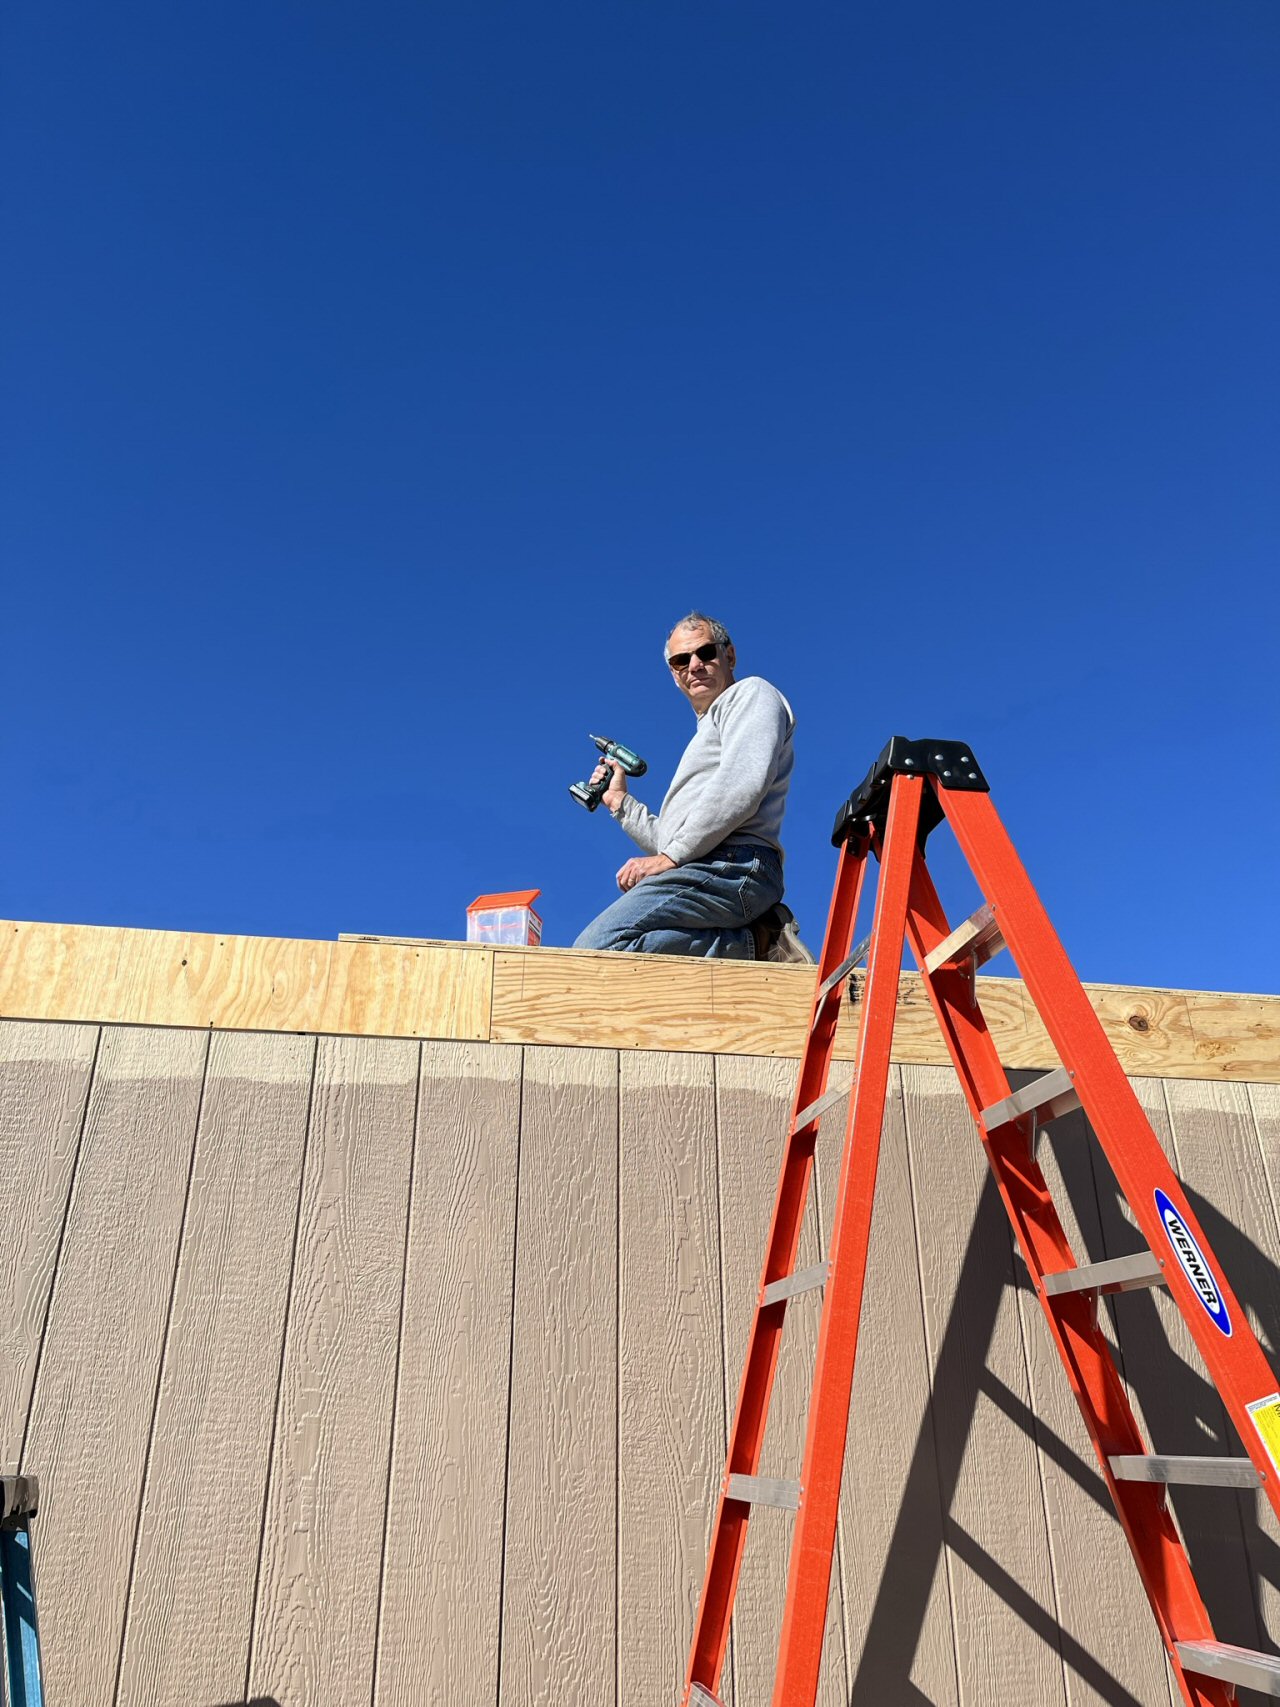
The next step is sheathing the roof. We used 3/4 inch plywood and Barry had to painstakingly measure and cut each custom piece before we placed it in position and installed it with screws.
We would leave the tarp mostly in-place and attached because it was impossible to take it off and reinstall it with only two people.
*-*-*
Barry installing sheathing on the roof.
*-*-*
February 18, 2022 The roof sheathing is complete! Here is a view looking out through the ring. Look at those beautiful New Mexico skies.
*-*-*
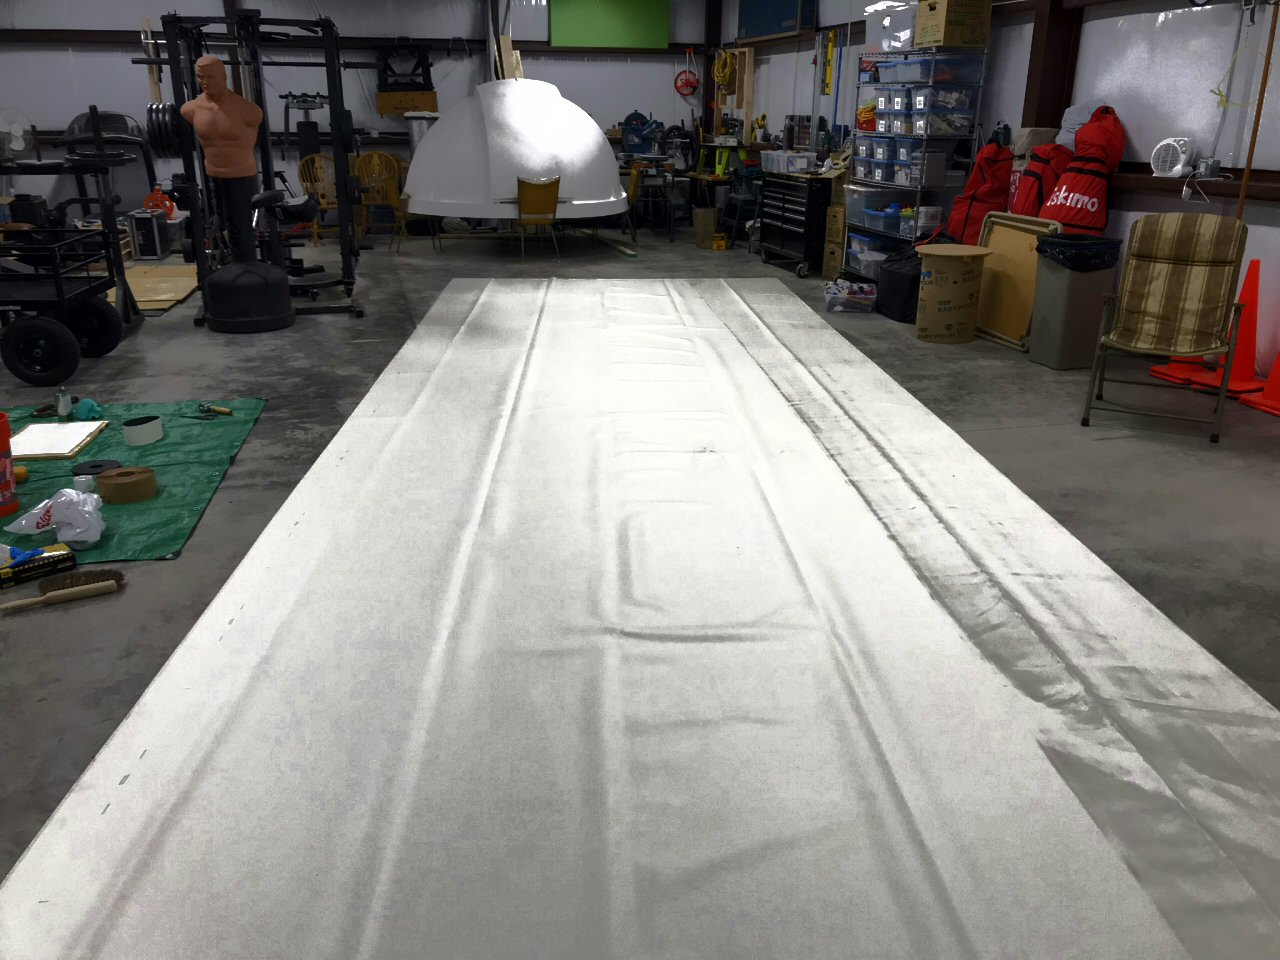
Here is the roofing material laid out in the shop. It is a rubbery material called EPDM which we ordered from a place in Arizona. It came folded up on a pallet but smoothed out once is was opened up and laid flat.
After it arrived Barry did some experiments of gluing it down to a board and making the splices so he would be familiar with its behavior.
*-*-*
Barry made careful measurements of the roof and the arc of the dome rings and transferred those to a portion of the EPDM sheet, "crowdsourced" the arc shape of the dome and then cut out each quadrant of the roof covering. We decided to cover the roof in 4 pieces with generous overlap splices where the pieces came together. We felt this was the simplest way to get a waterproof surface while having pieces small enough to work with.
*-*-*
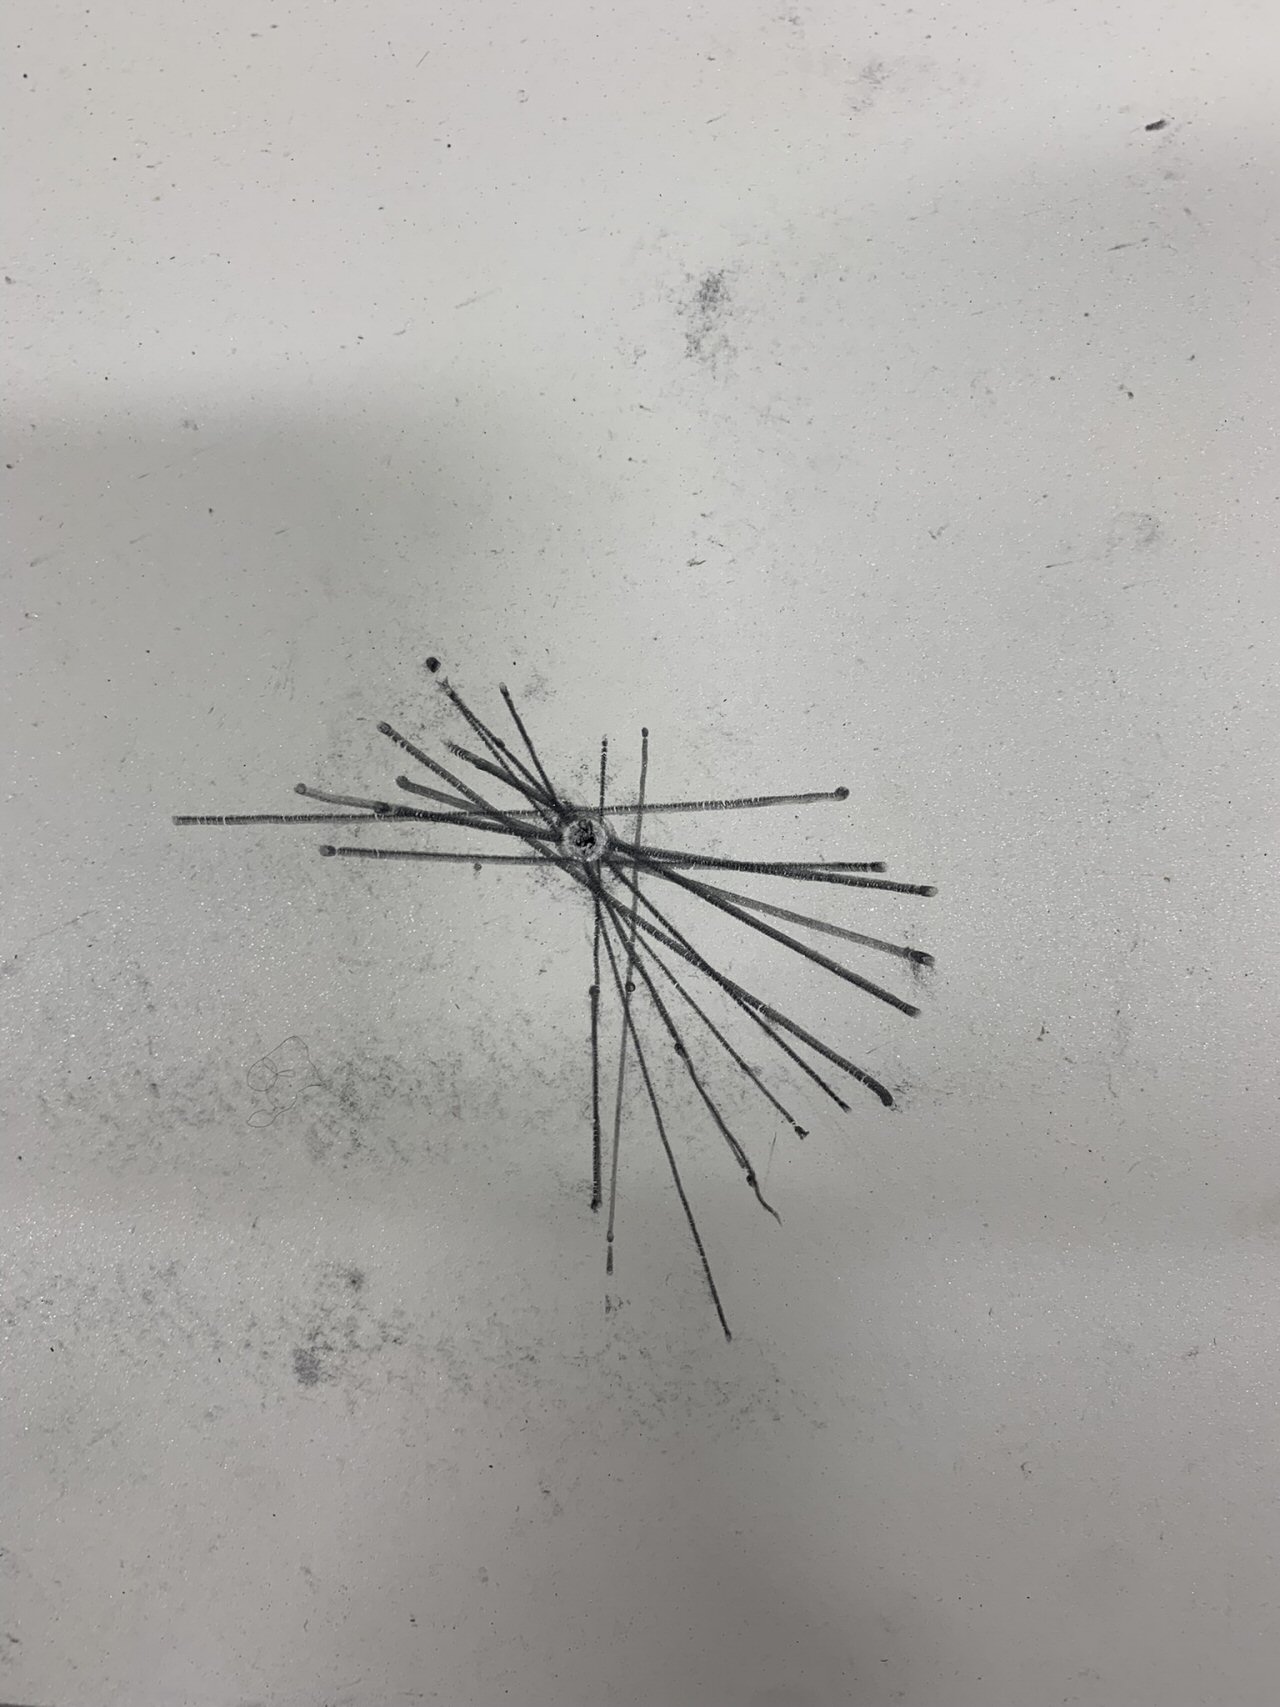
In order to get a "best fit" circular cutout to match up with the dome contour, we plotted the measured x, y points of the circular arc from a reference point located at the corner of the building for the appropriate quadrant of the building. This gave us a set of points along the radius but we wanted a continuous cutting line.
Using a metal strip with holes positioned for the idealized radius of the dome, we would construct an arc from each of these points to the center of the circle representing the center of the dome. These arcs are shown in this picture. Ideally, they would have all intersected at the same point. Because our measurements from the roof couldn't be exact, they didn't all intersect - so we would select a point that was a "best estimate" of the center of the dome circle. Barry coined the term "Crowd Sourcing" the dome arc.
Then we would use the metal strip and the best estimate center point to draw the arc of the dome ring on the EPDM and cut it out. This process worked very well!
*-*-*
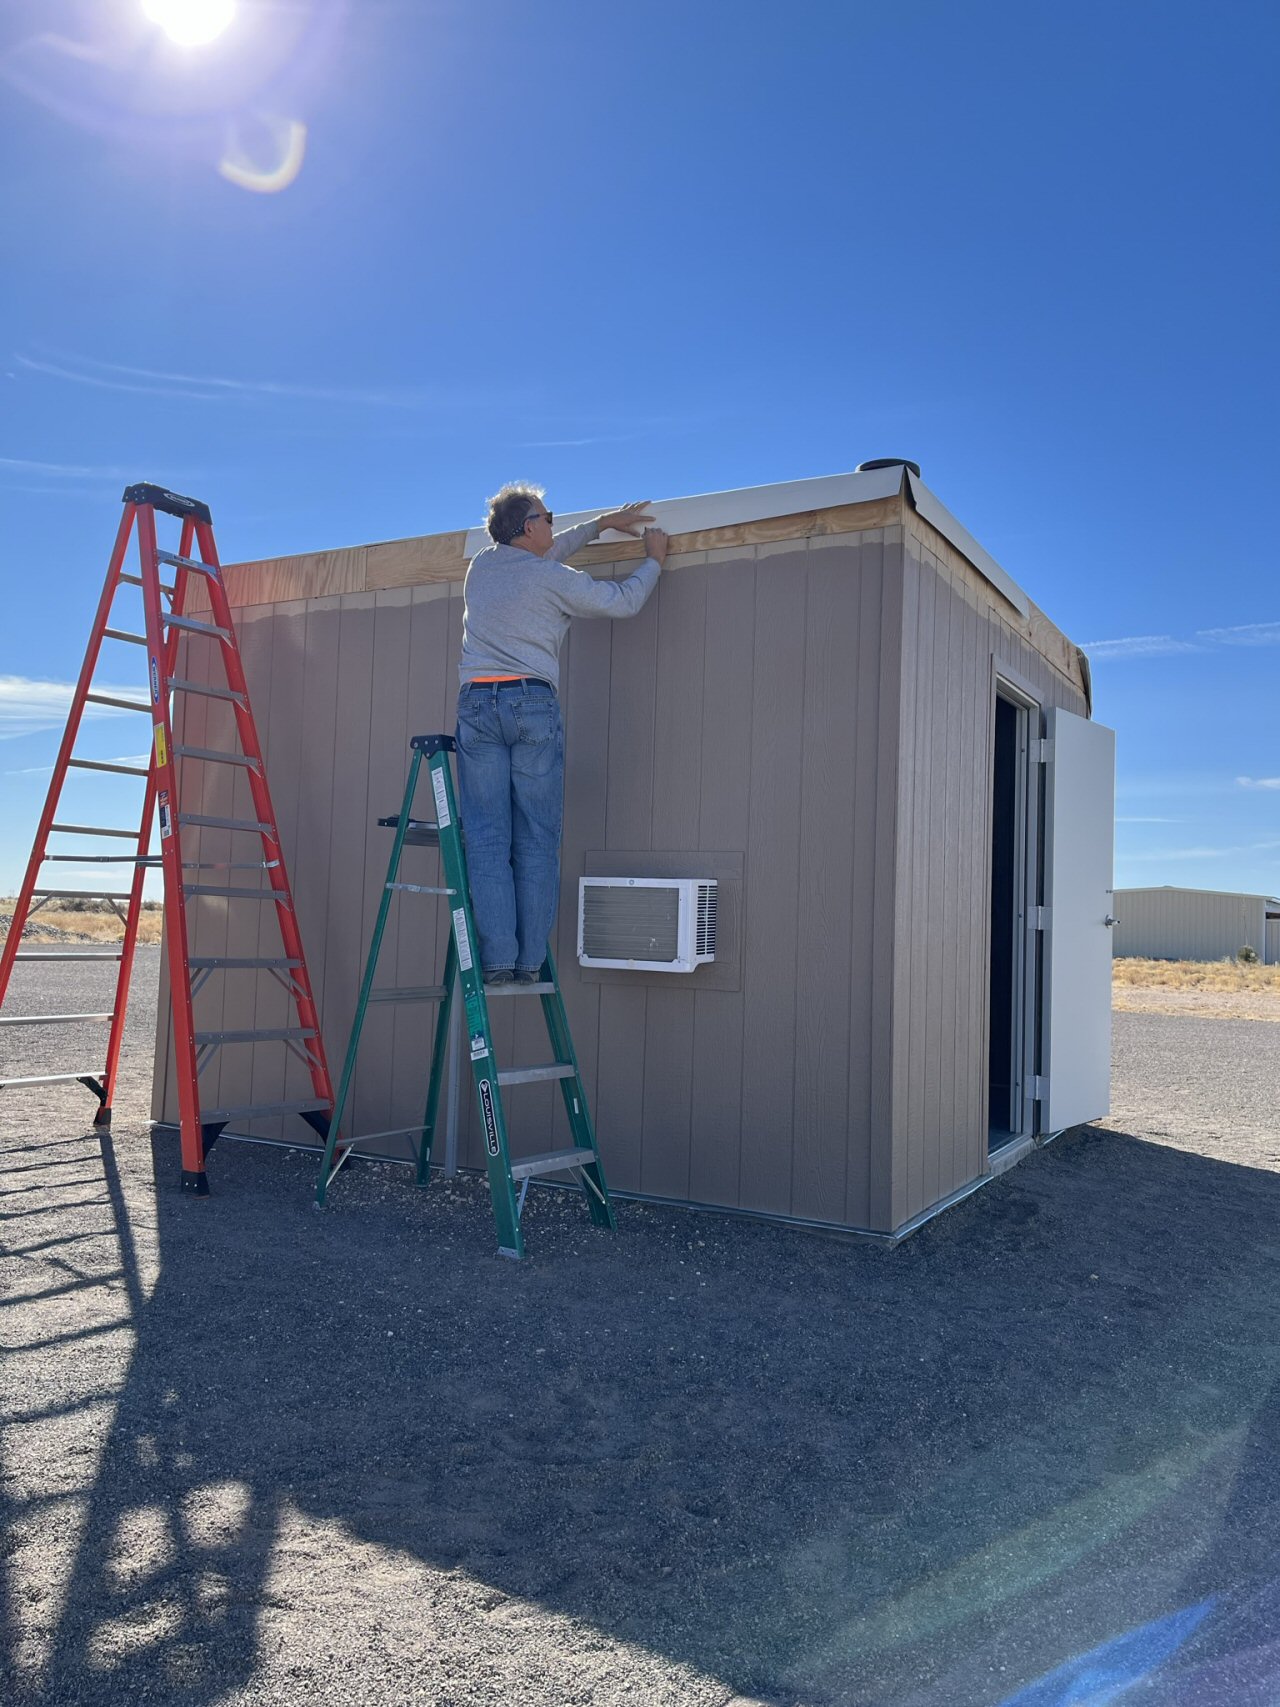
After laying the first piece of EPDM on the roof, Barry marks the edge along the wall so he knows how far down to apply the adhesive. The EPDM wraps over the edge and down the side 4-5 inches to seal the top of the siding and allow water to run off.
*-*-*
Barry applys the adhesive to the underside of the EPDM. On the first piece we didn't control it when we flipped it, the wind caught it and it stuck to itself. Man is it sticky! We did finally get it unstuck, smoothed down and onto the roof!
*-*-*
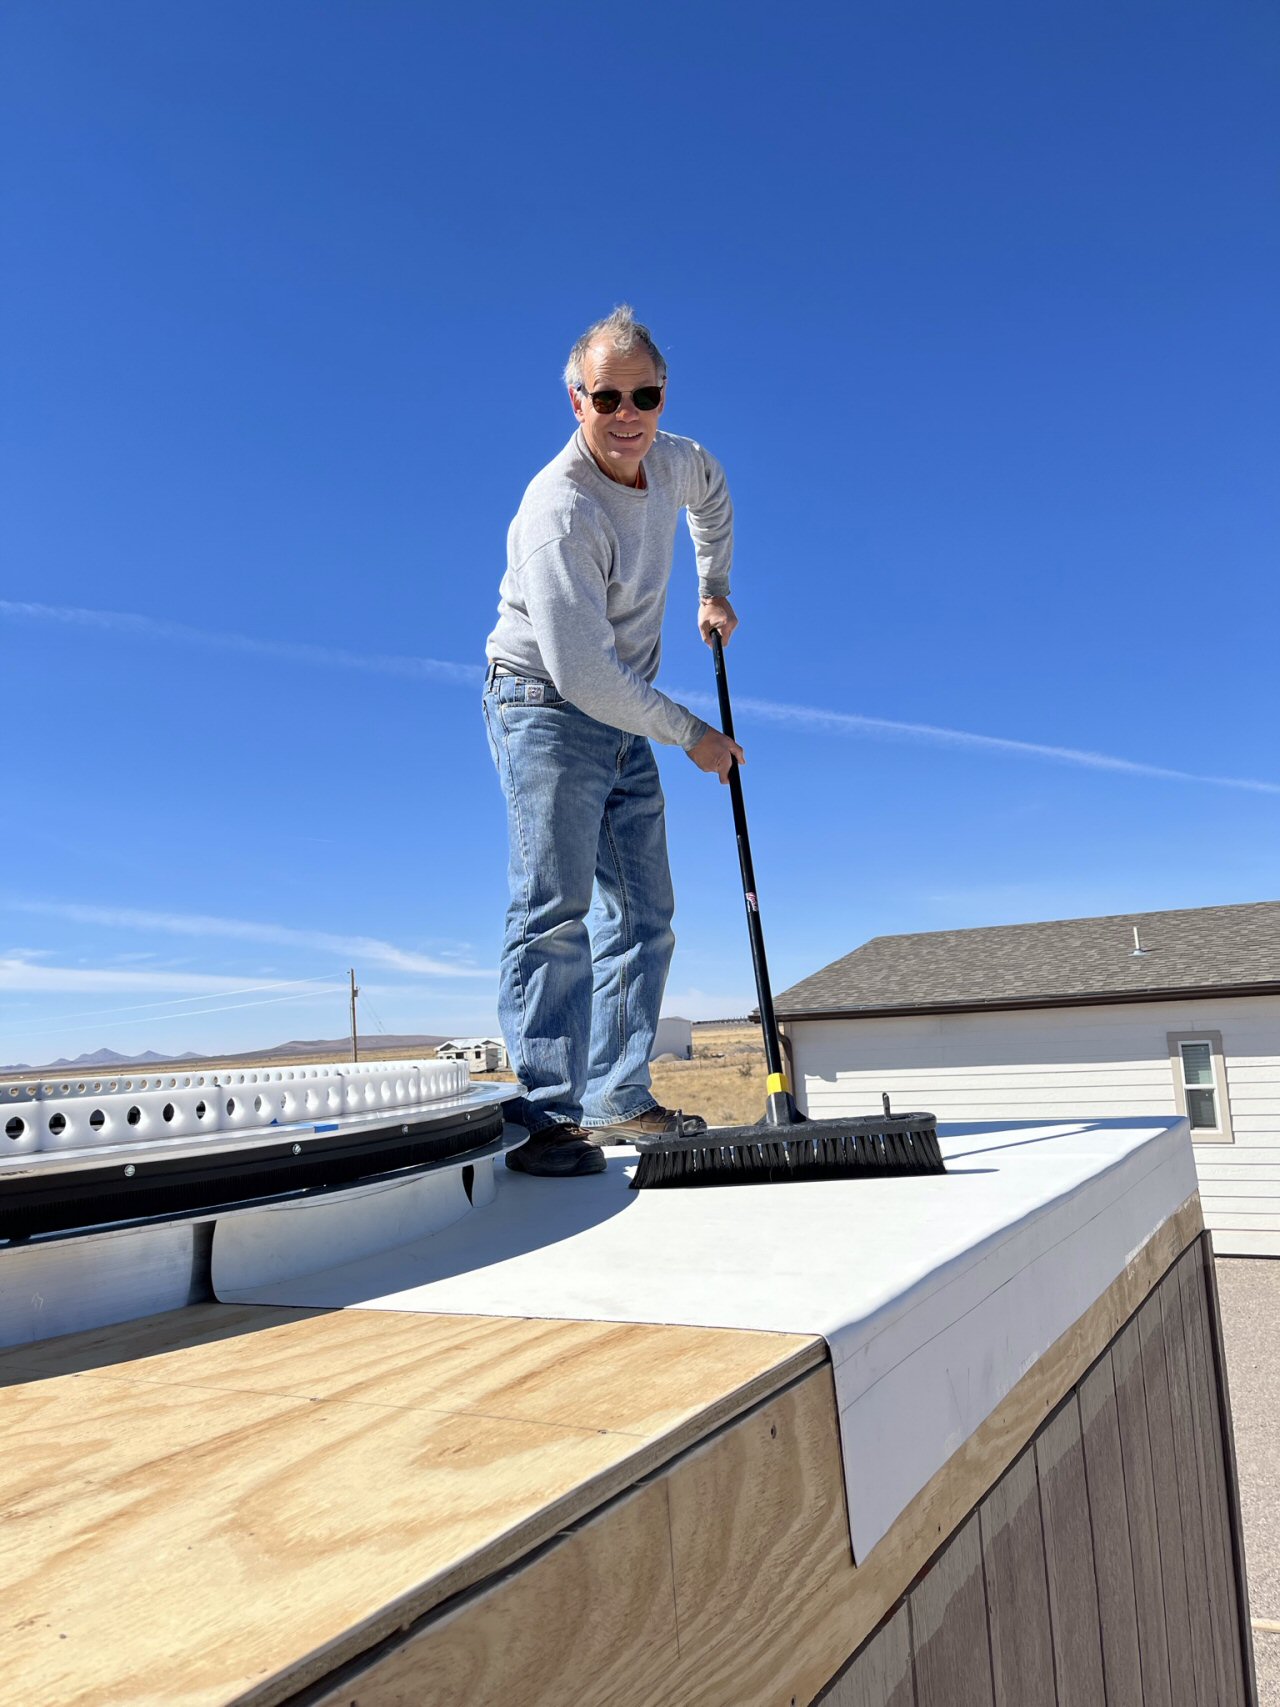
Once the EPDM is put in place with adhesive, the surface needs to be smoothed out. The manufacture recommends the use of a soft bristled broom. This is called "brooming" the surface to get air bubbles out and ensure it is uniformly stuck down.
In this view you can also see the darts we had to make to allow the EPDM to wrap up the side of the dome rings. We also used glue on this wrapped part and then we had to find a suitable way to cover the gaps.
*-*-*
The first piece of EPDM on the roof glued down and smooth.
*-*-*
March 3, 2022 The EPDM is all installed. The last step is to cover the darts made to wrap the roofing material up the dome. Initially Barry cut pieces of the EPDM to cover the darts around the dome ring, but the EPDM proved to be too stiff and not suitable. So we had to get creative.
We used a product called FlexSeal which is a thin very sticky tape. While it worked well, we will need to keep an eye on this because it may not stand up to time. However it isn't in direct sunlight and it is protected by the lip of the dome from wind and rain.
*-*-*
We are down to the final step - getting the dome safely onto the observatory. We have hired a crane (from Las Cruces), and picked a day when the wind forcast is for low winds early in the morning. But we still need a way to pick up the dome. We have been brainstorming on this for a few weeks now.
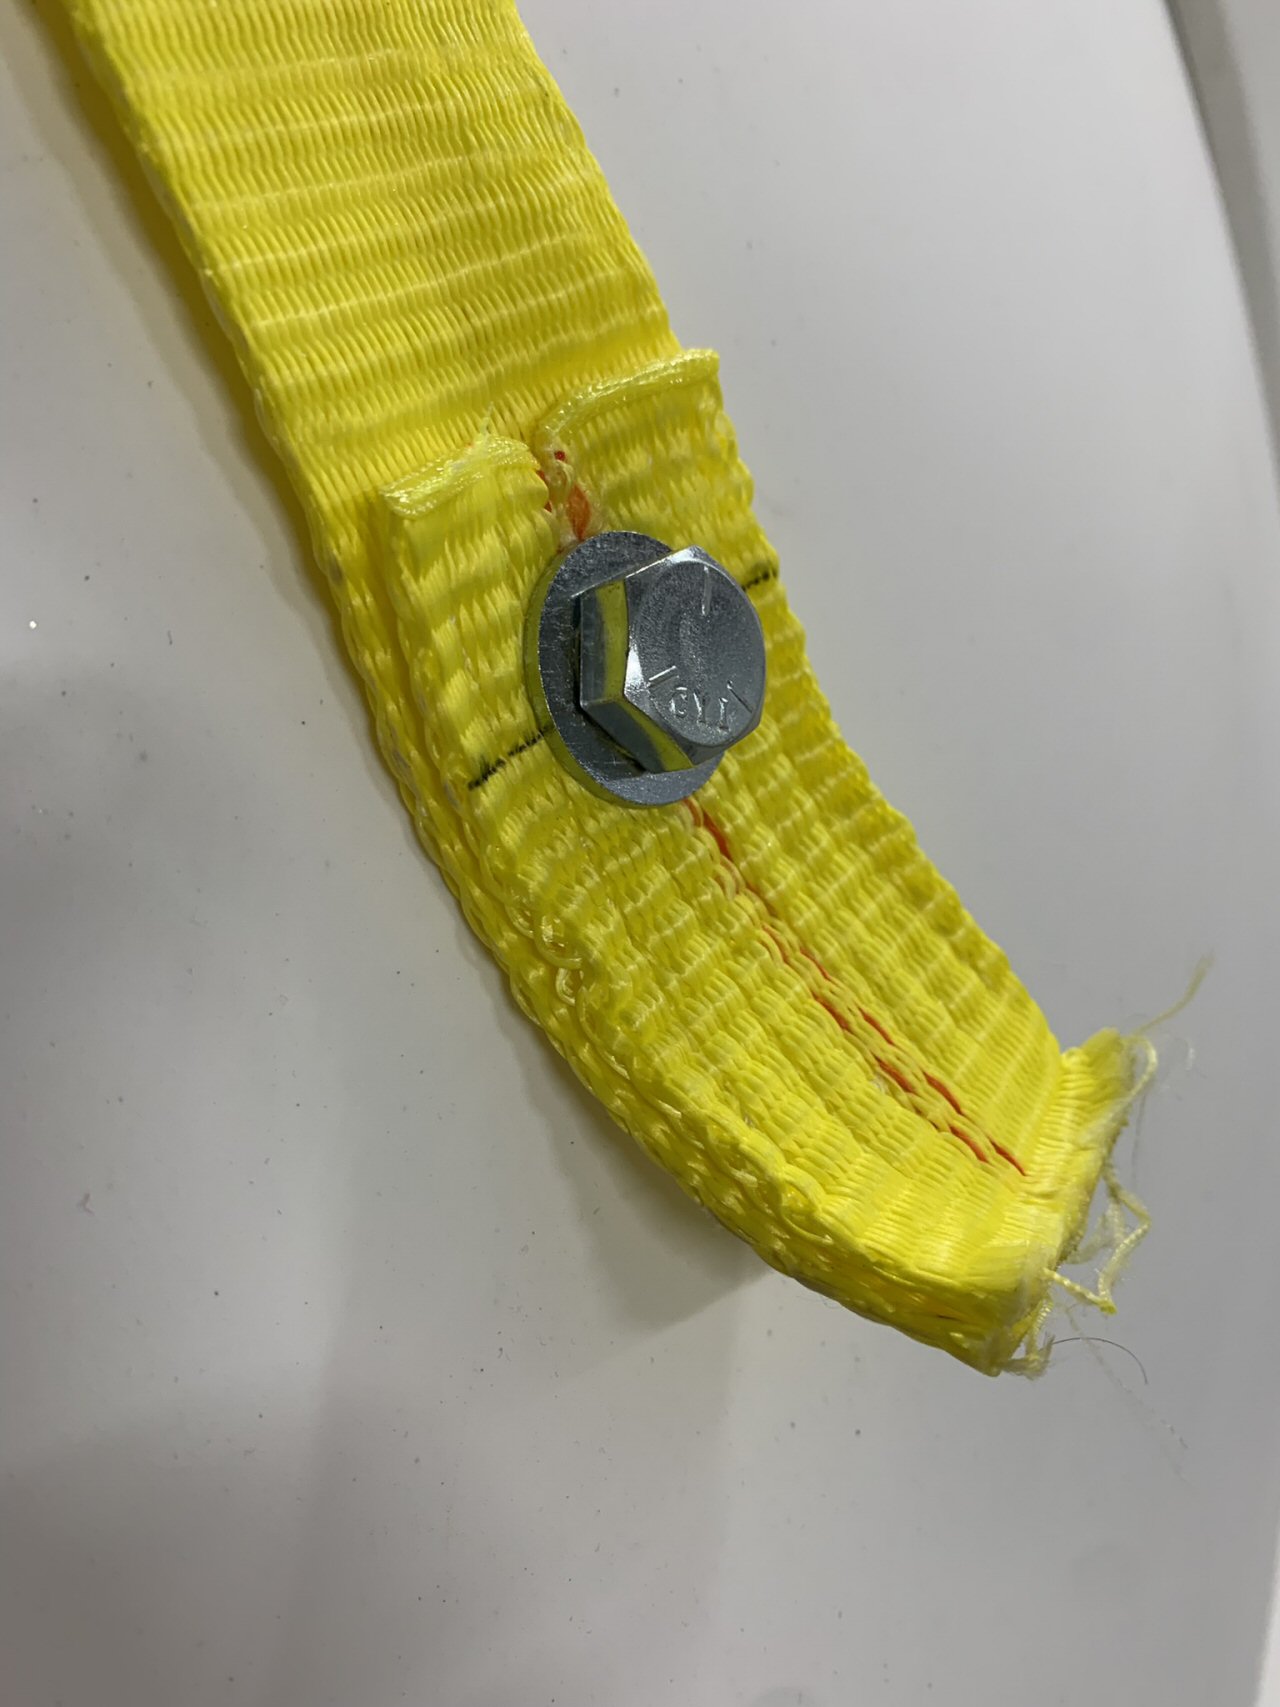
Under the assumption that simple is best, Barry installs four 1/2 in diameter bolts into towing straps a little below midway up the dome. They are also symmetrically located. This is all intended to keep the dome from flipping when we pick it up. We try to test it before the big day but because of the size cannot come up with a way to safely do this.
*-*-*
To move the dome from the shop out to the observatory where the crane is waiting, Barry modifies the garden cart to become the Dome Mobile.
*-*-*
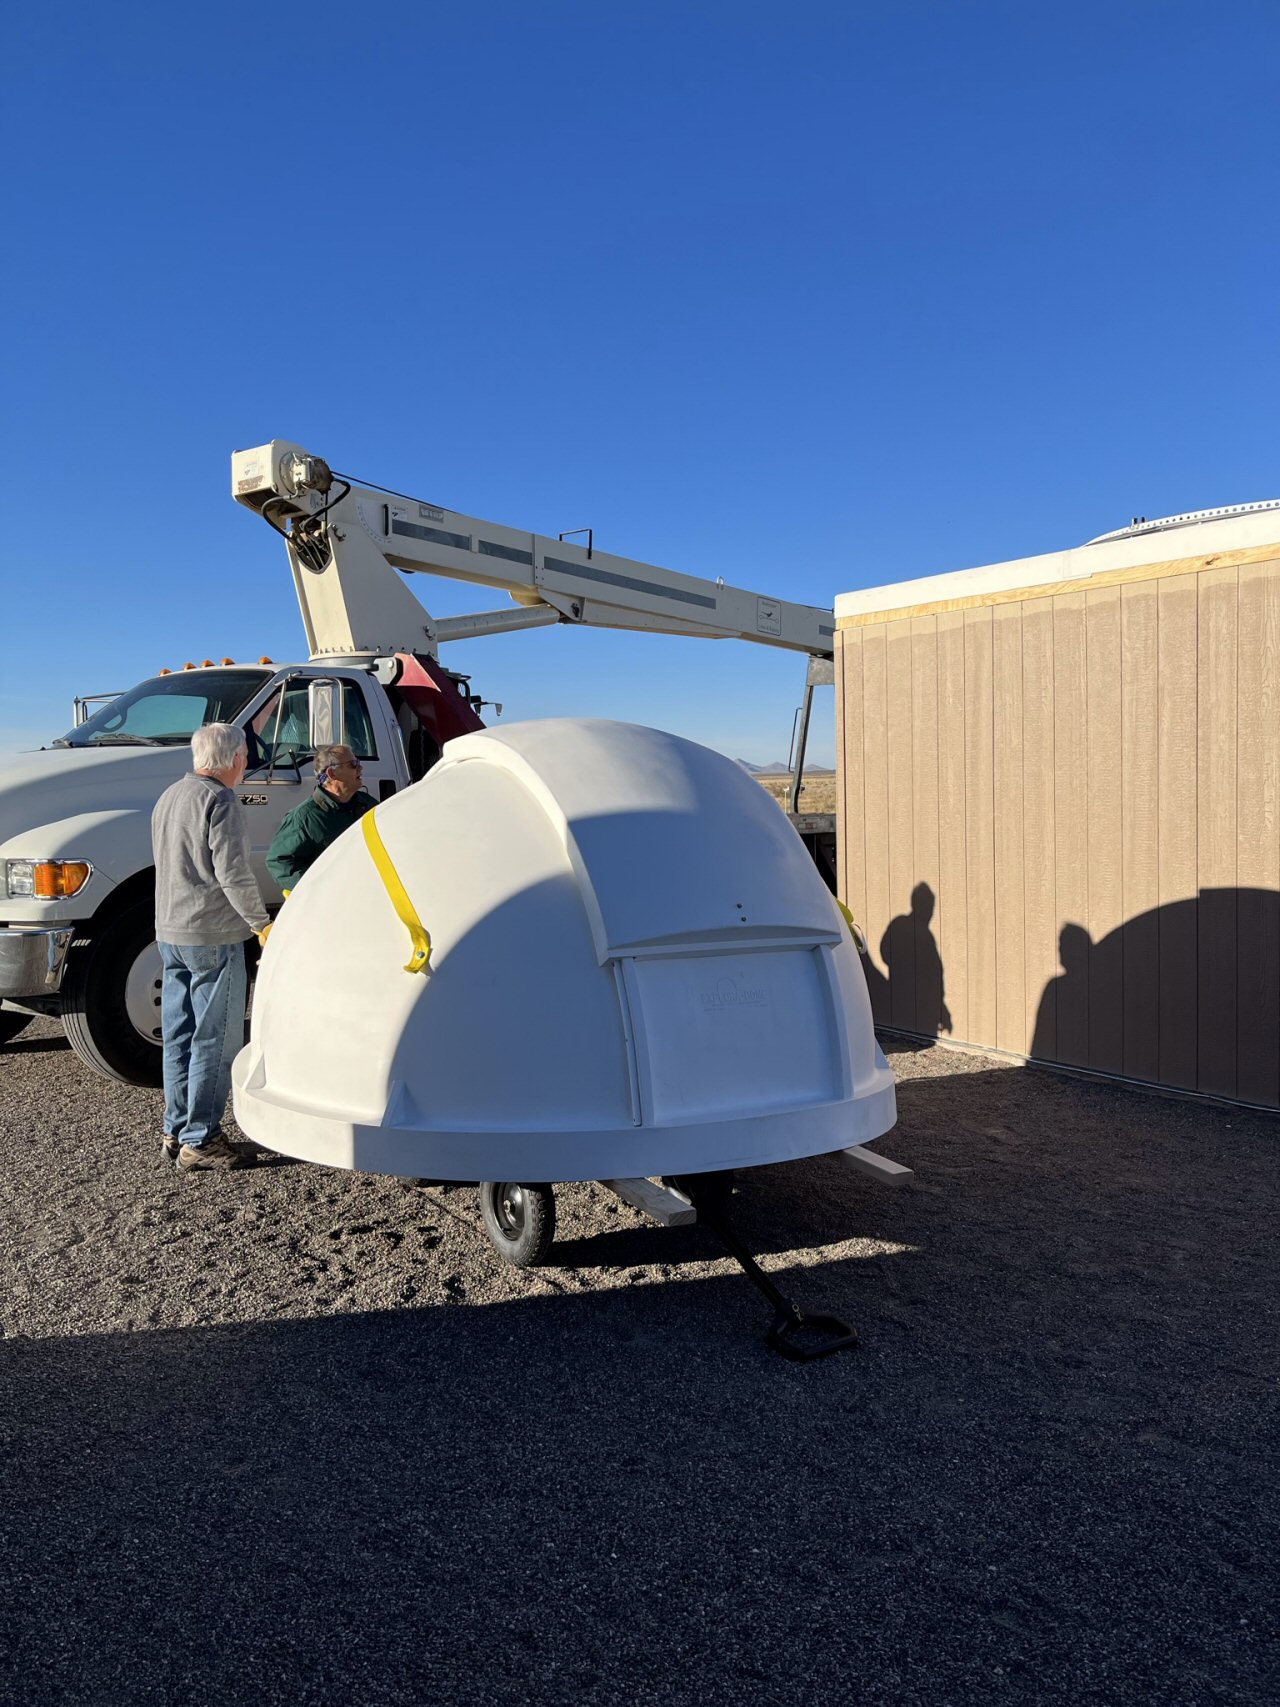
March 7, 2022 The big day finally arrives - the dome is going to be placed on the observatory! Here is the dome on the Dome Mobile sitting next to the observatory.
*-*-*
Before hoisting the dome all the way up Barry wants to check stability but just lifting it off the Dome Mobile. It works beautifully! I would have expected nothing less from a retired loads engineer.
*-*-*
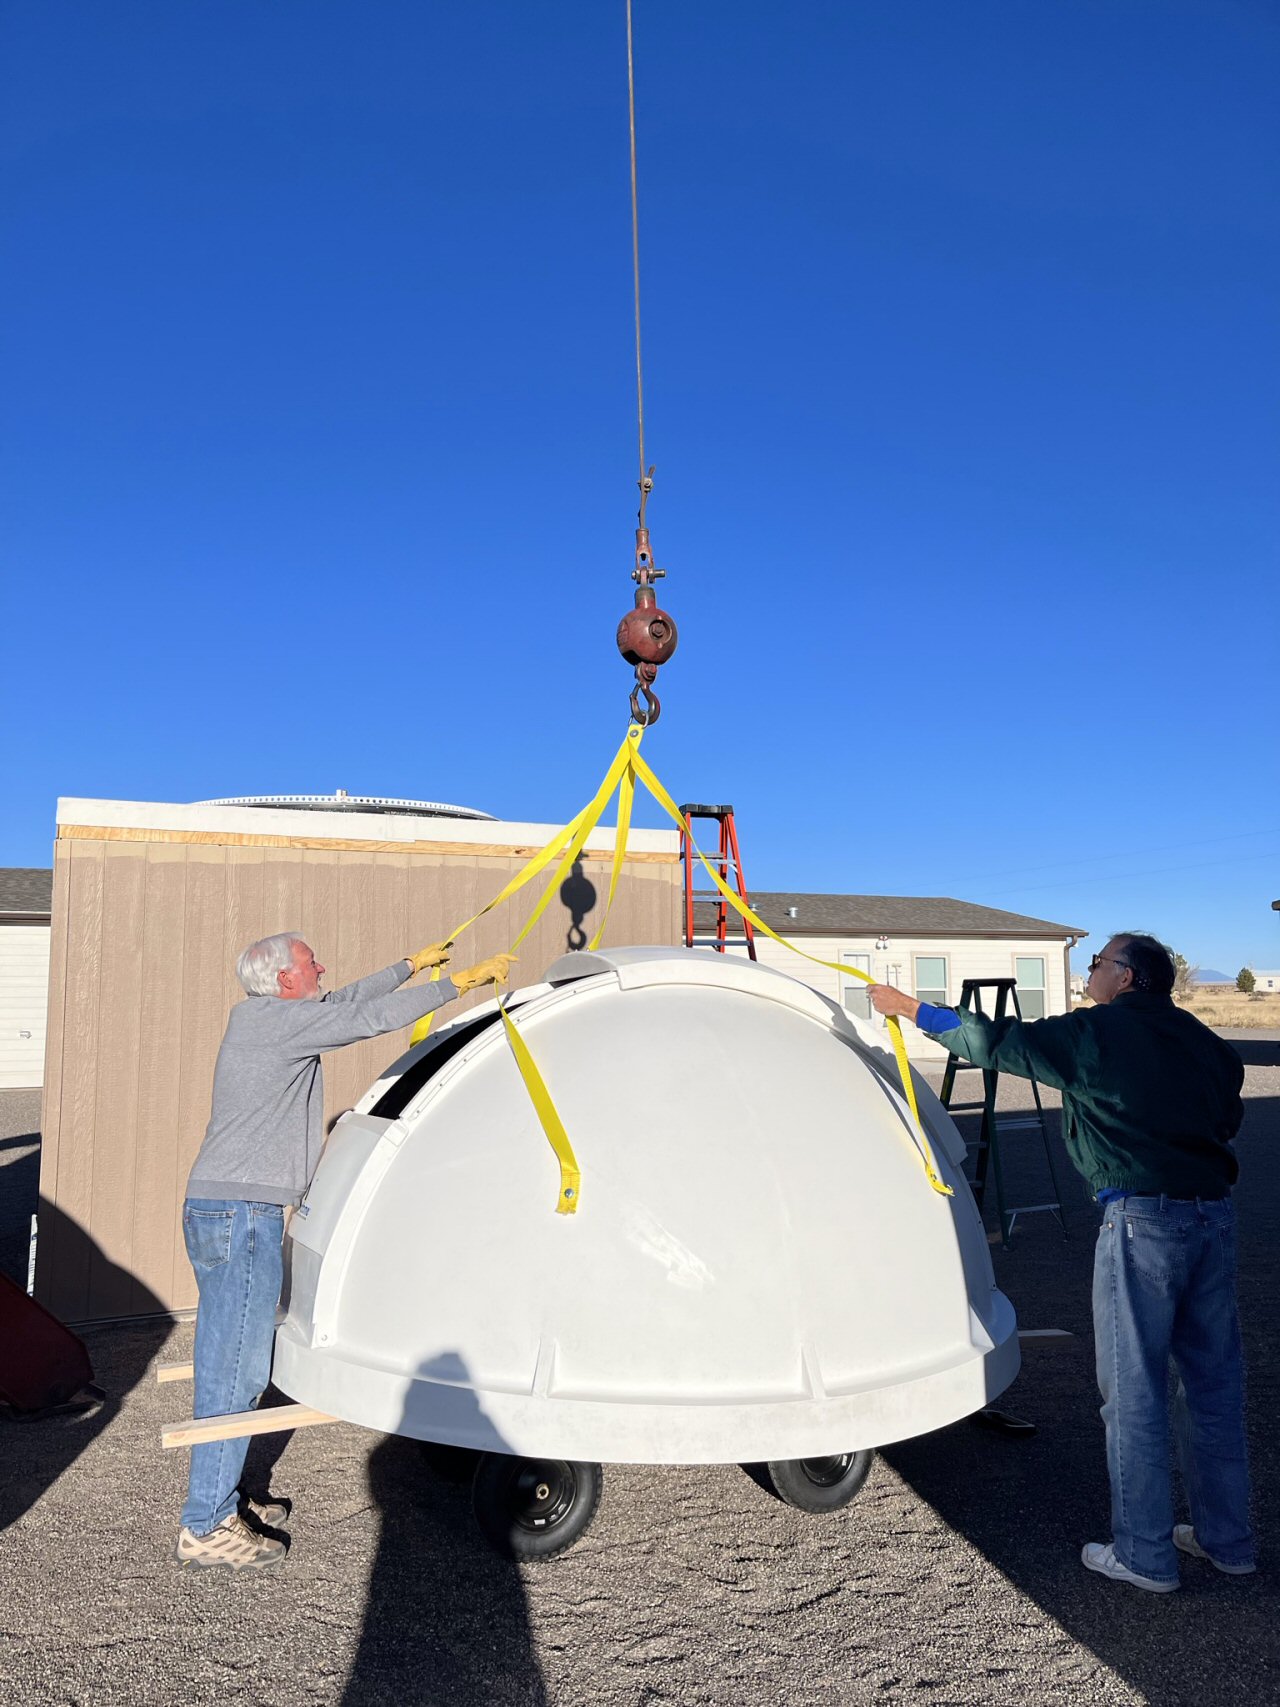
This is a video showing the hoisting of the dome and placing it on the observatory.
*-*-*
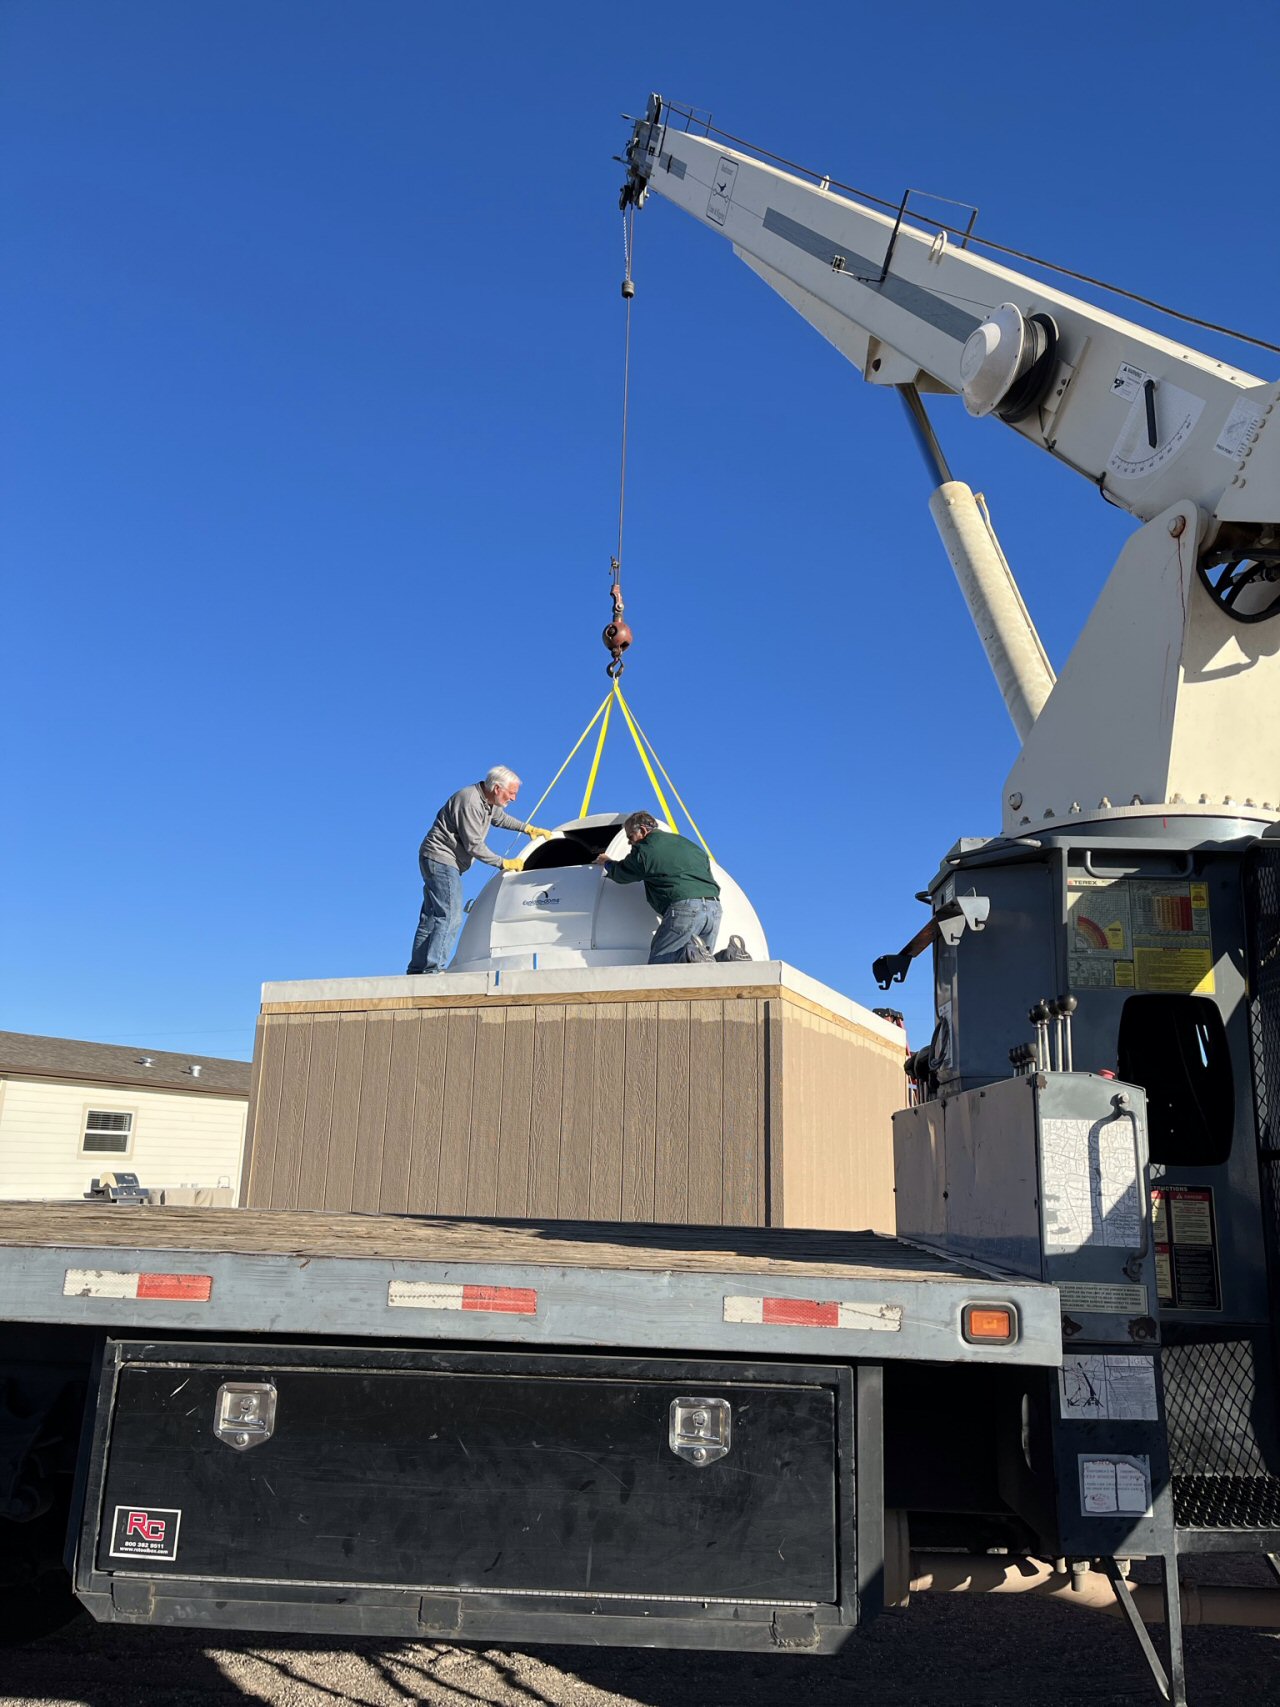
Barry and Cal put the finishing touches on the dome position before releasing the cables.
*-*-*
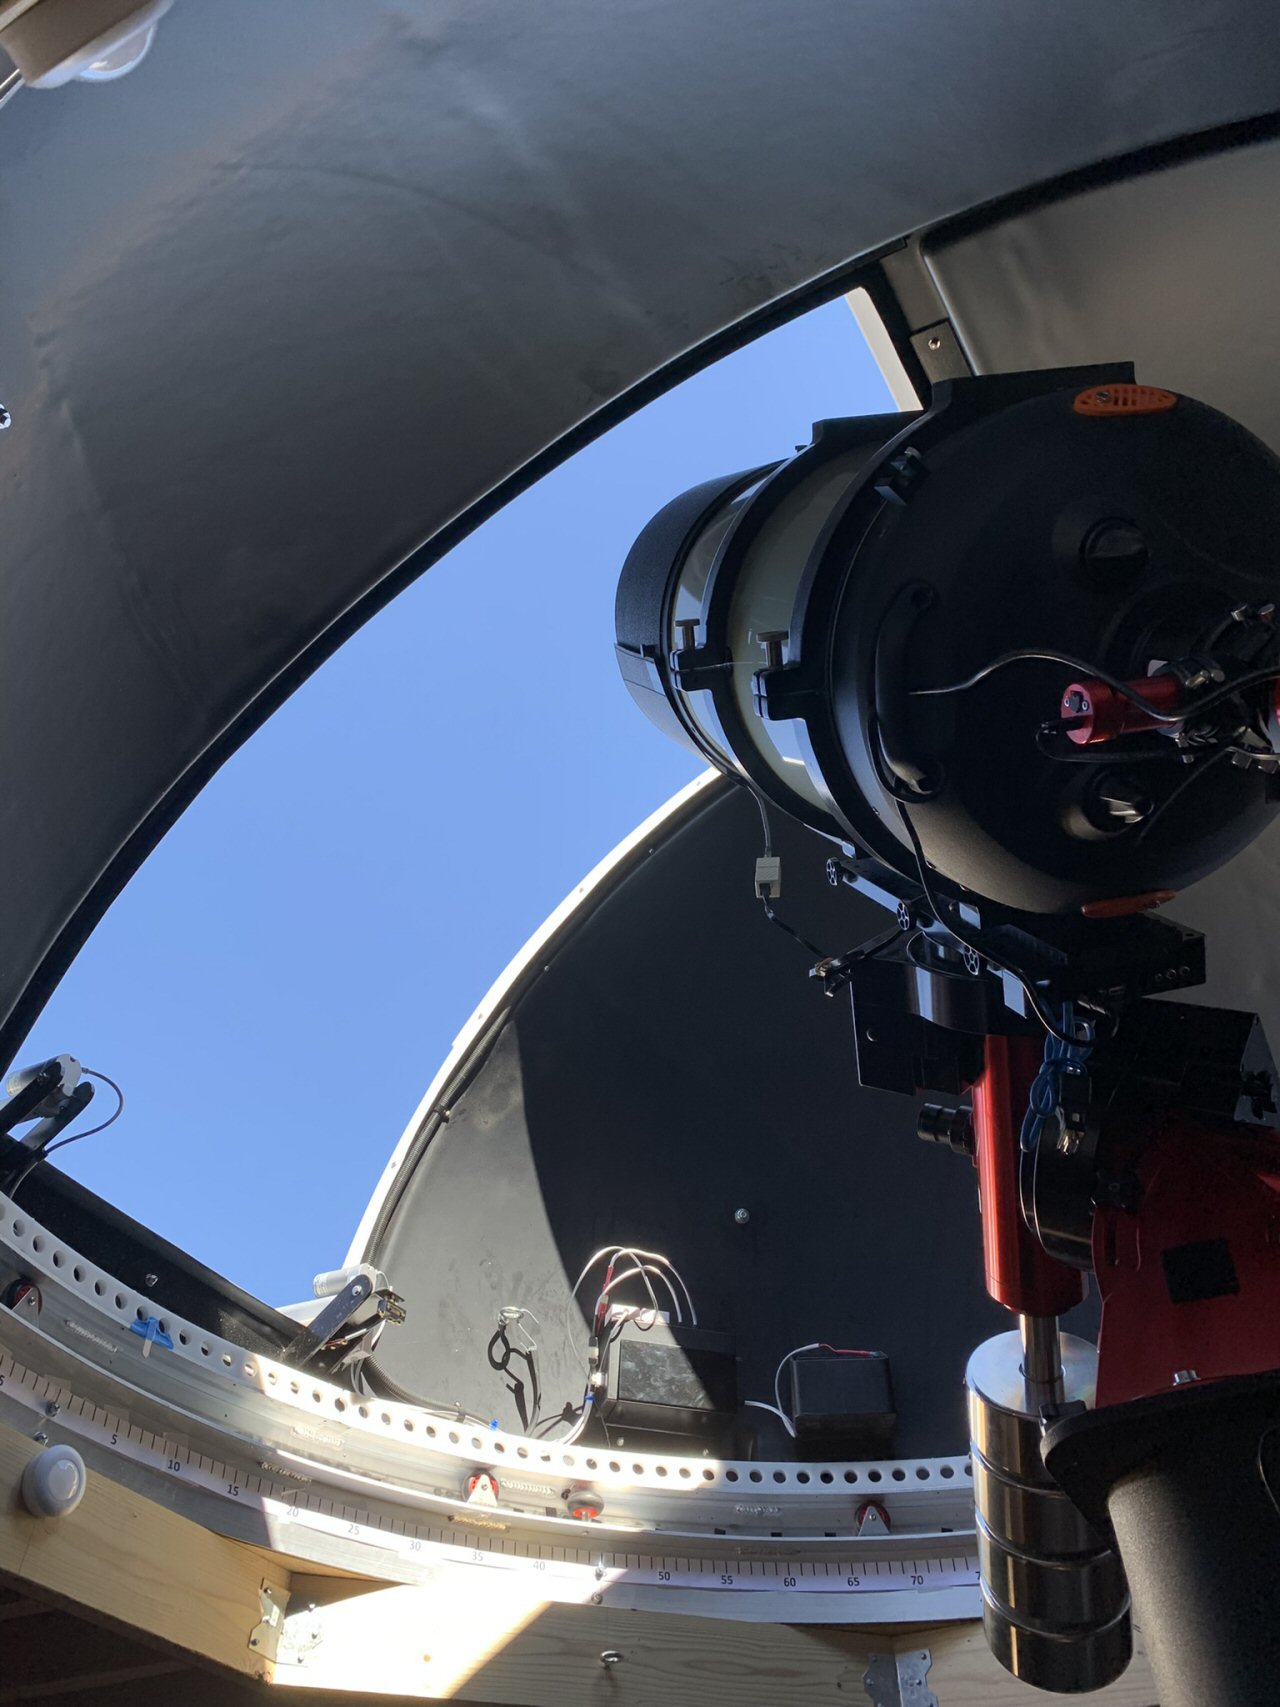
March 8, 2022 Barry wasted no time in mounting the C-14 and tonight we take our first images from the new observatory.
It is really cool sitting inside and having the dome track the telescope during imaging. The dome automation and dome control software in TheSkyX by Software Bisque worked flawlessly. That was one of our worries in selecting a dome instead of a roll-off roof.
There are still many small things that need to be done - finishing out the top of the walls, tying down the dome against wind, permanent mounting of the monitor but this is a huge accomplishment - the dome is on the observatory, the building is (hopefully) watertight and the telescope is set up on a permanent pier safely inside.
*-*-*
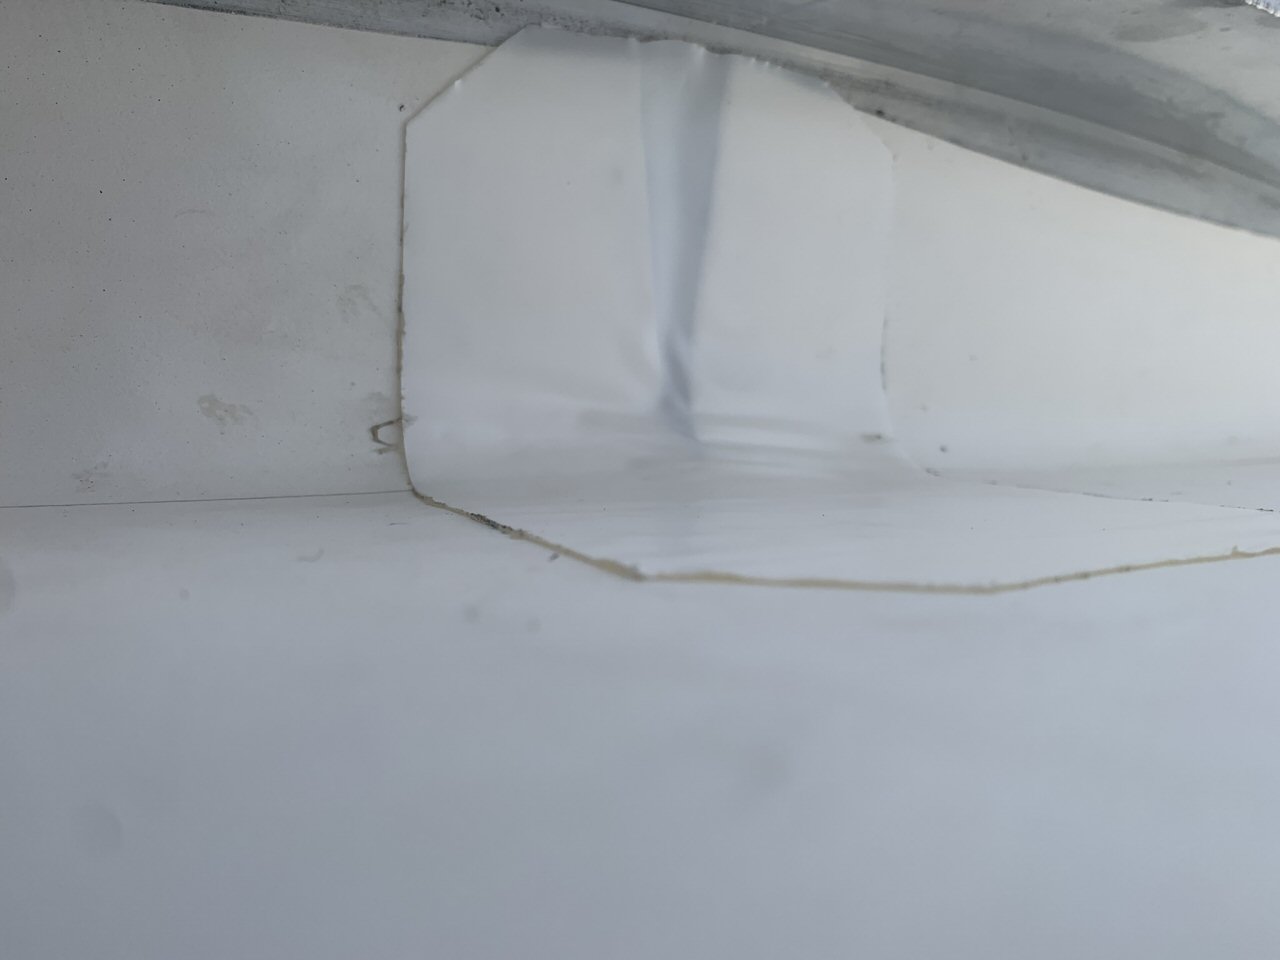
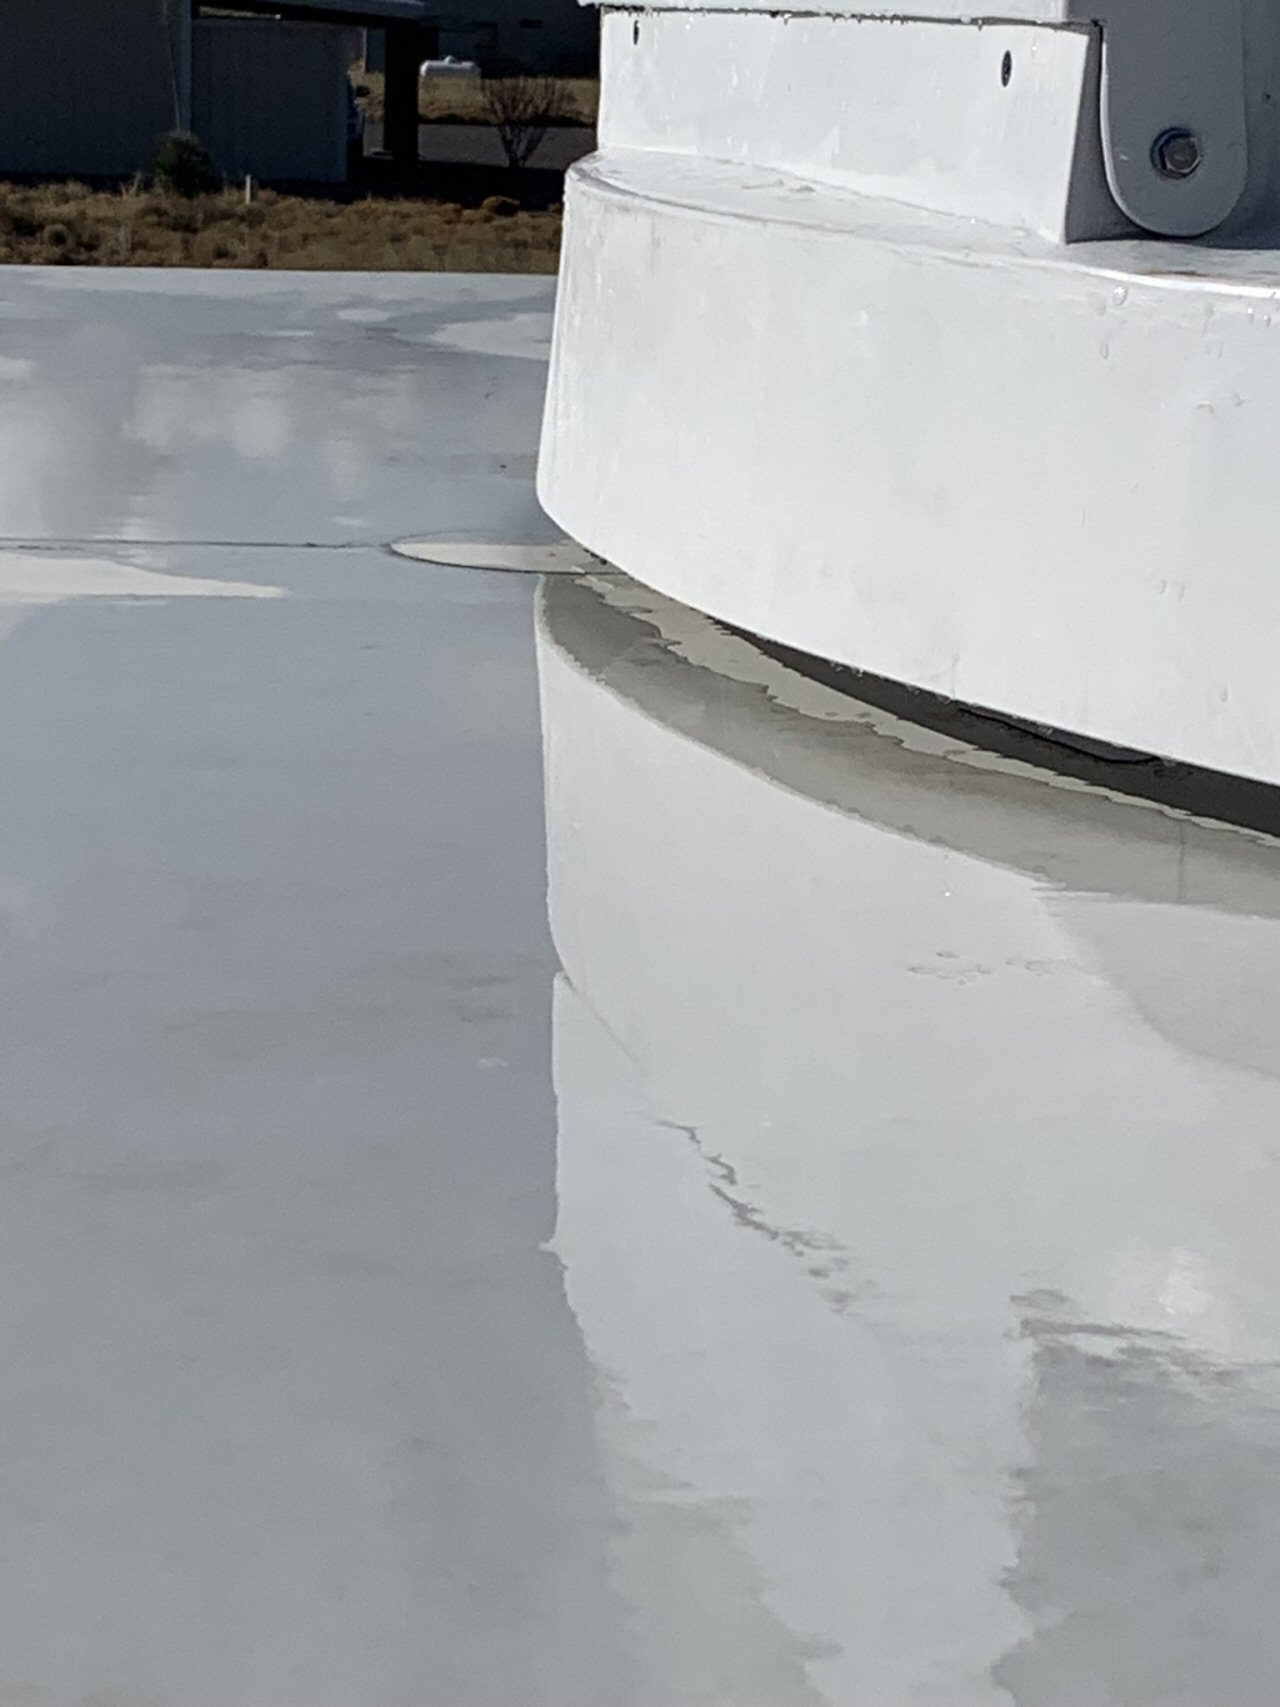
A few days after completion, we had our first rain. It wasn't as heavy as we will get in the summer but it allowed Barry to check for leaks and look at the roof.
Here is a close up under the lip of the dome and the dome ring seems to be protected from the rain. There was no water inside the dome either.
*-*-*
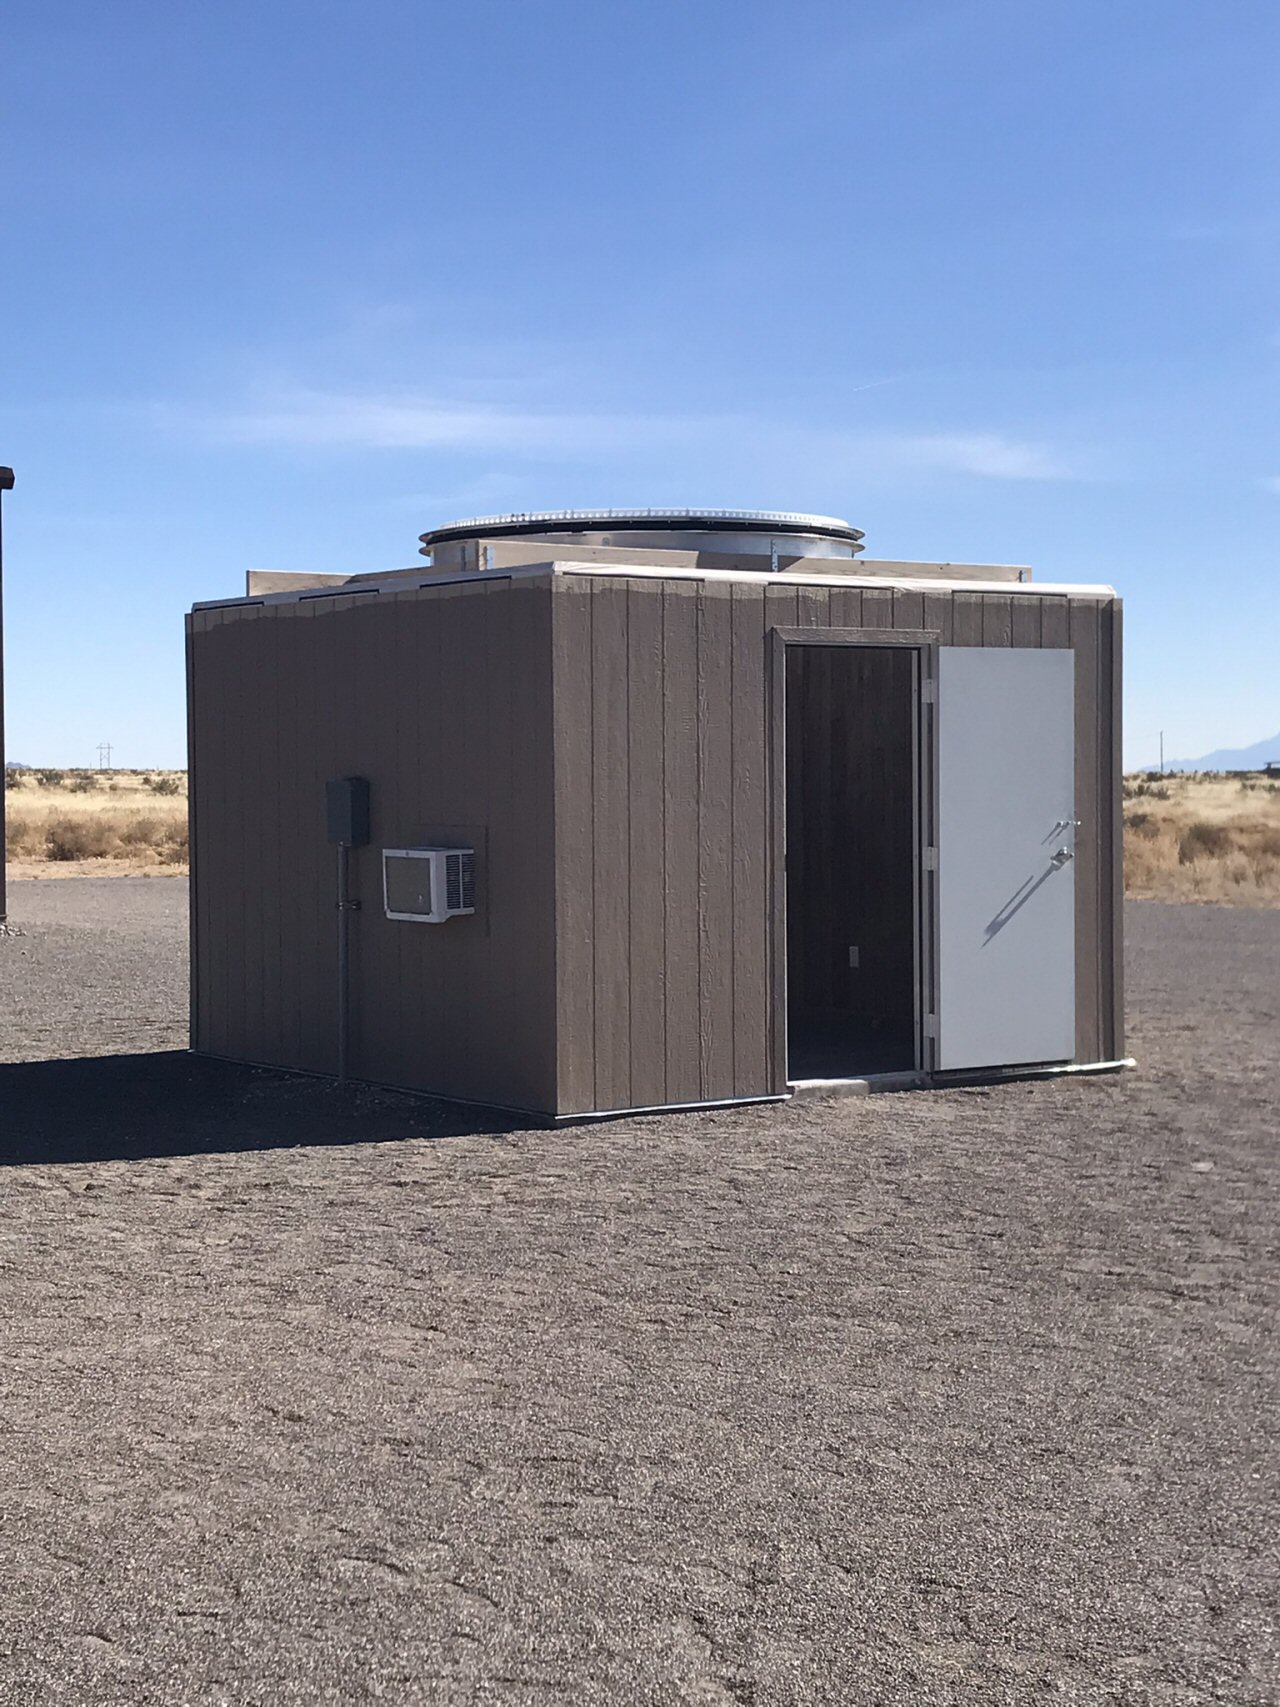
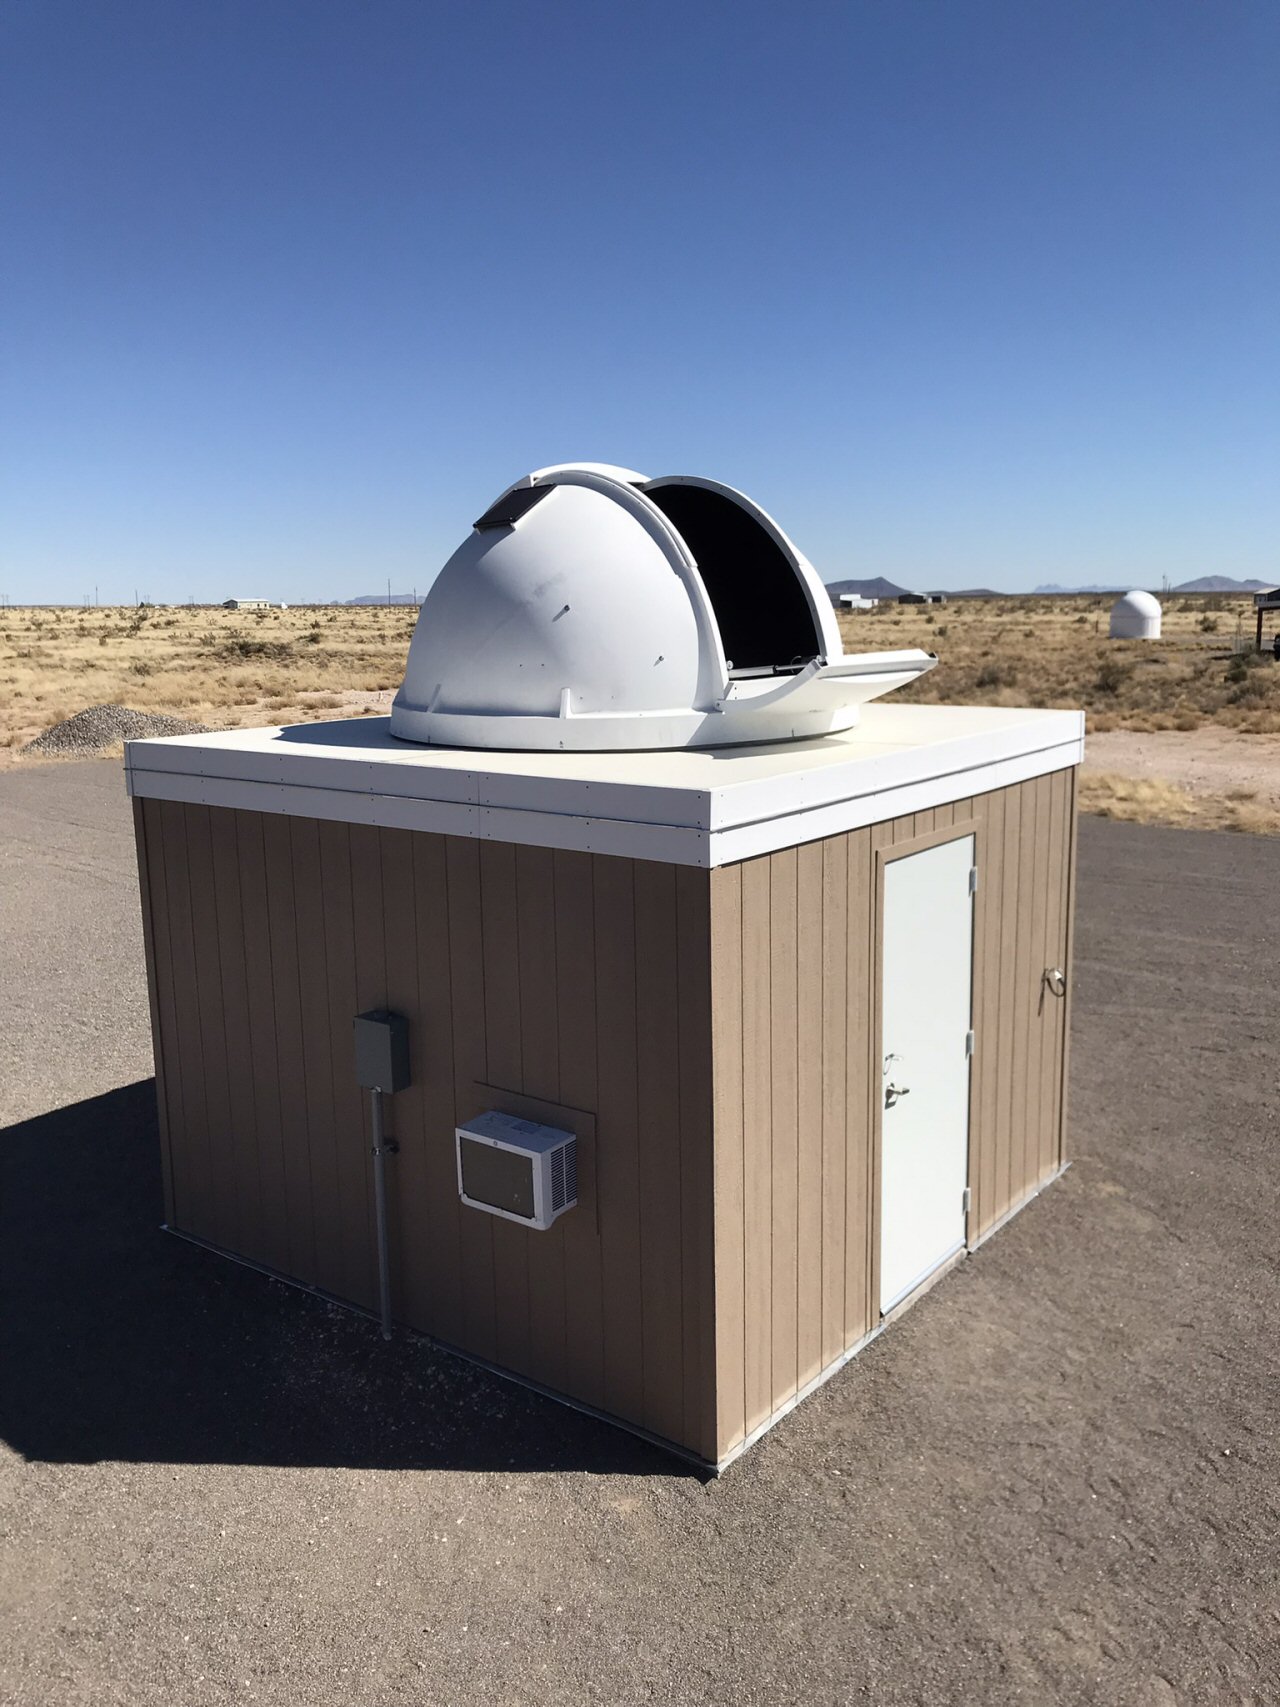
A view of the finished observatory with the dome slit open.
*-*-*
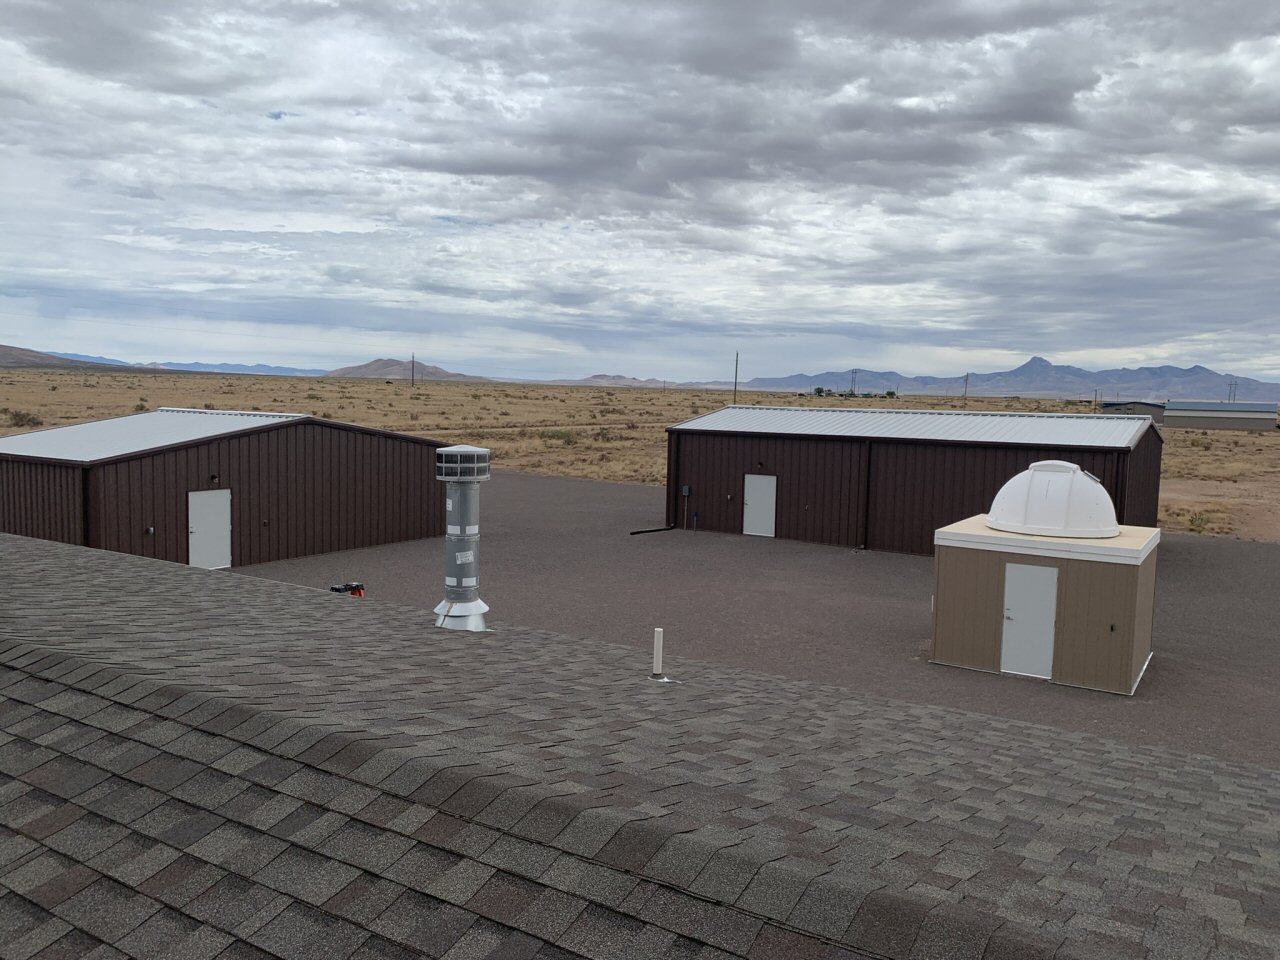
Here is a view of our compound from the roof of our house with Cooke's Peak as a backdrop. This is the culmination of a dream we have had for many years and with the completion of the observatory it has been achieved.